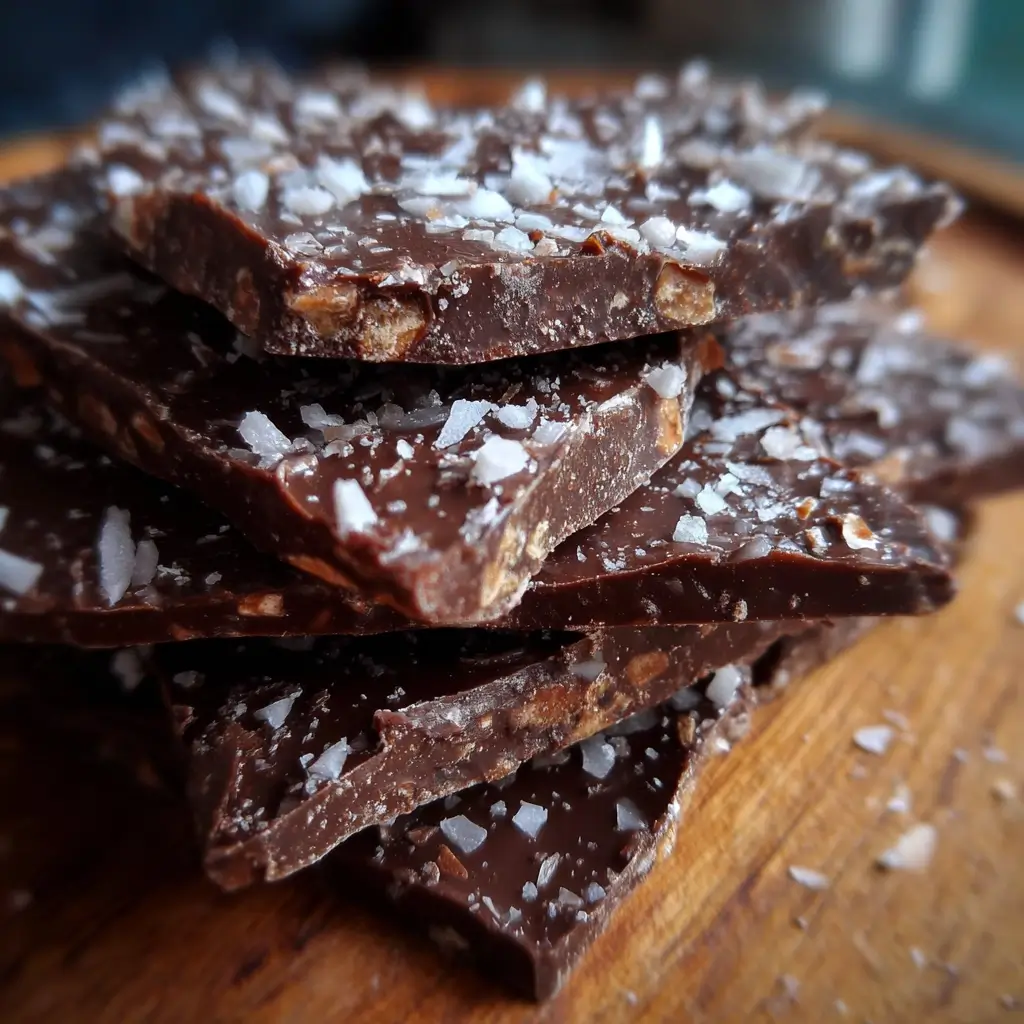
I’ll never forget the first time I made this 5-Minute Chocolate Coconut Bark. It was one of those frantic weeknights where my sweet tooth was screaming for attention, but my energy levels were at an all-time low. I had promised to bring a dessert to a small get-together the next day and had completely forgotten. Panic started to set in as I mentally scrolled through complex cake and cookie recipes. Then, a lightbulb went off. I remembered a simple concept I’d seen somewhere: melted chocolate, toppings, and a freezer. Rummaging through my pantry, I found a bag of quality semi-sweet chocolate chips and a half-full bag of shredded coconut—two of my absolute favorite ingredients. In what felt like a stroke of genius, I decided to combine them. The process was laughably simple, taking less time than it takes to brew a pot of coffee. I melted the chocolate, stirred in the coconut, spread it on a baking sheet, and slid it into the freezer. Twenty minutes later, I pulled out a beautifully set, glistening sheet of chocolate-coconut perfection. The snap it made as I broke it into jagged, rustic pieces was immensely satisfying. When I brought it to the party, it vanished in minutes. People raved about the rich, deep flavor of the chocolate perfectly balanced by the sweet, chewy texture of the coconut. My family now requests this “emergency dessert” regularly, and it has become my go-to recipe for everything from holiday gift baskets to a simple after-dinner treat. It’s proof that the most delicious and impressive creations don’t require hours of effort, just a few good ingredients and five minutes of your time.
Ingredients
- 12 ounces (about 2 cups) High-Quality Chocolate Chips: The star of the show. Using good quality chocolate (at least 60% cacao) will yield a richer flavor and a smoother melt. You can use semi-sweet, dark, or even milk chocolate depending on your preference.
- 1 tablespoon Coconut Oil: This is the secret to a glossy finish and a perfect “snap.” It helps the chocolate melt smoothly and set firmly. Use refined coconut oil if you don’t want an extra coconut flavor, or unrefined if you do.
- 1 ½ cups Unsweetened Shredded Coconut: This provides the wonderful chewy texture and nutty-sweet flavor that pairs so beautifully with chocolate. Using unsweetened coconut allows you to control the overall sweetness of the bark.
- 1 teaspoon Vanilla Extract: A crucial flavor enhancer that deepens and rounds out the taste of the chocolate, adding a touch of warmth and complexity.
- ⅛ teaspoon Sea Salt: Do not skip this! A tiny pinch of salt doesn’t make the bark salty; instead, it brightens and intensifies the chocolate flavor, balancing the sweetness.
Instructions
- Prepare Your Pan: Line a standard baking sheet (approximately 9×13 inches) with parchment paper or a silicone baking mat. This is a critical step to ensure the chocolate bark releases easily once it has set.
- Melt the Chocolate: Place the chocolate chips and coconut oil in a medium-sized microwave-safe bowl. Microwave in 30-second intervals, stirring well after each interval. Continue this process until the chocolate is about 90% melted. The residual heat will melt the remaining bits as you stir, preventing the chocolate from overheating and becoming grainy. Stir until the mixture is completely smooth and glossy.
- Combine the Ingredients: Once the chocolate is perfectly melted, stir in the unsweetened shredded coconut, vanilla extract, and sea salt. Mix thoroughly until every shred of coconut is evenly coated in the rich chocolate mixture.
- Spread the Bark: Pour the chocolate coconut mixture onto your prepared baking sheet. Using a spatula or the back of a spoon, spread the mixture into a thin, even layer. Don’t worry about making it a perfect rectangle; a rustic, uneven shape is part of the charm of chocolate bark. The thickness should be about ¼ inch.
- Chill to Set: Place the baking sheet in the freezer for at least 15-20 minutes, or in the refrigerator for about 30-40 minutes. The bark is ready when it is completely firm and solid to the touch.
- Break and Enjoy: Once set, lift the parchment paper from the baking sheet. You can either use your hands to break the bark into irregular, bite-sized pieces or place it on a cutting board and use a large knife to chop it into more uniform shapes.
Nutrition Facts
- Servings: 12 servings
- Calories per serving: Approximately 185 kcal
- Healthy Fats (14g): Primarily sourced from the coconut oil and the cocoa butter in the dark chocolate, these fats contribute to satiety and provide a steady source of energy.
- Fiber (3g): The shredded coconut is a great source of dietary fiber, which is essential for digestive health and helps to stabilize blood sugar levels.
- Carbohydrates (13g): Provides the quick energy boost that makes this a perfect afternoon pick-me-up or post-workout treat. Using dark chocolate and unsweetened coconut keeps the sugar content in check.
- Iron (1.5mg): Dark chocolate is a notable source of iron, a vital mineral that helps transport oxygen in the blood and supports overall energy and focus.
- Antioxidants: Dark chocolate is packed with flavonoids, powerful antioxidants that help combat oxidative stress in the body and support cardiovascular health.
Preparation Time
This recipe truly lives up to its name with an active preparation time of only 5 minutes. This includes gathering your ingredients, melting the chocolate, and spreading it on the pan. The majority of the time involved is inactive chilling time, where your freezer or refrigerator does all the work. It’s the ultimate instant gratification dessert, perfect for busy schedules and last-minute cravings.
How to Serve
This 5-Minute Chocolate Coconut Bark is incredibly versatile. Its simple elegance allows it to be served in numerous ways, fitting for any occasion from a casual Tuesday night to a festive holiday party. Here are some creative ways to serve and enjoy your homemade treat:
- On a Dessert Charcuterie Board:
- Arrange the broken pieces of bark on a wooden board or slate platter.
- Pair it with complementary flavors and textures like fresh berries (raspberries, strawberries), sliced figs, sharp cheeses (like an aged cheddar or manchego), and a variety of nuts (marcona almonds, candied pecans).
- The rich bark provides a wonderful chocolatey element that balances the fruit and cheese.
- As an Edible Gift:
- This bark makes a stunning and thoughtful homemade gift.
- Carefully pack the pieces into clear cellophane bags tied with a festive ribbon.
- Alternatively, layer the pieces in a beautiful glass jar or a decorative holiday tin.
- Attach a small tag with the name of the treat. It’s perfect for holidays, teacher appreciation gifts, or as a thank you gesture.
- As a Versatile Topping:
- Don’t just eat it on its own! Crumble the bark into smaller bits and use it as a decadent topping.
- Sprinkle it over a bowl of vanilla or coconut ice cream for an instant upgrade.
- Stir it into a bowl of Greek yogurt or oatmeal for a delicious and textural breakfast treat.
- Use it to decorate the top of a frosted cake or a batch of cupcakes for added crunch and flavor.
- With Your Favorite Hot Beverage:
- The simple pleasure of a piece of chocolate with coffee or tea should not be underestimated.
- Serve a few pieces alongside a freshly brewed espresso or a robust black coffee. The bitterness of the coffee beautifully contrasts the sweet, rich bark.
- Pair it with a cup of herbal tea, like peppermint or chamomile, for a relaxing and comforting evening snack.
- For Movie Night or Game Night:
- Elevate your snack game by placing a large bowl of chocolate coconut bark in the center of the table.
- It’s a much more sophisticated and satisfying option than standard store-bought candy and is easy for everyone to grab and enjoy without a mess.
Additional Tips
To help you perfect your chocolate coconut bark every single time and explore creative variations, here are eight essential tips.
- Toast the Coconut for Deeper Flavor: While the recipe is fantastic with raw shredded coconut, toasting it beforehand takes the flavor to a whole new level. Spread the shredded coconut on a dry baking sheet and bake at 350°F (175°C) for 3-5 minutes, watching it carefully and stirring once or twice until it’s fragrant and lightly golden. This process enhances its nutty sweetness and adds a delightful crunch.
- Master the Chocolate Melting Process: The key to smooth, glossy bark is properly melted chocolate. Avoid the temptation to blast it in the microwave on high power. The “low and slow” method of 30-second intervals with thorough stirring is crucial. Alternatively, use a double boiler (a heatproof bowl set over a saucepan of simmering, not boiling, water). This gentle, indirect heat prevents the chocolate from scorching or seizing (becoming a clumpy, grainy mess).
- Don’t Be Afraid to Customize with Toppings: This recipe is a perfect canvas for your creativity. Before chilling, while the chocolate is still wet, sprinkle on additional toppings. Consider:
- Nuts: Toasted slivered almonds, chopped pecans, walnuts, or pistachios.
- Dried Fruit: Chopped dried cranberries, apricots, or cherries for a chewy, tart contrast.
- Seeds: Pumpkin seeds, sunflower seeds, or chia seeds for extra crunch and nutrition.
- Spices: A dash of cinnamon, a pinch of cayenne pepper for a spicy kick, or cardamom for an exotic twist.
- Finishing Touches: A generous sprinkle of flaky sea salt (like Maldon) on top looks beautiful and adds a sophisticated crunch. A swirl of melted white chocolate or peanut butter can also be added for a marbled effect.
- Control the Thickness: The thickness of your bark affects its texture. For a very thin, delicate bark with a sharp “snap,” spread the mixture as thinly as possible across the baking sheet. For a thicker, chewier, more substantial piece, spread it into a smaller rectangle, keeping the layer thicker (closer to ½ inch).
- Achieve Clean Cuts (If You Prefer Them): If the rustic, broken-shard look isn’t for you, there’s a way to get cleaner squares. Let the bark set at room temperature for about 10 minutes until it’s partially firm but not rock solid. Then, use a large, sharp knife to score the bark into your desired shapes. Once fully chilled and hardened in the fridge or freezer, it will break cleanly along the scored lines.
- Proper Storage is Key: To maintain its freshness and snap, store the chocolate coconut bark in an airtight container. It’s best kept in the refrigerator, where it will stay firm and fresh for up to 2 weeks. You can also freeze it for up to 3 months. Storing it at room temperature is possible in cooler climates, but it may become soft if the room is too warm.
- Make it Keto or Low-Carb Friendly: This recipe is incredibly easy to adapt for a ketogenic or low-carb diet. Simply swap the regular chocolate chips for a sugar-free variety sweetened with stevia or erythritol (like Lily’s brand). Ensure you are using unsweetened shredded coconut, as the sweetened version contains a lot of added sugar. The result is a delicious, guilt-free treat that fits your dietary needs.
- Get the Kids Involved: This is a fantastic recipe to make with children because it’s fast, requires no oven, and is practically foolproof. Let them help with stirring the ingredients (with supervision) and, their favorite part, spreading the mixture and sprinkling on extra toppings like colorful sprinkles or mini M&Ms. It’s a fun way to create kitchen memories and a tasty treat.
FAQ Section
1. Why did my chocolate get thick and clumpy when I melted it?
This is a common issue called “seizing.” Chocolate seizes when it comes into contact with even a tiny drop of water or when it’s overheated. To prevent this, ensure your bowl and spatula are completely dry before you begin. When melting, use short intervals in the microwave or gentle heat from a double boiler. If your chocolate does seize, you can sometimes save it by vigorously stirring in a teaspoon of boiling water or more coconut oil, but the texture might not be as perfectly smooth for bark.
2. Can I use white chocolate or milk chocolate instead of dark chocolate?
Absolutely! You can easily substitute white chocolate or milk chocolate chips in the exact same quantity. White chocolate pairs beautifully with tart additions like dried cranberries or lime zest. Milk chocolate will result in a sweeter, creamier bark that is often a favorite with kids. Be aware that white and milk chocolate are more sensitive to heat, so melt them even more carefully.
3. Is this 5-Minute Chocolate Coconut Bark recipe vegan and gluten-free?
Yes, it can easily be both! To ensure it’s vegan, simply use a brand of dark chocolate that is dairy-free (many high-cacao-content chocolates are naturally vegan, but always check the label for ingredients like milk fat). All other ingredients (coconut oil, shredded coconut, vanilla, salt) are naturally vegan and gluten-free. This makes it a fantastic dessert option for those with dietary restrictions.
4. My bark is soft and isn’t hardening properly. What went wrong?
This usually happens for one of two reasons. First, you may not have used enough chocolate in proportion to the other ingredients, or you may have added too much coconut oil. The ratio in the recipe is designed for a firm set. Second, and more likely, it just needs more time to chill. Freezer and refrigerator temperatures can vary. Leave it in the freezer for another 15-20 minutes, and it should firm up perfectly.
5. Can I make this recipe without coconut oil?
While coconut oil gives the best texture and shine, you can make substitutions in a pinch. You could omit it entirely, though your chocolate might be slightly thicker and less glossy. Alternatively, you could substitute a small amount of another neutral-flavored oil or even butter (if you’re not concerned with keeping it vegan). However, coconut oil is highly recommended for the ideal final product.
6. What is that whitish or grayish film that sometimes appears on my stored chocolate bark?
This is called “chocolate bloom,” and it’s perfectly safe to eat. There are two types: sugar bloom (from moisture) and fat bloom (from temperature fluctuations). It happens when the cocoa butter or sugar separates and recrystallizes on the surface. To prevent it, avoid drastic temperature changes and store the bark in a well-sealed, airtight container in a cool, stable environment like the refrigerator.
7. How can I make this recipe nut-free for someone with allergies?
The base recipe of chocolate, coconut, and vanilla is naturally nut-free. The main concern comes from cross-contamination. To ensure it’s completely safe for someone with a severe nut allergy, be sure to use a brand of chocolate chips that is certified as being made in a nut-free facility. When considering extra toppings, stick to safe options like seeds (from a nut-free source), dried fruit, or flaky sea salt.
8. Can I add extracts other than vanilla?
Of course! This is a great way to customize the flavor profile. Try replacing the vanilla with ¼ to ½ teaspoon of a different extract. Peppermint extract would create a delicious chocolate-peppermint-coconut combination, perfect for the holidays. Almond extract would add a lovely marzipan-like flavor, and a touch of orange extract would give it a bright, citrusy note that pairs wonderfully with dark chocolate.
5-Minute Chocolate Coconut Bark Recipe
Ingredients
- 12 ounces (about 2 cups) High-Quality Chocolate Chips: The star of the show. Using good quality chocolate (at least 60% cacao) will yield a richer flavor and a smoother melt. You can use semi-sweet, dark, or even milk chocolate depending on your preference.
- 1 tablespoon Coconut Oil: This is the secret to a glossy finish and a perfect “snap.” It helps the chocolate melt smoothly and set firmly. Use refined coconut oil if you don’t want an extra coconut flavor, or unrefined if you do.
- 1 ½ cups Unsweetened Shredded Coconut: This provides the wonderful chewy texture and nutty-sweet flavor that pairs so beautifully with chocolate. Using unsweetened coconut allows you to control the overall sweetness of the bark.
- 1 teaspoon Vanilla Extract: A crucial flavor enhancer that deepens and rounds out the taste of the chocolate, adding a touch of warmth and complexity.
- ⅛ teaspoon Sea Salt: Do not skip this! A tiny pinch of salt doesn’t make the bark salty; instead, it brightens and intensifies the chocolate flavor, balancing the sweetness.
Instructions
- Prepare Your Pan: Line a standard baking sheet (approximately 9×13 inches) with parchment paper or a silicone baking mat. This is a critical step to ensure the chocolate bark releases easily once it has set.
- Melt the Chocolate: Place the chocolate chips and coconut oil in a medium-sized microwave-safe bowl. Microwave in 30-second intervals, stirring well after each interval. Continue this process until the chocolate is about 90% melted. The residual heat will melt the remaining bits as you stir, preventing the chocolate from overheating and becoming grainy. Stir until the mixture is completely smooth and glossy.
- Combine the Ingredients: Once the chocolate is perfectly melted, stir in the unsweetened shredded coconut, vanilla extract, and sea salt. Mix thoroughly until every shred of coconut is evenly coated in the rich chocolate mixture.
- Spread the Bark: Pour the chocolate coconut mixture onto your prepared baking sheet. Using a spatula or the back of a spoon, spread the mixture into a thin, even layer. Don’t worry about making it a perfect rectangle; a rustic, uneven shape is part of the charm of chocolate bark. The thickness should be about ¼ inch.
- Chill to Set: Place the baking sheet in the freezer for at least 15-20 minutes, or in the refrigerator for about 30-40 minutes. The bark is ready when it is completely firm and solid to the touch.
- Break and Enjoy: Once set, lift the parchment paper from the baking sheet. You can either use your hands to break the bark into irregular, bite-sized pieces or place it on a cutting board and use a large knife to chop it into more uniform shapes.
Nutrition
- Serving Size: one normal portion
- Calories: 185
- Fat: 14g
- Carbohydrates: 13g
- Fiber: 3g