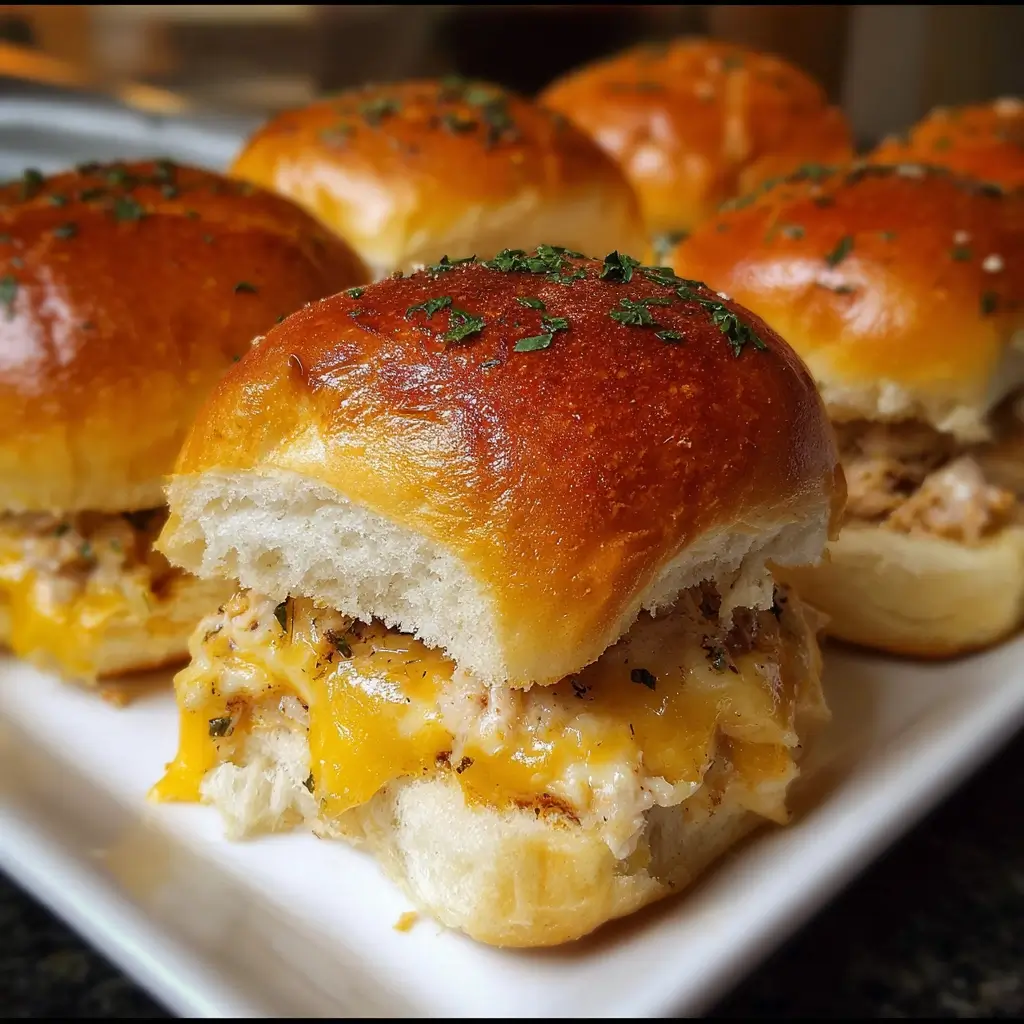
Of all the quick and easy meals in my arsenal, there’s one that consistently earns the title of “family MVP.” It’s the recipe that can turn a chaotic weeknight into a moment of pure, comforting bliss. I’m talking about these Cheesy Tuna Melt Sliders. The first time I made them, I was just looking for a way to use up a pack of sweet Hawaiian rolls and some pantry staples. I didn’t expect a culinary revolution in my kitchen. But as the aroma of toasted butter, garlic, and melting cheese filled the air, I knew I was onto something special. When I pulled the golden-brown tray from the oven, the tops glistening and the cheese oozing from the sides, my family gathered around the island like moths to a flame. The verdict was instantaneous. The combination of the slightly sweet, pillowy rolls with the savory, creamy tuna salad and the sharp, gooey cheddar was pure magic. They were devoured in minutes, with requests for a second batch immediately following. Now, these sliders are a staple for everything from game day gatherings to lazy Sunday lunches, and they never fail to disappear. They are, without a doubt, the most requested, most loved, and most delightfully simple recipe I have.
Ingredients
- Hawaiian Sweet Rolls (12-count): The signature sweet and fluffy base for our sliders. Their softness soaks up the butter topping beautifully while their slight sweetness perfectly contrasts the savory filling.
- Canned Tuna (Two 5-ounce cans): Use tuna packed in water, drained very thoroughly. This is the protein-packed heart of our recipe.
- Mayonnaise (1 cup): Full-fat mayonnaise provides the creamiest, richest binder for the tuna salad.
- Celery (2 stalks): Finely chopped for a fresh, crisp crunch and a subtle vegetal note that cuts through the richness.
- Red Onion (1/4 cup): Minced finely to provide a sharp, zesty bite without overpowering the other flavors.
- Sharp Cheddar Cheese (2 cups): Freshly grated from a block for the ultimate melt-in-your-mouth experience. Pre-shredded cheese often contains anti-caking agents that can inhibit melting.
- Dijon Mustard (1 tablespoon): Adds a tangy, complex flavor that elevates the tuna salad from simple to sophisticated.
- Lemon Juice (1 tablespoon): Freshly squeezed to brighten up the entire mixture and add a touch of acidity.
- Black Pepper (1/2 teaspoon): Freshly ground for the best flavor.
- Unsalted Butter (1/2 cup): This will be melted for the essential topping that makes the rolls golden and delicious.
- Garlic Powder (1 teaspoon): A key ingredient for the butter topping, infusing the rolls with a savory, aromatic flavor.
- Dried Parsley (1 teaspoon): Mixed into the butter topping for a touch of color and herbaceousness.
Instructions
- Preheat and Prepare: Begin by preheating your oven to 375°F (190°C). Take a 9×13 inch baking dish and lightly grease it with butter or non-stick spray to prevent the sliders from sticking.
- Prepare the Rolls: Carefully take the entire slab of 12 Hawaiian rolls out of the package. Without separating them, use a large serrated bread knife to slice the slab in half horizontally, creating a single top piece and a single bottom piece. Place the entire bottom slab of rolls into your prepared baking dish.
- Mix the Tuna Filling: In a medium-sized mixing bowl, combine the two cans of thoroughly drained tuna, the mayonnaise, the finely chopped celery, the minced red onion, Dijon mustard, fresh lemon juice, and black pepper. Stir everything together until it is well combined and creamy. Draining the tuna properly is the most critical step to prevent soggy sliders, so press out as much liquid as you can.
- Assemble the Sliders: Spoon the tuna salad mixture evenly over the bottom slab of rolls in the baking dish. Use a spatula to spread it all the way to the edges, ensuring every slider gets a generous amount of filling.
- Add the Cheese: Sprinkle the 2 cups of freshly grated sharp cheddar cheese evenly over the top of the tuna salad layer. Be generous! This is what makes them “cheesy” tuna melts. The cheese will melt into a glorious, gooey blanket.
- Complete the Assembly: Place the top slab of rolls directly on top of the cheese layer, lining it up with the bottom slab to reform the original shape.
- Create the Garlic Butter Topping: In a small, microwave-safe bowl, melt the 1/2 cup of unsalted butter. Once melted, stir in the garlic powder and dried parsley until they are well incorporated.
- Brush the Topping: Using a pastry brush, generously brush the garlic butter mixture all over the tops and sides of the rolls. Make sure to get into all the crevices. This topping is not just for flavor; it helps to create a perfectly golden-brown, crispy top and prevents the rolls from drying out.
- Bake to Perfection: Cover the baking dish loosely with aluminum foil. This prevents the tops of the rolls from burning before the cheese has a chance to melt completely. Bake in the preheated oven for 15 minutes.
- Final Browning: After 15 minutes, carefully remove the aluminum foil. Place the dish back in the oven and bake for another 5-10 minutes, or until the tops are beautifully golden brown and the cheese is completely melted, bubbly, and oozing out the sides.
- Rest and Serve: Remove the sliders from the oven and let them rest in the pan for about 3-5 minutes. This allows the cheese to set slightly, making them easier to cut and serve. Use a knife to cut along the lines of the individual rolls, then use a small spatula to lift them out and serve immediately while they’re warm and gooey.
Nutrition Facts
- Servings: 12 sliders
- Calories: Approximately 280-320 calories per slider. This can vary based on the specific brands of mayonnaise, rolls, and cheese used.
- Protein: Around 12g per slider. The tuna and cheese make these a satisfying, protein-rich snack or meal component.
- Fat: Approximately 18g per slider. The majority of this comes from the full-fat mayonnaise and cheddar cheese, providing richness and flavor.
- Carbohydrates: Roughly 20g per slider. Primarily from the sweet Hawaiian rolls, which provide the soft and delicious vessel for the filling.
- Sodium: This can be a higher sodium dish due to the canned tuna, cheese, and mayonnaise. Choosing low-sodium versions of these ingredients can help reduce the overall content.
Preparation Time
These Cheesy Tuna Melt Sliders are a testament to quick and efficient cooking. The total time from start to finish is only about 35-40 minutes. The active preparation time, which includes mixing the filling and assembling the sliders, takes just 15 minutes. The remaining 20-25 minutes is passive baking time, where the oven does all the magical work of melting, toasting, and creating an irresistible meal.
How to Serve
These versatile sliders can be dressed up or down for any occasion. Their small size makes them perfect for various serving styles. Here are some of the best ways to present your Cheesy Tuna Melt Sliders:
- As a Crowd-Pleasing Appetizer:
- Arrange them on a large platter or wooden board for a “pull-apart” style presentation at parties or game days.
- Serve them alongside other classic finger foods like chicken wings, mozzarella sticks, or a fresh vegetable crudité platter with dip.
- Stick a decorative toothpick in the top of each slider for easy grabbing and a festive look.
- As a Comforting Main Course:
- Classic Pairing: Serve 2-3 sliders alongside a warm bowl of creamy tomato soup. This is the ultimate comfort food combination, perfect for dipping.
- With a Crisp Salad: Balance the richness of the sliders with a light, refreshing side salad. A simple green salad with a vinaigrette dressing or a tangy coleslaw works wonderfully.
- With a Savory Side: For a heartier meal, pair the sliders with:
- Classic French Fries
- Sweet Potato Fries
- Crispy Onion Rings
- A simple bag of potato chips for a quick and easy lunch.
- For Different Occasions:
- Potlucks and Picnics: Assemble them in a disposable foil pan. They travel well and can be easily reheated or even served at room temperature (though warm is best!).
- Quick Weeknight Dinner: They are a complete meal in themselves when you’re short on time. The combination of protein, carbs, and fat is satisfying and requires minimal cleanup.
- Kid-Friendly Lunch: Their small size and cheesy goodness make them a huge hit with children. Serve with a side of apple slices, carrot sticks, or Goldfish crackers for a balanced and fun meal.
Additional Tips
- The Tuna is Key: While any canned tuna works, using solid white albacore tuna packed in water will give you the best texture. It’s flakier and less “mushy” than chunk light. The absolute most important step is to drain it completely. Press the tuna against the side of the can with a fork to squeeze out every last drop of water. This is your number one defense against soggy sliders.
- Grate Your Own Cheese: It might seem like a small step, but grating a block of sharp cheddar cheese yourself makes a world of difference. Pre-shredded cheeses are coated in starches like potato starch or cellulose to prevent clumping, which also prevents them from melting as smoothly and creamily as freshly grated cheese.
- Don’t Be Shy with the Topping: The garlic butter topping does more than just add flavor. It creates a moisture barrier on top of the rolls, helping them get toasty and golden instead of steaming and becoming soft. Brush it on generously, making sure to cover the entire surface and let some drip down the sides.
- Customize Your Filling: The tuna salad is a fantastic base for customization. Feel free to add your favorite ingredients to the mix. Some excellent additions include:
- Finely chopped dill pickles or sweet pickle relish for a tangy kick.
- A tablespoon of capers (drained) for a briny, salty pop.
- A pinch of red pepper flakes for a little heat.
- Different herbs like fresh dill or chives instead of parsley.
- Achieve the Perfect Golden Top: If you notice the tops of your rolls are browning too quickly before the cheese inside is fully melted, simply place the aluminum foil back over the top for the remainder of the baking time. This “tenting” method protects the rolls while allowing the heat to continue melting the cheese.
- Make-Ahead Magic: You can easily prepare these sliders ahead of time. Mix the tuna salad filling and store it in an airtight container in the refrigerator for up to 24 hours. You can also fully assemble the sliders (without the butter topping) in the baking dish, cover with plastic wrap, and refrigerate. When ready to bake, just make and brush on the fresh butter topping and add a few extra minutes to the initial covered baking time.
- The Right Bread Knife Matters: Using a long, sharp serrated bread knife is essential for slicing the slab of rolls in half cleanly. A smaller knife will tear the soft rolls and make it difficult to get an even cut, leading to a messy assembly. A steady hand and a gentle sawing motion are all you need.
- Don’t Overbake: Keep a close eye on the sliders during the last 5 minutes of uncovered baking. They can go from perfectly golden to burnt very quickly. You’re looking for that ideal moment when the cheese is fully melted and bubbling, and the tops are a rich, toasty brown. Pull them out as soon as they hit that sweet spot.
FAQ Section
1. Can I make these Cheesy Tuna Melt Sliders ahead of time?
Absolutely! This is one of the best features of this recipe. You have two great options. First, you can prepare the tuna salad mixture up to 24 hours in advance. Just store it in an airtight container in the refrigerator. When you’re ready to eat, all you have to do is assemble and bake. Alternatively, you can fully assemble the sliders in the baking dish, place the top rolls on, cover tightly with plastic wrap, and refrigerate for up to 12 hours. Do not add the butter topping until just before baking, as it can make the rolls soggy if it sits for too long. When baking from the fridge, you may need to add 5-7 extra minutes to the initial covered baking time to ensure they are heated through.
2. How do I store and reheat leftover sliders?
If you have any leftovers (which is rare!), store them in an airtight container in the refrigerator for up to 2 days. The best way to reheat them is in an oven or an air fryer. Preheat your oven to 350°F (175°C) and bake the sliders on a baking sheet for 8-10 minutes, or until warmed through and the tops are crisp again. An air fryer at 350°F for 3-5 minutes also works wonders to restore their crispy texture. We do not recommend using a microwave, as it will make the bread soft, steamy, and chewy.
3. My sliders turned out soggy. What did I do wrong?
Soggy sliders are almost always caused by excess moisture. There are a few likely culprits. The most common is not draining the tuna well enough. You must press out as much water as physically possible. Another cause could be using watery add-ins like fresh tomatoes without de-seeding them. Finally, make sure you don’t let the assembled, unbaked sliders sit out at room temperature for too long, as the filling can start to seep into the bottom rolls. Assembling and baking right away is the best practice.
4. Can I use a different type of bread?
Yes, you can. While Hawaiian sweet rolls are classic for their unique flavor and texture, this recipe is also delicious with other types of pull-apart rolls. Brioche slider buns would be a fantastic, rich alternative. Soft potato rolls or even standard dinner rolls will also work well. The key is to use a soft roll that comes in a connected slab for easy slicing and assembly.
5. Can I freeze these sliders?
Yes, these sliders freeze surprisingly well, making them a great option for meal prep. For the best results, it’s recommended to freeze them before baking. Assemble the sliders completely in a freezer-safe baking dish, but do not add the butter topping. Cover the dish tightly with a layer of plastic wrap, followed by a layer of aluminum foil. They can be frozen for up to 2 months. When you’re ready to eat, there’s no need to thaw. Preheat your oven, make the fresh garlic butter topping and brush it on the frozen sliders. Bake from frozen, covering with foil for the first 25-30 minutes, then uncover and bake for another 10-15 minutes until golden and heated through.
6. What other types of cheese can I use?
Sharp cheddar is a classic choice for a tuna melt, but you can certainly experiment with other great melting cheeses. Provolone is a wonderful option for its mild flavor and incredible “cheese pull.” Monterey Jack or a Colby Jack blend would also be delicious and melt beautifully. For a smokier flavor, try using smoked Gouda. You can even use a mix of your favorite cheeses to create a more complex flavor profile.
7. Are these sliders good for kids?
These Cheesy Tuna Melt Sliders are a massive hit with kids! The combination of soft, sweet bread and gooey, melted cheese is almost universally loved. If you have particularly picky eaters, you can simplify the filling by omitting the celery and red onion, creating a simple and creamy tuna and cheese mixture they’re sure to enjoy. Their small, manageable size is also perfect for little hands.
8. Can I make this recipe gluten-free?
Yes, you can easily adapt this recipe to be gluten-free. The key is to find a good brand of gluten-free slider buns or dinner rolls. Many companies now make excellent gluten-free versions of Hawaiian-style sweet rolls. Simply substitute them for the regular rolls. All other ingredients—tuna, mayonnaise, cheese, and spices—are typically gluten-free, but it’s always wise to double-check the labels on your specific products, especially the mayonnaise and spices, to ensure there are no hidden gluten-containing additives.

Cheesy Tuna Melt Sliders
Ingredients
- Hawaiian Sweet Rolls (12-count): The signature sweet and fluffy base for our sliders. Their softness soaks up the butter topping beautifully while their slight sweetness perfectly contrasts the savory filling.
- Canned Tuna (Two 5-ounce cans): Use tuna packed in water, drained very thoroughly. This is the protein-packed heart of our recipe.
- Mayonnaise (1 cup): Full-fat mayonnaise provides the creamiest, richest binder for the tuna salad.
- Celery (2 stalks): Finely chopped for a fresh, crisp crunch and a subtle vegetal note that cuts through the richness.
- Red Onion (1/4 cup): Minced finely to provide a sharp, zesty bite without overpowering the other flavors.
- Sharp Cheddar Cheese (2 cups): Freshly grated from a block for the ultimate melt-in-your-mouth experience. Pre-shredded cheese often contains anti-caking agents that can inhibit melting.
- Dijon Mustard (1 tablespoon): Adds a tangy, complex flavor that elevates the tuna salad from simple to sophisticated.
- Lemon Juice (1 tablespoon): Freshly squeezed to brighten up the entire mixture and add a touch of acidity.
- Black Pepper (1/2 teaspoon): Freshly ground for the best flavor.
- Unsalted Butter (1/2 cup): This will be melted for the essential topping that makes the rolls golden and delicious.
- Garlic Powder (1 teaspoon): A key ingredient for the butter topping, infusing the rolls with a savory, aromatic flavor.
- Dried Parsley (1 teaspoon): Mixed into the butter topping for a touch of color and herbaceousness.
Instructions
- Preheat and Prepare: Begin by preheating your oven to 375°F (190°C). Take a 9×13 inch baking dish and lightly grease it with butter or non-stick spray to prevent the sliders from sticking.
- Prepare the Rolls: Carefully take the entire slab of 12 Hawaiian rolls out of the package. Without separating them, use a large serrated bread knife to slice the slab in half horizontally, creating a single top piece and a single bottom piece. Place the entire bottom slab of rolls into your prepared baking dish.
- Mix the Tuna Filling: In a medium-sized mixing bowl, combine the two cans of thoroughly drained tuna, the mayonnaise, the finely chopped celery, the minced red onion, Dijon mustard, fresh lemon juice, and black pepper. Stir everything together until it is well combined and creamy. Draining the tuna properly is the most critical step to prevent soggy sliders, so press out as much liquid as you can.
- Assemble the Sliders: Spoon the tuna salad mixture evenly over the bottom slab of rolls in the baking dish. Use a spatula to spread it all the way to the edges, ensuring every slider gets a generous amount of filling.
- Add the Cheese: Sprinkle the 2 cups of freshly grated sharp cheddar cheese evenly over the top of the tuna salad layer. Be generous! This is what makes them “cheesy” tuna melts. The cheese will melt into a glorious, gooey blanket.
- Complete the Assembly: Place the top slab of rolls directly on top of the cheese layer, lining it up with the bottom slab to reform the original shape.
- Create the Garlic Butter Topping: In a small, microwave-safe bowl, melt the 1/2 cup of unsalted butter. Once melted, stir in the garlic powder and dried parsley until they are well incorporated.
- Brush the Topping: Using a pastry brush, generously brush the garlic butter mixture all over the tops and sides of the rolls. Make sure to get into all the crevices. This topping is not just for flavor; it helps to create a perfectly golden-brown, crispy top and prevents the rolls from drying out.
- Bake to Perfection: Cover the baking dish loosely with aluminum foil. This prevents the tops of the rolls from burning before the cheese has a chance to melt completely. Bake in the preheated oven for 15 minutes.
- Final Browning: After 15 minutes, carefully remove the aluminum foil. Place the dish back in the oven and bake for another 5-10 minutes, or until the tops are beautifully golden brown and the cheese is completely melted, bubbly, and oozing out the sides.
- Rest and Serve: Remove the sliders from the oven and let them rest in the pan for about 3-5 minutes. This allows the cheese to set slightly, making them easier to cut and serve. Use a knife to cut along the lines of the individual rolls, then use a small spatula to lift them out and serve immediately while they’re warm and gooey.
Nutrition
- Serving Size: one normal portion
- Calories: 320
- Fat: 18g
- Carbohydrates: 20g
- Protein: 12g