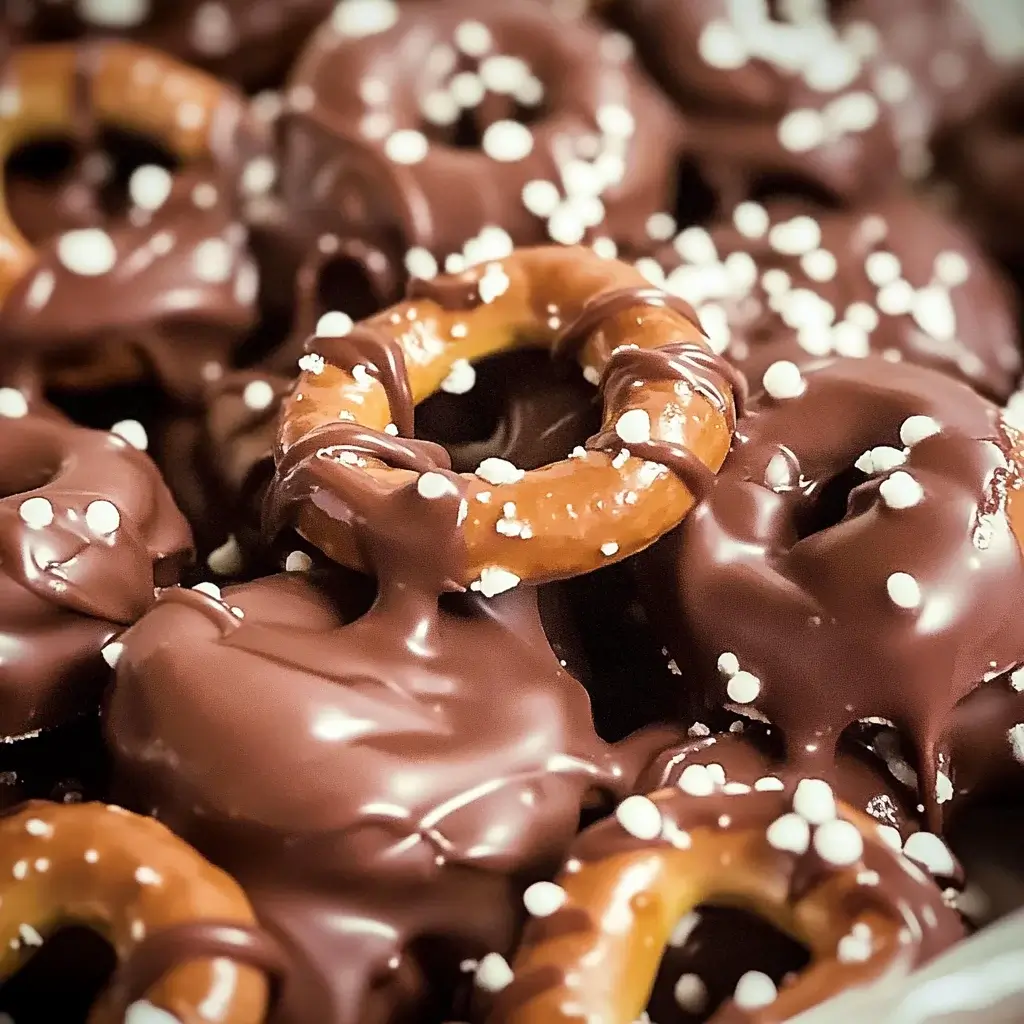
Alright, let’s dive into the delightful world of homemade treats! There’s something truly magical about transforming simple ingredients into something utterly irresistible, and these Chocolate Covered Pretzel Bites are a perfect example. In our house, these little gems are legendary. From impromptu movie nights to festive holiday gatherings, they’ve become our go-to sweet and salty fix. I remember the first time I made them – my kids, usually picky eaters, devoured them in minutes, leaving behind only chocolatey smiles and pretzel crumbs. And honestly, who can resist that satisfying crunch of a salty pretzel enveloped in smooth, decadent chocolate? Whether you’re a seasoned baker or just starting your culinary journey, these pretzel bites are foolproof, fun to make, and guaranteed to be a crowd-pleaser. Get ready to experience the joy of creating these addictive treats – you might just find yourself making them again and again, just like we do!
Ingredients for Chocolate Covered Pretzel Bites
- Pretzels: (1 pound) Choose your favorite pretzel shape – mini pretzels, pretzel rods, or even pretzel snaps all work wonderfully. The key is to select pretzels that are sturdy enough to hold their shape when dipped and coated in chocolate.
- Chocolate: (12 ounces) Select high-quality chocolate for the best flavor. You can use milk chocolate, dark chocolate, semi-sweet chocolate, or white chocolate chips, melting wafers, or baking bars. Consider using a combination for a visually appealing and flavor-rich result.
- Toppings (Optional): Get creative with your toppings! Sprinkles (jimmies, nonpareils, colored sugar), chopped nuts (peanuts, almonds, pecans), sea salt flakes, shredded coconut, mini chocolate chips, crushed candy canes (during holidays), or even a drizzle of caramel or peanut butter can elevate your pretzel bites.
Instructions: Crafting Your Chocolate Covered Pretzel Bites
- Prepare Your Workspace: Before you begin, set up your workspace for efficient dipping and decorating. Line a baking sheet with parchment paper or wax paper. This will prevent the pretzel bites from sticking and make cleanup a breeze. Have your toppings ready in small bowls for easy access. Melted chocolate can set quickly, so organization is key to a smooth dipping process.
- Melt the Chocolate – The Heart of the Treat: This is arguably the most crucial step. You have a few options for melting chocolate, each with its own advantages.
- Microwave Method (Quick and Easy): Place your chocolate in a microwave-safe bowl. Microwave in 30-second intervals, stirring well after each interval. Continue this process until the chocolate is almost completely melted. At this point, reduce the intervals to 15 seconds, stirring until smooth and glossy. Be very careful not to overheat the chocolate, as it can seize and become grainy. If using chocolate chips, adding a teaspoon of coconut oil or vegetable oil can help them melt more smoothly and maintain a glossy finish.
- Double Boiler Method (Gentle and Controlled): Fill a saucepan with about an inch of water and bring it to a simmer. Place a heatproof bowl (glass or stainless steel) on top of the saucepan, ensuring the bottom of the bowl doesn’t touch the water. Add the chocolate to the bowl. The steam from the simmering water will gently melt the chocolate. Stir occasionally until completely melted and smooth. This method is less likely to overheat the chocolate and is ideal for achieving a perfectly smooth texture, especially for higher quality chocolates.
- Candy Melts/Melting Wafers (Foolproof and Convenient): Candy melts or melting wafers are specifically designed for dipping and coating. They melt easily in the microwave and set up quickly and firmly. Follow the package instructions for melting. They come in a variety of colors, making them perfect for themed pretzel bites.
- Dipping the Pretzels – The Art of Chocolate Coating: Once your chocolate is melted and smooth, it’s time to dip the pretzels. Hold a pretzel firmly and dip it into the melted chocolate, ensuring it’s fully coated or partially coated, depending on your preference. Use a fork or dipping tool to lift the pretzel out of the chocolate, allowing any excess chocolate to drip back into the bowl. Gently tap the fork against the side of the bowl to remove even more excess chocolate, creating a neater finish.
- Decorating with Toppings – Unleash Your Creativity: Immediately after dipping, place the chocolate-covered pretzel onto the prepared baking sheet. If you are using toppings, sprinkle them onto the wet chocolate right away. The melted chocolate acts as the “glue” to hold the toppings in place. Get creative and have fun with different combinations! For example, try dipping half in dark chocolate and half in white chocolate, then use contrasting sprinkles or nuts. You can also drizzle melted white chocolate over dark chocolate-covered pretzels or vice versa for a decorative effect.
- Setting the Chocolate – Patience is Rewarded: Allow the chocolate-covered pretzels to set completely. This can be done at room temperature, which will take approximately 30-60 minutes depending on the room temperature and humidity. For faster setting, you can place the baking sheet in the refrigerator for 15-20 minutes. However, be mindful that refrigerating can sometimes cause the chocolate to bloom (develop white streaks), although this is purely cosmetic and doesn’t affect the taste. If you refrigerate, let them sit at room temperature for a few minutes before serving to prevent the chocolate from being too hard.
- Storage – Keeping Your Bites Fresh and Delicious: Once the chocolate is fully set, store your Chocolate Covered Pretzel Bites in an airtight container at room temperature. They will stay fresh for up to a week. Avoid storing them in the refrigerator for extended periods, as condensation can affect the chocolate’s texture and appearance over time. If you live in a very warm climate, you can store them in the refrigerator, but ensure they are in a truly airtight container to minimize moisture exposure. For optimal freshness and flavor, it’s best to enjoy them within a few days.
Nutrition Facts (per serving, approximate)
- Servings: Approximately 20-24 pretzel bites (depending on pretzel size and chocolate coating thickness)
- Calories per serving (1 bite): 80-120 calories (depending on chocolate type and toppings)
- Fat: 5-8g
(Note: Nutritional values are estimates and can vary based on specific ingredients used, portion sizes, and toppings. For accurate nutritional information, use a nutrition calculator with the specific brands and quantities of ingredients you use.)
Preparation Time: Quick Treat, Big Impact
- Prep Time: 15-20 minutes (This includes gathering ingredients, preparing the baking sheet, and melting the chocolate.)
- Setting Time: 30-60 minutes at room temperature, or 15-20 minutes in the refrigerator.
- Total Time: 45 minutes to 1 hour 20 minutes.
Description: Chocolate Covered Pretzel Bites are remarkably quick to prepare, especially considering the delightful results. The active time, involving melting chocolate and dipping pretzels, is minimal. Most of the time is spent waiting for the chocolate to set, making this a fantastic recipe for when you need a delicious treat without spending hours in the kitchen.
How to Serve Chocolate Covered Pretzel Bites
- Party Platters: Arrange them beautifully on a platter alongside other snacks and desserts for parties, potlucks, or holiday gatherings. Their sweet and salty combination is always a crowd-pleaser.
- Dessert Board Star: Incorporate them into a dessert board or charcuterie board. Their contrasting textures and flavors complement other sweet treats, cheeses, and fruits.
- Edible Gifts: Package them in cellophane bags or decorative boxes tied with ribbons to create charming homemade gifts for friends, family, or neighbors, especially during the holidays.
- Movie Night Snack: Enjoy them as a perfect sweet and salty snack during movie nights or game nights. They are easy to eat and satisfying.
- After-Dinner Treat: Serve a small plate of pretzel bites as a simple yet satisfying after-dinner dessert.
- Coffee or Tea Companion: Pair them with a cup of coffee, tea, or hot chocolate for a delightful afternoon or evening treat.
- Kid-Friendly Snack: They are a hit with kids! Pack them in lunchboxes (in moderation) or serve them as a fun after-school snack.
Additional Tips for Perfect Chocolate Covered Pretzel Bites
- Choose the Right Chocolate: For the smoothest and shiniest chocolate coating, opt for good quality chocolate chips, melting wafers, or baking bars. Chocolate with a higher cocoa butter content tends to melt more smoothly. Avoid using chocolate that is too old or has been improperly stored, as it may not melt as well.
- Don’t Overheat the Chocolate: Overheated chocolate can become grainy or seize. Melt chocolate gently and slowly, especially when using the microwave. Use short intervals and stir frequently. If using a double boiler, ensure the water is simmering, not boiling vigorously.
- Control Chocolate Consistency: If your melted chocolate is too thick for easy dipping, you can thin it slightly by adding a teaspoon of vegetable oil, coconut oil, or shortening. Stir until smooth. Be careful not to add too much liquid, as it can affect the chocolate’s setting ability.
- Ensure Pretzels are Dry: Make sure your pretzels are completely dry before dipping them in chocolate. Any moisture can cause the chocolate to seize or not adhere properly.
- Work Quickly: Melted chocolate starts to set as it cools. Work relatively quickly while dipping and decorating to ensure the chocolate remains smooth and the toppings adhere well. If the chocolate starts to thicken, you can gently reheat it briefly.
- Experiment with Chocolate Types: Don’t be afraid to experiment with different types of chocolate – milk chocolate, dark chocolate, semi-sweet, white chocolate, or even flavored chocolates like peppermint or orange chocolate. Combining different chocolates can create unique and delicious flavor profiles.
- Get Creative with Toppings: Think beyond sprinkles! Explore a wide range of toppings to customize your pretzel bites. Consider chopped nuts, dried fruits, shredded coconut, sea salt flakes, mini candies, crushed cookies, or even a drizzle of caramel or peanut butter after the chocolate has set.
- Make Them Ahead: Chocolate Covered Pretzel Bites are great for making ahead of time. They can be stored in an airtight container at room temperature for several days, making them perfect for party prep or gifting. This makes them a stress-free dessert option for busy schedules.
FAQ: Your Chocolate Covered Pretzel Bite Questions Answered
Q1: What is the best type of chocolate to use for chocolate covered pretzels?
A: The best chocolate to use depends on your preference and desired outcome. For ease of melting and a smooth, glossy finish, melting wafers or candy melts are excellent choices. High-quality chocolate chips or baking bars (milk, dark, semi-sweet, or white chocolate) also work well and offer superior flavor. Avoid using cheap chocolate as it may not melt as smoothly and can have a waxy texture.
Q2: How do I melt chocolate without it seizing?
A: To prevent chocolate from seizing, melt it gently and slowly. Use low heat, whether in the microwave (short intervals) or a double boiler. Avoid getting any water or steam into the chocolate, as even a tiny amount of moisture can cause it to seize. Stir frequently while melting and stop heating as soon as the chocolate is mostly melted and smooth, allowing residual heat to melt any remaining pieces.
Q3: Can I use different types of pretzels for this recipe?
A: Absolutely! You can use various types of pretzels, such as mini pretzels, pretzel rods, pretzel snaps, or even braided pretzels. Choose pretzels that are sturdy enough to hold their shape when dipped and coated. Mini pretzels are great for bite-sized treats, while pretzel rods offer a longer, more elegant presentation.
Q4: How long do chocolate covered pretzels last?
A: Chocolate covered pretzels will stay fresh for up to a week when stored in an airtight container at room temperature. For optimal freshness and flavor, it’s best to enjoy them within a few days. Avoid storing them in the refrigerator for extended periods as condensation can affect the chocolate’s texture.
Q5: Can I make chocolate covered pretzels vegan or dairy-free?
A: Yes, you can easily make vegan and dairy-free chocolate covered pretzels. Use vegan pretzels and dairy-free chocolate chips or melting wafers. Many brands offer vegan dark chocolate and semi-sweet chocolate options. Always check ingredient labels to ensure they are free of dairy and other animal products.
Q6: What are some fun topping ideas besides sprinkles?
A: Get creative with toppings! Consider chopped nuts (peanuts, almonds, pecans, walnuts), shredded coconut (toasted or unsweetened), sea salt flakes, mini chocolate chips, crushed candy canes (for holidays), dried cranberries, toffee bits, or even a drizzle of caramel or peanut butter (after the chocolate sets).
Q7: My chocolate is too thick, how can I thin it?
A: If your melted chocolate is too thick for dipping, you can thin it slightly by adding a small amount (start with ½ teaspoon) of vegetable oil, coconut oil, or shortening. Stir well until smooth. Add more in very small increments if needed, until you reach the desired consistency. Be cautious not to add too much liquid.
Q8: Can I make chocolate covered pretzels ahead of time for a party?
A: Yes, chocolate covered pretzels are perfect for making ahead of time. They hold up well and can be stored at room temperature in an airtight container for several days. This makes them an ideal make-ahead treat for parties, holidays, or gifting, saving you time and stress on the day of your event.
Print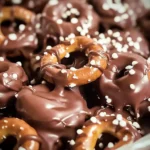
Chocolate Covered Pretzel Bites
Ingredients
- Pretzels: (1 pound) Choose your favorite pretzel shape – mini pretzels, pretzel rods, or even pretzel snaps all work wonderfully. The key is to select pretzels that are sturdy enough to hold their shape when dipped and coated in chocolate.
- Chocolate: (12 ounces) Select high-quality chocolate for the best flavor. You can use milk chocolate, dark chocolate, semi-sweet chocolate, or white chocolate chips, melting wafers, or baking bars. Consider using a combination for a visually appealing and flavor-rich result.
- Toppings (Optional): Get creative with your toppings! Sprinkles (jimmies, nonpareils, colored sugar), chopped nuts (peanuts, almonds, pecans), sea salt flakes, shredded coconut, mini chocolate chips, crushed candy canes (during holidays), or even a drizzle of caramel or peanut butter can elevate your pretzel bites.
Instructions
- Prepare Your Workspace: Before you begin, set up your workspace for efficient dipping and decorating. Line a baking sheet with parchment paper or wax paper. This will prevent the pretzel bites from sticking and make cleanup a breeze. Have your toppings ready in small bowls for easy access. Melted chocolate can set quickly, so organization is key to a smooth dipping process.
- Melt the Chocolate – The Heart of the Treat: This is arguably the most crucial step. You have a few options for melting chocolate, each with its own advantages.
- Microwave Method (Quick and Easy): Place your chocolate in a microwave-safe bowl. Microwave in 30-second intervals, stirring well after each interval. Continue this process until the chocolate is almost completely melted. At this point, reduce the intervals to 15 seconds, stirring until smooth and glossy. Be very careful not to overheat the chocolate, as it can seize and become grainy. If using chocolate chips, adding a teaspoon of coconut oil or vegetable oil can help them melt more smoothly and maintain a glossy finish.
- Double Boiler Method (Gentle and Controlled): Fill a saucepan with about an inch of water and bring it to a simmer. Place a heatproof bowl (glass or stainless steel) on top of the saucepan, ensuring the bottom of the bowl doesn’t touch the water. Add the chocolate to the bowl. The steam from the simmering water will gently melt the chocolate. Stir occasionally until completely melted and smooth. This method is less likely to overheat the chocolate and is ideal for achieving a perfectly smooth texture, especially for higher quality chocolates.
- Candy Melts/Melting Wafers (Foolproof and Convenient): Candy melts or melting wafers are specifically designed for dipping and coating. They melt easily in the microwave and set up quickly and firmly. Follow the package instructions for melting. They come in a variety of colors, making them perfect for themed pretzel bites.
- Dipping the Pretzels – The Art of Chocolate Coating: Once your chocolate is melted and smooth, it’s time to dip the pretzels. Hold a pretzel firmly and dip it into the melted chocolate, ensuring it’s fully coated or partially coated, depending on your preference. Use a fork or dipping tool to lift the pretzel out of the chocolate, allowing any excess chocolate to drip back into the bowl. Gently tap the fork against the side of the bowl to remove even more excess chocolate, creating a neater finish.
- Decorating with Toppings – Unleash Your Creativity: Immediately after dipping, place the chocolate-covered pretzel onto the prepared baking sheet. If you are using toppings, sprinkle them onto the wet chocolate right away. The melted chocolate acts as the “glue” to hold the toppings in place. Get creative and have fun with different combinations! For example, try dipping half in dark chocolate and half in white chocolate, then use contrasting sprinkles or nuts. You can also drizzle melted white chocolate over dark chocolate-covered pretzels or vice versa for a decorative effect.
- Setting the Chocolate – Patience is Rewarded: Allow the chocolate-covered pretzels to set completely. This can be done at room temperature, which will take approximately 30-60 minutes depending on the room temperature and humidity. For faster setting, you can place the baking sheet in the refrigerator for 15-20 minutes. However, be mindful that refrigerating can sometimes cause the chocolate to bloom (develop white streaks), although this is purely cosmetic and doesn’t affect the taste. If you refrigerate, let them sit at room temperature for a few minutes before serving to prevent the chocolate from being too hard.
- Storage – Keeping Your Bites Fresh and Delicious: Once the chocolate is fully set, store your Chocolate Covered Pretzel Bites in an airtight container at room temperature. They will stay fresh for up to a week. Avoid storing them in the refrigerator for extended periods, as condensation can affect the chocolate’s texture and appearance over time. If you live in a very warm climate, you can store them in the refrigerator, but ensure they are in a truly airtight container to minimize moisture exposure. For optimal freshness and flavor, it’s best to enjoy them within a few days.
Nutrition
- Serving Size: one normal portion
- Calories: 120
- Fat: 8g