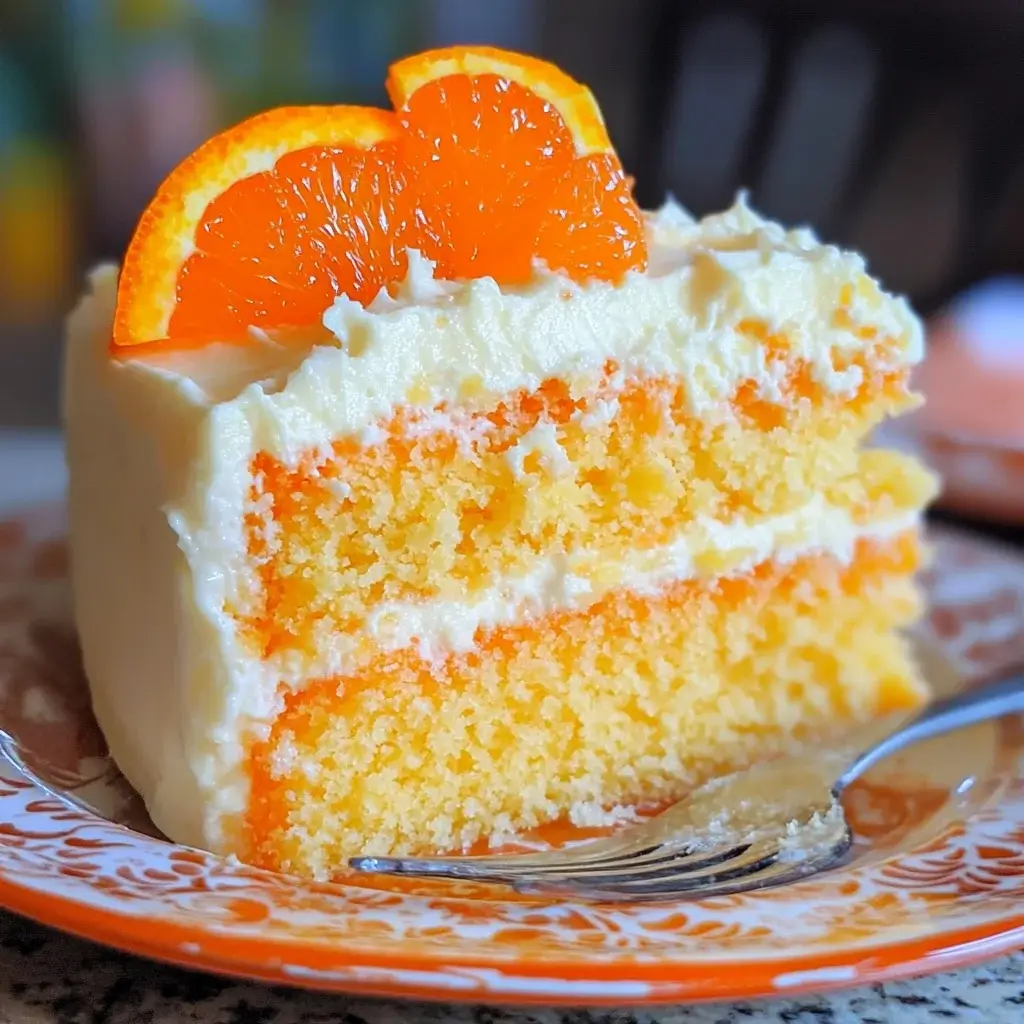
It’s funny how some flavors just transport you right back to childhood. For me, the taste of orange and vanilla together is pure nostalgia, instantly reminding me of hot summer days and chasing after the ice cream truck for a creamsicle. Recently, I decided to capture that joyful flavor in a cake, and let me tell you, this Creamy Orange Creamsicle Cake was an absolute hit! From the moment it came out of the oven, filling the kitchen with the bright scent of citrus, I knew it was going to be special. My family devoured it, and even the pickiest eaters were asking for seconds. The cake itself is incredibly moist and tender, bursting with orange flavor, and the creamy vanilla frosting is the perfect complement, echoing the classic creamsicle experience. It’s become a new favorite in our house, and I’m so excited to share this recipe with you so you can bring a little sunshine and sweet memories into your own kitchen.
Ingredients
- For the Cake:
- All-Purpose Flour: 3 cups, provides the structure for the cake.
- Granulated Sugar: 2 cups, sweetens the cake and adds moisture.
- Baking Powder: 3 teaspoons, a leavening agent that helps the cake rise and become light and airy.
- Baking Soda: 1 teaspoon, another leavening agent, works with baking powder to create a tender crumb.
- Salt: 1 teaspoon, enhances the flavors of the other ingredients and balances the sweetness.
- Unsalted Butter: 1 cup (2 sticks), softened, adds richness, flavor, and moisture to the cake. Make sure it’s properly softened for smooth creaming.
- Vegetable Oil: ½ cup, contributes to the cake’s moistness and tender texture.
- Large Eggs: 4, bind the ingredients together, add richness, and contribute to the cake’s structure.
- Orange Zest: 2 tablespoons, freshly grated, provides a concentrated burst of bright orange flavor. Zest only the orange part, avoiding the bitter white pith.
- Fresh Orange Juice: 1 cup, adds moisture and intensifies the orange flavor of the cake. Use freshly squeezed juice for the best taste.
- Vanilla Extract: 2 teaspoons, enhances the overall flavor profile and adds a touch of warmth.
- Buttermilk: 1 cup, adds tanginess and tenderness to the cake, reacting with the baking soda for a light texture. If you don’t have buttermilk, you can make a substitute (see tips section).
- Orange Extract (optional): 1 teaspoon, for an extra boost of orange flavor, especially if your oranges are not very strong. Use sparingly as it can be potent.
- For the Creamy Vanilla Frosting:
- Unsalted Butter: 1 cup (2 sticks), softened, the base of the frosting, providing richness and flavor. Again, ensure it is properly softened.
- Cream Cheese: 8 ounces, softened, adds tanginess and creaminess to the frosting, mimicking the creamy part of a creamsicle. Full-fat cream cheese works best for flavor and texture.
- Powdered Sugar: 4 cups, sweetens and thickens the frosting to the perfect spreading consistency. Sift it if it’s lumpy for a smoother frosting.
- Vanilla Extract: 2 teaspoons, enhances the vanilla flavor of the frosting and complements the orange cake.
- Heavy Cream or Milk: 2-4 tablespoons, used to adjust the frosting consistency to make it smooth and spreadable. Add gradually until desired consistency is reached.
Instructions
Step 1: Preheat Oven and Prepare Pans
Begin by preheating your oven to 350°F (175°C). This ensures the oven is at the correct temperature when you place the cake in, allowing for even baking. Grease and flour two 9-inch round cake pans. Alternatively, you can use baking spray with flour for an easier release. Dusting with flour after greasing prevents the cake from sticking to the pans, ensuring clean removal and beautiful cake layers. You can also line the bottom of the pans with parchment paper for extra insurance against sticking; simply grease the pans, place parchment circles in the bottom, and then grease the parchment paper.
Step 2: Combine Dry Ingredients
In a large mixing bowl, whisk together the all-purpose flour, granulated sugar, baking powder, baking soda, and salt. Whisking is crucial here as it aerates the flour and ensures the leavening agents and salt are evenly distributed throughout the dry ingredients. This even distribution is key for consistent rising and flavor in the final cake. Set this bowl aside for later.
Step 3: Cream Wet Ingredients
In a separate large mixing bowl, or the bowl of a stand mixer fitted with the paddle attachment, cream together the softened unsalted butter and vegetable oil until light and fluffy. Creaming the butter and oil incorporates air, which contributes to the cake’s light and airy texture. This step usually takes about 2-3 minutes.
Step 4: Add Eggs and Flavorings
Beat in the large eggs one at a time, mixing well after each addition. Ensure each egg is fully incorporated before adding the next to maintain a smooth batter. Then, stir in the orange zest, fresh orange juice, vanilla extract, and orange extract (if using). Mix until just combined. The orange zest and juice are the primary sources of orange flavor, while the extracts enhance and deepen it. Be careful not to overmix at this stage once the wet ingredients are added to the dry ingredients in the next step.
Step 5: Combine Wet and Dry Ingredients
Gradually add the dry ingredients to the wet ingredients in three additions, alternating with the buttermilk in two additions, beginning and ending with the dry ingredients. Start by adding about a third of the dry ingredients to the wet mixture and mix until just combined. Then add half of the buttermilk and mix until just combined. Repeat with another third of the dry ingredients, then the remaining buttermilk, and finally the last third of the dry ingredients. Mix until just until everything is just combined and a smooth batter forms. Be careful not to overmix the batter at this stage. Overmixing can develop the gluten in the flour, resulting in a tough cake. Mix only until the flour is just incorporated.
Step 6: Divide Batter and Bake
Divide the cake batter evenly between the prepared cake pans. Use a kitchen scale for precise division if desired, ensuring even layers that bake at the same rate. Smooth the tops of the batter with a spatula. Bake in the preheated oven for 25-30 minutes, or until a toothpick inserted into the center comes out clean. The baking time can vary slightly depending on your oven, so start checking for doneness around 25 minutes.
Step 7: Cool Cakes Completely
Let the cakes cool in the pans for 10-15 minutes before inverting them onto a wire rack to cool completely. Cooling in the pans allows the cakes to set slightly before being removed, preventing them from breaking apart. Cooling completely before frosting is crucial, as warm cake will melt the frosting and make it difficult to work with.
Step 8: Prepare the Creamy Vanilla Frosting
While the cakes are cooling, prepare the creamy vanilla frosting. In a large mixing bowl or the bowl of a stand mixer fitted with the paddle attachment, cream together the softened unsalted butter and softened cream cheese until smooth and creamy. Creaming these together creates the base of the frosting, ensuring it’s light and airy.
Step 9: Add Powdered Sugar and Vanilla
Gradually add the powdered sugar, one cup at a time, beating on low speed at first to prevent a powdered sugar cloud, and then increasing to medium speed as it incorporates. Beat until smooth and fluffy after all the powdered sugar is added. Stir in the vanilla extract.
Step 10: Adjust Frosting Consistency
Add heavy cream or milk, one tablespoon at a time, until the frosting reaches your desired spreading consistency. You want a frosting that is thick enough to hold its shape but spreadable enough to easily frost the cake. Start with 2 tablespoons and add more if needed, up to 4 tablespoons.
Step 11: Frost and Decorate the Cake
Once the cakes are completely cool, place one cake layer on a serving plate or cake stand. Frost the top of the first layer with a generous amount of frosting. Carefully place the second cake layer on top. Frost the top and sides of the cake with the remaining frosting. You can create swirls with a spatula for a rustic look or use a piping bag for a more decorative finish.
Step 12: Optional Decorations
For extra decoration and to enhance the creamsicle theme, you can garnish the cake with fresh orange slices, orange zest, or even candied orange peels. White chocolate shavings or sprinkles can also add a nice touch. For a more intense orange flavor, consider drizzling a light orange glaze over the top of the frosted cake.
Step 13: Chill and Serve
While not strictly necessary, chilling the frosted cake for about 30 minutes before serving can help the frosting set and make slicing cleaner. However, this cake is delicious at room temperature as well. Slice, serve, and enjoy your homemade Creamy Orange Creamsicle Cake!
Nutrition Facts (per serving, estimated)
- Servings: 12
- Calories: Approximately 450-550 kcal
- Fat: 25-30g
Please note: Nutrition facts are estimates and can vary based on specific ingredients used and serving sizes.
Preparation Time
- Prep time: 30 minutes (includes measuring ingredients, zesting oranges, mixing batter, and making frosting)
- Bake time: 25-30 minutes
- Cooling time: 1-2 hours (for cakes to cool completely)
- Total time: Approximately 2-3 hours
How to Serve
- Classic Slice: Serve a generous slice of the Creamy Orange Creamsicle Cake as is, allowing the flavors to speak for themselves. It’s perfect on its own or with a simple beverage.
- With a Scoop of Vanilla Ice Cream: Elevate the creamsicle experience by serving each slice with a scoop of high-quality vanilla ice cream. The cold ice cream complements the cake beautifully and enhances the creamy vanilla notes.
- Accompanied by Fresh Berries: Add a touch of freshness and color by serving the cake with a side of mixed fresh berries like strawberries, raspberries, and blueberries. The tartness of the berries cuts through the sweetness of the cake and frosting.
- With a Dollop of Whipped Cream: For an extra creamy indulgence, top each slice with a dollop of freshly whipped cream. Lightly sweetened whipped cream adds a delicate texture and enhances the overall richness.
- As a Birthday Cake: This cake is a fantastic choice for a birthday celebration, especially for those who love citrus flavors or creamsicles. Decorate it with candles and birthday sprinkles for a festive touch.
- For Summer Gatherings: Its bright, refreshing flavor makes it an ideal dessert for summer barbecues, picnics, and potlucks. It’s a crowd-pleaser that’s sure to be a hit on a warm day.
- With Coffee or Tea: Enjoy a slice of this cake with a cup of hot coffee or tea for a delightful afternoon treat or after-dinner dessert. The citrus notes pair well with both coffee and tea.
- Chilled for a Refreshing Treat: Especially during warmer months, serve the cake chilled directly from the refrigerator. The cold temperature enhances the creamsicle-like sensation and makes it even more refreshing.
Additional Tips for the Perfect Creamy Orange Creamsicle Cake
- Use Freshly Squeezed Orange Juice and Zest: Freshly squeezed orange juice and zest are key to achieving the bright, authentic orange flavor in this cake. Bottled juice and pre-zested orange lack the vibrancy and essential oils that make fresh citrus so appealing.
- Don’t Overmix the Batter: Overmixing develops the gluten in the flour, which can result in a tough, dense cake. Mix the batter just until the ingredients are combined and no streaks of flour remain. A few lumps are okay.
- Room Temperature Ingredients are Crucial: Ensure your butter, cream cheese, eggs, and buttermilk are all at room temperature. Room temperature ingredients emulsify better, creating a smoother batter and frosting, and resulting in a more tender and evenly textured cake.
- Buttermilk Substitute: If you don’t have buttermilk, you can easily make a substitute. For 1 cup of buttermilk, place 1 tablespoon of lemon juice or white vinegar in a liquid measuring cup and add enough milk (dairy or non-dairy) to reach the 1-cup mark. Stir and let it sit for 5 minutes to thicken slightly before using.
- Taste and Adjust Sweetness: Taste the frosting as you make it and adjust the amount of powdered sugar to your preference. Some people prefer a sweeter frosting, while others like it less sweet. You can also adjust the amount of vanilla extract to suit your taste.
- Prevent Cake Domes: To minimize doming and create flatter cake layers, use cake strips wrapped around the outside of your cake pans. These strips insulate the edges of the pan, allowing the center to bake more evenly and preventing a high dome. Alternatively, you can gently level the cake tops with a serrated knife once they are cooled.
- Storage Instructions: Store leftover Creamy Orange Creamsicle Cake in an airtight container at room temperature for up to 3 days or in the refrigerator for up to 5 days. If refrigerating, allow the cake to come to room temperature for about 30 minutes before serving for the best flavor and texture. For longer storage, unfrosted cake layers can be wrapped tightly and frozen for up to 2 months. Frosting should be made fresh for best results.
Frequently Asked Questions (FAQ)
Q1: Can I use a different type of flour for this cake?
While all-purpose flour is recommended for this recipe to achieve the best texture, you can substitute with cake flour for an even more tender crumb. If using cake flour, use the same amount as specified for all-purpose flour. We do not recommend using self-rising flour as it already contains leavening agents and salt, which would alter the recipe’s balance. For gluten-free options, a gluten-free all-purpose blend specifically designed for baking should work, but you may need to adjust liquid amounts as gluten-free flours can absorb moisture differently.
Q2: Can I make this cake ahead of time?
Yes, you can definitely make parts of this cake ahead of time. The cake layers can be baked a day or two in advance, cooled completely, wrapped tightly in plastic wrap, and stored at room temperature or in the refrigerator. You can also make the frosting a day ahead and store it in an airtight container in the refrigerator. Let the frosting come to room temperature and re-whip it briefly before frosting the cake. Assembled and frosted cake is best enjoyed within 2-3 days for optimal freshness but will still be delicious for up to 5 days when refrigerated.
Q3: Can I make this cake into cupcakes instead of a layer cake?
Absolutely! This recipe can easily be adapted into cupcakes. Simply line muffin tins with cupcake liners and fill each liner about two-thirds full. Bake at 350°F (175°C) for 18-22 minutes, or until a toothpick inserted into the center comes out clean. The baking time will be shorter, so keep a close eye on them. The frosting recipe will provide enough for approximately 24 cupcakes, depending on how generously you frost them. Cupcakes are a fun and convenient way to serve this cake, especially for parties and events.
Q4: Can I use margarine or a butter substitute instead of butter?
For the best flavor and texture, we recommend using real unsalted butter in both the cake and the frosting. Butter contributes significantly to the richness and flavor of both components. While margarine or some butter substitutes might work, they may alter the taste and texture, potentially making the cake and frosting less flavorful and the cake slightly less tender. If you must substitute, choose a high-quality butter substitute that is designed for baking.
Q5: What if I don’t have orange extract? Is it necessary?
Orange extract is optional but recommended for boosting the orange flavor, especially if your oranges aren’t very fragrant or flavorful. If you don’t have orange extract, you can still make a delicious cake by relying on fresh orange zest and juice. To compensate for the missing extract, you could increase the amount of orange zest slightly or consider adding a tablespoon of orange liqueur (like Cointreau or Grand Marnier) to the batter for a more complex orange flavor, if appropriate for your audience.
Q6: My frosting is too soft/runny. How can I fix it?
If your frosting is too soft, the most common reason is that the butter or cream cheese was too warm, or too much liquid was added. To fix runny frosting, try chilling it in the refrigerator for 30 minutes to an hour to firm up. If it’s still too soft after chilling, you can add more powdered sugar, one tablespoon at a time, and beat until it reaches the desired consistency. Conversely, if your frosting is too thick, you can add a little more heavy cream or milk, a teaspoon at a time, until it becomes smoother and more spreadable. Be sure to add liquids very gradually to avoid making it too thin again.
Print
Creamy Orange Creamsicle Cake
Ingredients
- For the Cake:
- All-Purpose Flour: 3 cups, provides the structure for the cake.
- Granulated Sugar: 2 cups, sweetens the cake and adds moisture.
- Baking Powder: 3 teaspoons, a leavening agent that helps the cake rise and become light and airy.
- Baking Soda: 1 teaspoon, another leavening agent, works with baking powder to create a tender crumb.
- Salt: 1 teaspoon, enhances the flavors of the other ingredients and balances the sweetness.
- Unsalted Butter: 1 cup (2 sticks), softened, adds richness, flavor, and moisture to the cake. Make sure it’s properly softened for smooth creaming.
- Vegetable Oil: ½ cup, contributes to the cake’s moistness and tender texture.
- Large Eggs: 4, bind the ingredients together, add richness, and contribute to the cake’s structure.
- Orange Zest: 2 tablespoons, freshly grated, provides a concentrated burst of bright orange flavor. Zest only the orange part, avoiding the bitter white pith.
- Fresh Orange Juice: 1 cup, adds moisture and intensifies the orange flavor of the cake. Use freshly squeezed juice for the best taste.
- Vanilla Extract: 2 teaspoons, enhances the overall flavor profile and adds a touch of warmth.
- Buttermilk: 1 cup, adds tanginess and tenderness to the cake, reacting with the baking soda for a light texture. If you don’t have buttermilk, you can make a substitute (see tips section).
- Orange Extract (optional): 1 teaspoon, for an extra boost of orange flavor, especially if your oranges are not very strong. Use sparingly as it can be potent.
- For the Creamy Vanilla Frosting:
- Unsalted Butter: 1 cup (2 sticks), softened, the base of the frosting, providing richness and flavor. Again, ensure it is properly softened.
- Cream Cheese: 8 ounces, softened, adds tanginess and creaminess to the frosting, mimicking the creamy part of a creamsicle. Full-fat cream cheese works best for flavor and texture.
- Powdered Sugar: 4 cups, sweetens and thickens the frosting to the perfect spreading consistency. Sift it if it’s lumpy for a smoother frosting.
- Vanilla Extract: 2 teaspoons, enhances the vanilla flavor of the frosting and complements the orange cake.
- Heavy Cream or Milk: 2-4 tablespoons, used to adjust the frosting consistency to make it smooth and spreadable. Add gradually until desired consistency is reached.
Instructions
Step 1: Preheat Oven and Prepare Pans
Begin by preheating your oven to 350°F (175°C). This ensures the oven is at the correct temperature when you place the cake in, allowing for even baking. Grease and flour two 9-inch round cake pans. Alternatively, you can use baking spray with flour for an easier release. Dusting with flour after greasing prevents the cake from sticking to the pans, ensuring clean removal and beautiful cake layers. You can also line the bottom of the pans with parchment paper for extra insurance against sticking; simply grease the pans, place parchment circles in the bottom, and then grease the parchment paper.
Step 2: Combine Dry Ingredients
In a large mixing bowl, whisk together the all-purpose flour, granulated sugar, baking powder, baking soda, and salt. Whisking is crucial here as it aerates the flour and ensures the leavening agents and salt are evenly distributed throughout the dry ingredients. This even distribution is key for consistent rising and flavor in the final cake. Set this bowl aside for later.
Step 3: Cream Wet Ingredients
In a separate large mixing bowl, or the bowl of a stand mixer fitted with the paddle attachment, cream together the softened unsalted butter and vegetable oil until light and fluffy. Creaming the butter and oil incorporates air, which contributes to the cake’s light and airy texture. This step usually takes about 2-3 minutes.
Step 4: Add Eggs and Flavorings
Beat in the large eggs one at a time, mixing well after each addition. Ensure each egg is fully incorporated before adding the next to maintain a smooth batter. Then, stir in the orange zest, fresh orange juice, vanilla extract, and orange extract (if using). Mix until just combined. The orange zest and juice are the primary sources of orange flavor, while the extracts enhance and deepen it. Be careful not to overmix at this stage once the wet ingredients are added to the dry ingredients in the next step.
Step 5: Combine Wet and Dry Ingredients
Gradually add the dry ingredients to the wet ingredients in three additions, alternating with the buttermilk in two additions, beginning and ending with the dry ingredients. Start by adding about a third of the dry ingredients to the wet mixture and mix until just combined. Then add half of the buttermilk and mix until just combined. Repeat with another third of the dry ingredients, then the remaining buttermilk, and finally the last third of the dry ingredients. Mix until just until everything is just combined and a smooth batter forms. Be careful not to overmix the batter at this stage. Overmixing can develop the gluten in the flour, resulting in a tough cake. Mix only until the flour is just incorporated.
Step 6: Divide Batter and Bake
Divide the cake batter evenly between the prepared cake pans. Use a kitchen scale for precise division if desired, ensuring even layers that bake at the same rate. Smooth the tops of the batter with a spatula. Bake in the preheated oven for 25-30 minutes, or until a toothpick inserted into the center comes out clean. The baking time can vary slightly depending on your oven, so start checking for doneness around 25 minutes.
Step 7: Cool Cakes Completely
Let the cakes cool in the pans for 10-15 minutes before inverting them onto a wire rack to cool completely. Cooling in the pans allows the cakes to set slightly before being removed, preventing them from breaking apart. Cooling completely before frosting is crucial, as warm cake will melt the frosting and make it difficult to work with.
Step 8: Prepare the Creamy Vanilla Frosting
While the cakes are cooling, prepare the creamy vanilla frosting. In a large mixing bowl or the bowl of a stand mixer fitted with the paddle attachment, cream together the softened unsalted butter and softened cream cheese until smooth and creamy. Creaming these together creates the base of the frosting, ensuring it’s light and airy.
Step 9: Add Powdered Sugar and Vanilla
Gradually add the powdered sugar, one cup at a time, beating on low speed at first to prevent a powdered sugar cloud, and then increasing to medium speed as it incorporates. Beat until smooth and fluffy after all the powdered sugar is added. Stir in the vanilla extract.
Step 10: Adjust Frosting Consistency
Add heavy cream or milk, one tablespoon at a time, until the frosting reaches your desired spreading consistency. You want a frosting that is thick enough to hold its shape but spreadable enough to easily frost the cake. Start with 2 tablespoons and add more if needed, up to 4 tablespoons.
Step 11: Frost and Decorate the Cake
Once the cakes are completely cool, place one cake layer on a serving plate or cake stand. Frost the top of the first layer with a generous amount of frosting. Carefully place the second cake layer on top. Frost the top and sides of the cake with the remaining frosting. You can create swirls with a spatula for a rustic look or use a piping bag for a more decorative finish.
Step 12: Optional Decorations
For extra decoration and to enhance the creamsicle theme, you can garnish the cake with fresh orange slices, orange zest, or even candied orange peels. White chocolate shavings or sprinkles can also add a nice touch. For a more intense orange flavor, consider drizzling a light orange glaze over the top of the frosted cake.
Step 13: Chill and Serve
While not strictly necessary, chilling the frosted cake for about 30 minutes before serving can help the frosting set and make slicing cleaner. However, this cake is delicious at room temperature as well. Slice, serve, and enjoy your homemade Creamy Orange Creamsicle Cake!
Nutrition
- Serving Size: one normal portion
- Calories: 550
- Fat: 30g