It’s hard to believe another Easter season is upon us, and with it, the delightful challenge of finding the perfect sweet treat to share with loved ones. This year, I decided to ditch the traditional Easter basket fillers and go straight for the heart – or rather, the sweet tooth! Enter these Easter Egg Cookie Bars. From the moment I pulled these beauties out of the oven, the aroma of warm vanilla and buttery goodness filled my kitchen, instantly transporting me back to childhood Easter celebrations. My family, a notoriously tough crowd when it comes to desserts, devoured them. The kids were mesmerized by the vibrant candy eggs nestled in the soft, chewy cookie base, and even the adults couldn’t resist sneaking seconds (and maybe thirds!). These bars are not only incredibly easy to make – a huge win for busy holiday prep – but they are also visually stunning, perfectly embodying the cheerful spirit of Easter. If you’re searching for a show-stopping, crowd-pleasing dessert that requires minimal effort but delivers maximum flavor and festive charm, look no further. These Easter Egg Cookie Bars are guaranteed to become a new family favorite, just as they have in mine. Get ready to bake up some Easter magic!
Ingredients You’ll Need to Bake Easter Egg Cookie Bars
- Unsalted Butter: 1 cup (2 sticks), softened to room temperature. Butter is the foundation of these cookie bars, providing richness, flavor, and that perfect chewy texture. Using unsalted butter allows you to control the total amount of salt in the recipe. Make sure it’s properly softened for easy creaming.
- Granulated Sugar: 1 cup. Granulated sugar adds sweetness and helps to create a slightly crisp edge while keeping the bars soft in the center. It also assists in the creaming process, aerating the butter for a lighter texture.
- Light Brown Sugar: ½ cup, packed. Brown sugar, with its molasses content, adds moisture, chewiness, and a subtle caramel flavor that complements the vanilla and butter beautifully. Packing it ensures you get the right amount and consistent sweetness.
- Large Eggs: 2. Eggs bind the ingredients together, add richness, and contribute to the structure of the cookie bars. They also help with moisture and tenderness. Using large eggs ensures the correct ratio in the recipe.
- Vanilla Extract: 2 teaspoons. Vanilla extract enhances the overall flavor profile of the cookie bars, adding warmth and depth. Use pure vanilla extract for the best flavor, or vanilla bean paste for an even more intense vanilla experience.
- All-Purpose Flour: 2 ½ cups. All-purpose flour provides the structure for the cookie bars. Measure it correctly by spooning it into your measuring cup and leveling it off to avoid using too much, which can lead to dry bars.
- Baking Soda: 1 teaspoon. Baking soda is a leavening agent that helps the cookie bars rise slightly and become tender. It also reacts with the brown sugar to create a slightly chewy texture.
- Salt: ½ teaspoon. Salt enhances the sweetness and balances the flavors in the cookie bars. It’s essential for bringing out the best in all the other ingredients.
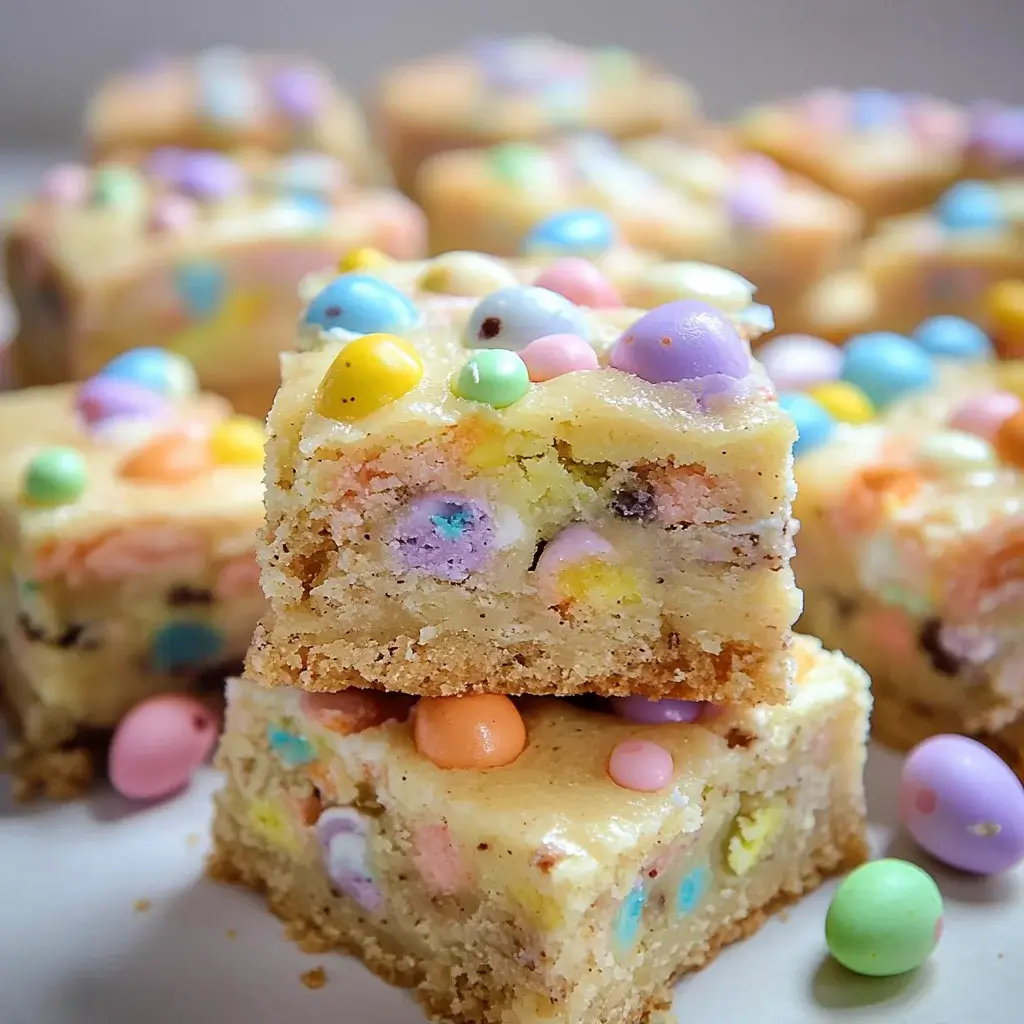
- Easter Egg Candies: 1 ½ cups (such as mini chocolate eggs, pastel M&Ms, or jelly beans). These are the stars of the show! Choose your favorite Easter candies to press into the top of the bars. A mix of colors and textures will make them visually appealing and festive. Consider using a variety of chocolate and candy-coated eggs for visual interest.
Step-by-Step Instructions for Easter Egg Cookie Bars
- Preheat Your Oven and Prepare Your Pan: Start by preheating your oven to 350°F (175°C). This ensures the oven is at the correct temperature when you place the cookie bars in, promoting even baking. Grease a 9×13 inch baking pan. You can use cooking spray or butter and flour. Lining the pan with parchment paper, leaving an overhang on the sides, is highly recommended for easy removal of the bars after baking. This will prevent sticking and make cleanup a breeze.
- Cream Together Butter and Sugars: In a large bowl, or the bowl of a stand mixer fitted with the paddle attachment, cream together the softened unsalted butter, granulated sugar, and packed light brown sugar. Beat on medium speed until the mixture is light and fluffy. This process, which usually takes 2-3 minutes, is crucial for incorporating air into the batter, which results in tender cookie bars. The mixture should become noticeably paler and increase in volume.
- Incorporate Eggs and Vanilla: Beat in the large eggs one at a time, mixing well after each addition. Ensure each egg is fully incorporated before adding the next to maintain a smooth batter. Then, stir in the vanilla extract until it is evenly distributed throughout the mixture. Vanilla extract enhances all the other flavors and adds a lovely aroma to the bars.
- Combine Dry Ingredients: In a separate medium bowl, whisk together the all-purpose flour, baking soda, and salt. Whisking ensures that the baking soda and salt are evenly distributed throughout the flour, preventing clumps and ensuring consistent leavening and flavor in the final product.
- Gradually Add Dry Ingredients to Wet Ingredients: Gradually add the dry ingredients to the wet ingredients, mixing on low speed until just combined. Be careful not to overmix. Overmixing can develop the gluten in the flour, leading to tough cookie bars. Mix just until the flour is incorporated and no streaks of flour remain.
- Press Dough into Pan: Press the cookie dough evenly into the prepared 9×13 inch baking pan. Use your hands or the back of a spatula to spread the dough to all corners of the pan, ensuring an even thickness for consistent baking. A uniform thickness will prevent some parts of the bars from being overbaked while others are underbaked.
- Bake the Cookie Bars: Bake in the preheated oven for 20-25 minutes, or until the edges are lightly golden brown and a toothpick inserted into the center comes out with moist crumbs attached. The baking time may vary slightly depending on your oven, so keep an eye on the bars starting around 20 minutes. Avoid overbaking, as this can make the bars dry.
- Add Easter Egg Candies: Remove the cookie bars from the oven and immediately press the Easter egg candies into the top of the warm cookie bars. Gently press them in so they adhere to the surface but don’t sink too deep. Adding them while the bars are warm allows the candies to slightly melt and adhere better to the cookie surface.
- Cool Completely: Allow the Easter Egg Cookie Bars to cool completely in the pan on a wire rack before cutting into squares or bars. Cooling completely is essential for the bars to set and firm up, making them easier to cut and preventing them from crumbling. This usually takes about 1-2 hours.
- Cut and Serve: Once completely cooled, lift the parchment paper out of the pan (if used) and cut the cookie bars into squares or rectangles. The size of the bars is up to your preference. Serve these festive Easter treats and enjoy! They are perfect for Easter brunch, dessert, or a sweet snack.
Nutrition Facts for Easter Egg Cookie Bars
Servings: Approximately 24 bars (depending on cut size)
Calories per Serving: Approximately 250-300 calories (This is an estimate and can vary based on candy toppings and bar size)
- Fat: 12-15g
- Saturated Fat: 7-9g
Please note: Nutrition facts are estimates and will vary based on specific ingredients used, candy types, and serving size. For precise nutritional information, use a nutrition calculator with the exact brands and quantities of ingredients used.
Preparation Time for Easter Egg Cookie Bars
Prep Time: 20 minutes
Bake Time: 20-25 minutes
Cooling Time: 1-2 hours
Total Time: Approximately 2-3 hours (including cooling)
These Easter Egg Cookie Bars are wonderfully quick to prepare, with the majority of the time being hands-off cooling time. The active preparation and baking steps are straightforward and can easily be managed even on a busy day, making them a fantastic choice for a last-minute Easter dessert or a fun baking project with kids.
How to Serve Easter Egg Cookie Bars
- Classic Dessert: Serve the cookie bars as a simple and satisfying dessert after your Easter meal. They pair perfectly with a scoop of vanilla ice cream or a dollop of whipped cream for an extra indulgent treat.
- Easter Brunch Addition: Add these colorful bars to your Easter brunch spread. They offer a sweet counterpoint to savory brunch dishes and provide a festive touch to your table.
- Kid-Friendly Snack: These cookie bars are a guaranteed hit with kids! Pack them in lunchboxes for a special Easter week treat or serve them as an afternoon snack.
- Party Platter: Arrange the cookie bars on a platter alongside other Easter treats like cupcakes, brownies, and fruit skewers for a beautiful and varied dessert table at your Easter gathering.
- Edible Gifts: Wrap individual cookie bars in cellophane bags tied with pastel ribbons to create charming edible gifts for friends, neighbors, or teachers.
- Warm or Cold: Enjoy these bars at room temperature, slightly warm, or even chilled from the refrigerator. Slightly warming them in the microwave for a few seconds can enhance their gooey texture, while chilling them makes them firmer and more refreshing.
- With Beverages: Serve with a glass of cold milk, a cup of hot coffee, or a refreshing iced tea. For a more festive touch, pair them with a pastel-colored lemonade or a sparkling cider.
- Decorated Further: Get creative! Drizzle melted white chocolate or pastel-colored candy melts over the cooled bars for an extra layer of decoration. You can also sprinkle them with edible glitter or chopped nuts before the chocolate sets.
Additional Tips for Perfect Easter Egg Cookie Bars
- Use Room Temperature Ingredients: Ensure your butter and eggs are at room temperature. This helps them emulsify properly, creating a smoother batter and a more tender final product. Room temperature butter creams more easily with sugar, and room temperature eggs incorporate better into the batter.
- Don’t Overmix the Dough: Overmixing the dough after adding the flour can develop the gluten, resulting in tough cookie bars. Mix just until the dry ingredients are incorporated and no streaks of flour remain. A few streaks are okay; they will disappear as you press the dough into the pan.
- Measure Flour Correctly: Incorrectly measured flour is a common baking mistake. Spoon the flour into your measuring cup and level it off with a straight edge. Avoid scooping directly from the bag, as this can pack the flour and result in using too much.
- Customize Your Candies: Feel free to get creative with your Easter egg candies! Use a mix of mini chocolate eggs, pastel M&Ms, jelly beans, or even chopped Cadbury Creme Eggs (added after baking and slightly melted by the warmth). Consider using different colors and textures for visual appeal.
- Adjust Baking Time as Needed: Oven temperatures can vary. Start checking for doneness around 20 minutes. The edges should be lightly golden brown, and a toothpick inserted into the center should come out with moist crumbs. Avoid overbaking to keep the bars chewy.
- Let Them Cool Completely Before Cutting: Patience is key! Allow the cookie bars to cool completely in the pan before attempting to cut them. This allows them to firm up, making them easier to slice neatly and preventing them from crumbling.
- Make Ahead and Freeze: These cookie bars are great for making ahead of time. Once cooled and cut, store them in an airtight container at room temperature for up to 3 days or freeze them for up to 2 months. Thaw frozen bars at room temperature before serving.
- Involve Kids in Decorating: Baking these Easter Egg Cookie Bars is a fun activity to do with kids! Let them help with measuring ingredients, mixing (with supervision), pressing the dough into the pan, and, most importantly, decorating with the Easter candies. It’s a great way to get them involved in the Easter festivities.
Frequently Asked Questions About Easter Egg Cookie Bars (FAQ)
Q1: Can I use salted butter instead of unsalted butter?
A: Yes, you can use salted butter, but you should reduce the amount of added salt in the recipe to ¼ teaspoon instead of ½ teaspoon. Using unsalted butter gives you more control over the salt level in the recipe.
Q2: Can I substitute brown sugar with something else?
A: Light brown sugar contributes to the chewiness and moisture of the bars. If you don’t have light brown sugar, you can use dark brown sugar for a richer molasses flavor, or in a pinch, you can use all granulated sugar, but the texture might be slightly less chewy and moist.
Q3: What if I don’t have Easter egg candies? Can I use something else?
A: Absolutely! You can use any type of candy you like. Sprinkles, chocolate chips, chopped nuts, dried fruit, or even a swirl of peanut butter or Nutella would all be delicious alternatives. The key is to add something fun and flavorful to the top of the bars.
Q4: How do I prevent the Easter egg candies from sinking to the bottom of the bars?
A: The trick is to press the candies onto the surface of the bars immediately after they come out of the oven while the cookie base is still warm and slightly soft. This allows the candies to adhere to the surface and slightly melt, securing them in place as the bars cool.
Q5: Can I make these cookie bars gluten-free?
A: Yes, you can make these cookie bars gluten-free by substituting the all-purpose flour with a gluten-free all-purpose flour blend. Ensure the blend is designed for baking and contains xanthan gum or another binder to help with structure. Follow the recipe as directed, keeping in mind that gluten-free flours can sometimes bake slightly differently, so monitor the baking time closely.
Q6: How should I store leftover Easter Egg Cookie Bars?
A: Store leftover cookie bars in an airtight container at room temperature for up to 3 days. For longer storage, you can freeze them for up to 2 months. Thaw them at room temperature before serving.
Q7: Can I double the recipe to make a larger batch?
A: Yes, you can easily double this recipe. Simply double all the ingredients and bake in a larger baking pan, such as a 12×17 inch pan, or use two 9×13 inch pans. The baking time might need to be slightly adjusted, so keep an eye on them.
Q8: My cookie bars are too crumbly. What did I do wrong?
A: Crumbly cookie bars can be caused by a few factors: overmixing the dough, using too much flour, or overbaking. Ensure you are measuring your flour correctly, mixing just until the ingredients are combined, and not overbaking the bars. Overbaking dries them out, leading to a crumbly texture. Checking for doneness around the 20-minute mark and removing them when a toothpick comes out with moist crumbs will help prevent this.

Easter Egg Cookie Bars
Ingredients
- Unsalted Butter: 1 cup (2 sticks), softened to room temperature. Butter is the foundation of these cookie bars, providing richness, flavor, and that perfect chewy texture. Using unsalted butter allows you to control the total amount of salt in the recipe. Make sure it’s properly softened for easy creaming.
- Granulated Sugar: 1 cup. Granulated sugar adds sweetness and helps to create a slightly crisp edge while keeping the bars soft in the center. It also assists in the creaming process, aerating the butter for a lighter texture.
- Light Brown Sugar: ½ cup, packed. Brown sugar, with its molasses content, adds moisture, chewiness, and a subtle caramel flavor that complements the vanilla and butter beautifully. Packing it ensures you get the right amount and consistent sweetness.
- Large Eggs: 2. Eggs bind the ingredients together, add richness, and contribute to the structure of the cookie bars. They also help with moisture and tenderness. Using large eggs ensures the correct ratio in the recipe.
- Vanilla Extract: 2 teaspoons. Vanilla extract enhances the overall flavor profile of the cookie bars, adding warmth and depth. Use pure vanilla extract for the best flavor, or vanilla bean paste for an even more intense vanilla experience.
- All-Purpose Flour: 2 ½ cups. All-purpose flour provides the structure for the cookie bars. Measure it correctly by spooning it into your measuring cup and leveling it off to avoid using too much, which can lead to dry bars.
- Baking Soda: 1 teaspoon. Baking soda is a leavening agent that helps the cookie bars rise slightly and become tender. It also reacts with the brown sugar to create a slightly chewy texture.
- Salt: ½ teaspoon. Salt enhances the sweetness and balances the flavors in the cookie bars. It’s essential for bringing out the best in all the other ingredients.
- Easter Egg Candies: 1 ½ cups (such as mini chocolate eggs, pastel M&Ms, or jelly beans). These are the stars of the show! Choose your favorite Easter candies to press into the top of the bars. A mix of colors and textures will make them visually appealing and festive. Consider using a variety of chocolate and candy-coated eggs for visual interest.
Instructions
- Preheat Your Oven and Prepare Your Pan: Start by preheating your oven to 350°F (175°C). This ensures the oven is at the correct temperature when you place the cookie bars in, promoting even baking. Grease a 9×13 inch baking pan. You can use cooking spray or butter and flour. Lining the pan with parchment paper, leaving an overhang on the sides, is highly recommended for easy removal of the bars after baking. This will prevent sticking and make cleanup a breeze.
- Cream Together Butter and Sugars: In a large bowl, or the bowl of a stand mixer fitted with the paddle attachment, cream together the softened unsalted butter, granulated sugar, and packed light brown sugar. Beat on medium speed until the mixture is light and fluffy. This process, which usually takes 2-3 minutes, is crucial for incorporating air into the batter, which results in tender cookie bars. The mixture should become noticeably paler and increase in volume.
- Incorporate Eggs and Vanilla: Beat in the large eggs one at a time, mixing well after each addition. Ensure each egg is fully incorporated before adding the next to maintain a smooth batter. Then, stir in the vanilla extract until it is evenly distributed throughout the mixture. Vanilla extract enhances all the other flavors and adds a lovely aroma to the bars.
- Combine Dry Ingredients: In a separate medium bowl, whisk together the all-purpose flour, baking soda, and salt. Whisking ensures that the baking soda and salt are evenly distributed throughout the flour, preventing clumps and ensuring consistent leavening and flavor in the final product.
- Gradually Add Dry Ingredients to Wet Ingredients: Gradually add the dry ingredients to the wet ingredients, mixing on low speed until just combined. Be careful not to overmix. Overmixing can develop the gluten in the flour, leading to tough cookie bars. Mix just until the flour is incorporated and no streaks of flour remain.
- Press Dough into Pan: Press the cookie dough evenly into the prepared 9×13 inch baking pan. Use your hands or the back of a spatula to spread the dough to all corners of the pan, ensuring an even thickness for consistent baking. A uniform thickness will prevent some parts of the bars from being overbaked while others are underbaked.
- Bake the Cookie Bars: Bake in the preheated oven for 20-25 minutes, or until the edges are lightly golden brown and a toothpick inserted into the center comes out with moist crumbs attached. The baking time may vary slightly depending on your oven, so keep an eye on the bars starting around 20 minutes. Avoid overbaking, as this can make the bars dry.
- Add Easter Egg Candies: Remove the cookie bars from the oven and immediately press the Easter egg candies into the top of the warm cookie bars. Gently press them in so they adhere to the surface but don’t sink too deep. Adding them while the bars are warm allows the candies to slightly melt and adhere better to the cookie surface.
- Cool Completely: Allow the Easter Egg Cookie Bars to cool completely in the pan on a wire rack before cutting into squares or bars. Cooling completely is essential for the bars to set and firm up, making them easier to cut and preventing them from crumbling. This usually takes about 1-2 hours.
- Cut and Serve: Once completely cooled, lift the parchment paper out of the pan (if used) and cut the cookie bars into squares or rectangles. The size of the bars is up to your preference. Serve these festive Easter treats and enjoy! They are perfect for Easter brunch, dessert, or a sweet snack.
Nutrition
- Serving Size: one normal portion
- Calories: 300
- Fat: 15g
- Saturated Fat: 9g