Of all the summer treats my family clamors for, nothing quite captures the magic of a vacation like this Frozen Pineapple Whip. I’ll never forget the first time we tried the iconic version at a theme park; the sun was high, the lines were long, and that first bite of cold, sweet, tangy pineapple soft serve was pure, unadulterated bliss. It tasted like sunshine in a cup. For years, I thought it was a complicated, secret recipe, a treat reserved only for those special, once-a-year trips. Then, one sweltering afternoon, with a bag of frozen pineapple in the freezer and a craving that wouldn’t quit, I decided to try and recreate the magic at home. The result was nothing short of a revelation. In less than five minutes, my blender whirred to life and produced a dessert so creamy, so intensely flavorful, and so identical to our beloved vacation treat that my kids’ eyes went wide with disbelief. Now, it’s our go-to recipe for hot days, movie nights, and any time we need a little taste of tropical paradise. It’s simple, surprisingly healthy, and brings the biggest smiles to everyone’s faces, turning an ordinary day into a mini-vacation.
What is Pineapple Whip? A Taste of the Tropics
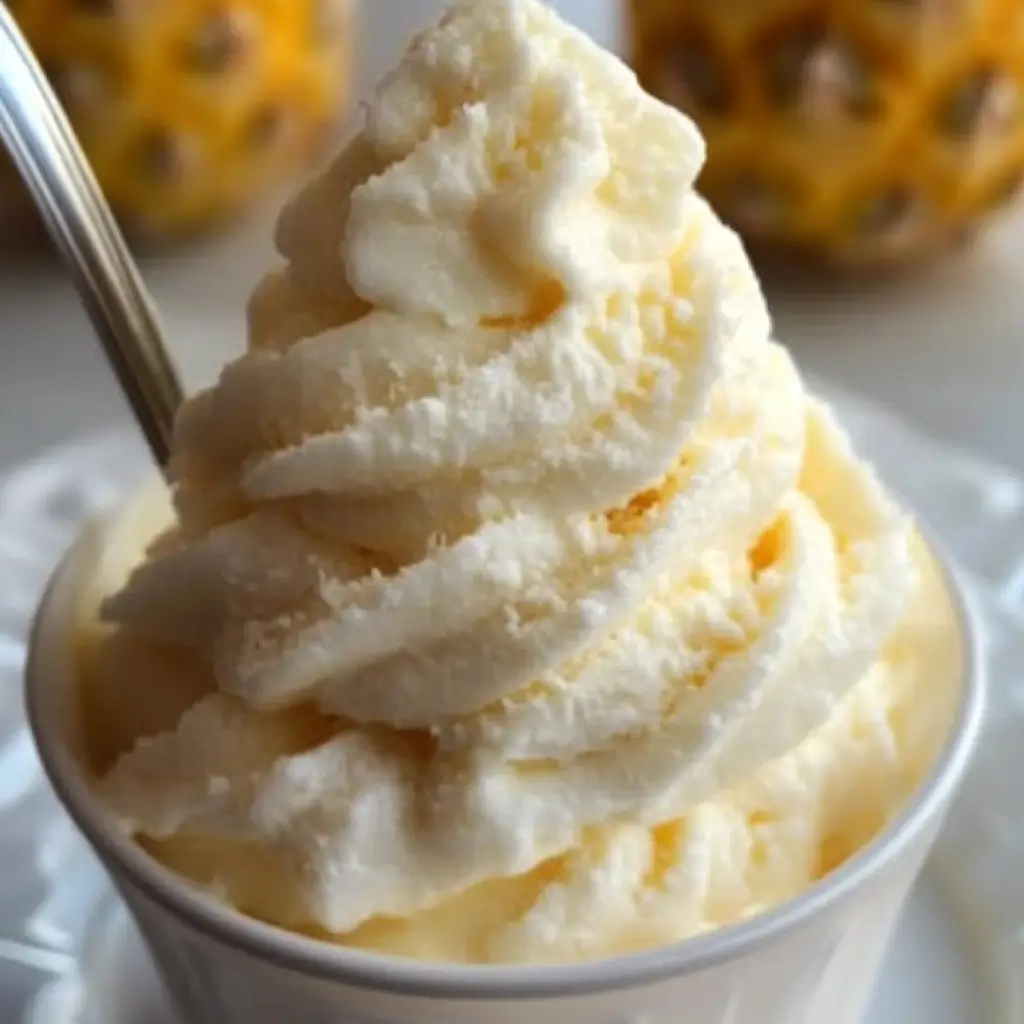
At its core, Pineapple Whip is a frozen dessert with a texture that falls somewhere between a sorbet and a soft-serve ice cream. It’s famous for its intensely sweet and tangy pineapple flavor and its incredibly smooth, creamy consistency. The most famous version, often found at theme parks like Disney World and Disneyland, is known as the Dole Whip®. This legendary treat has garnered a massive cult following for its refreshing taste and dairy-free nature, making it a perfect indulgence for almost everyone.
Our homemade Frozen Pineapple Whip recipe captures the essence of this iconic dessert, allowing you to bring that taste of tropical paradise right into your own kitchen. The beauty of this recipe lies in its simplicity. It harnesses the natural sweetness and fiber of frozen pineapple, blending it into a velvety-smooth confection without the need for an ice cream maker or any complicated steps. Unlike traditional ice creams that rely on heavy cream and eggs for their richness, this whip gets its creaminess from the flash-freezing process of blending already-frozen fruit. The result is a light, airy, yet satisfyingly creamy dessert that is both a treat for the taste buds and a healthier alternative to many store-bought frozen novelties. It’s the perfect solution for satisfying a sweet tooth on a hot day, offering pure, unadulterated pineapple flavor in every spoonful.
Why You’ll Absolutely Love This Frozen Pineapple Whip Recipe
Beyond its delicious taste, there are so many reasons to make this recipe a staple in your dessert rotation. It’s more than just a sweet treat; it’s a versatile, easy, and feel-good dessert that the whole family can enjoy.
- Incredibly Easy to Make: This is arguably one of the simplest dessert recipes you will ever encounter. With just a handful of ingredients and a blender or food processor, you are literally minutes away from a delicious frozen treat. There’s no cooking, no churning, and minimal cleanup.
- A Healthier Indulgence: Packed with real fruit, this pineapple whip is a fantastic source of Vitamin C and dietary fiber. It contains no heavy creams, artificial colors, or excessive preservatives found in many commercial desserts. It’s a treat you can feel good about serving to your family.
- Naturally Dairy-Free and Vegan: This recipe is a dream come true for those with dietary restrictions. By using plant-based milk or even just pineapple juice, it is completely free of dairy and animal products, making it a perfect vegan and lactose-intolerant-friendly dessert.
- Endlessly Customizable: While the classic pineapple flavor is divine on its own, this recipe serves as a perfect base for your creativity. You can add other frozen fruits, mix in coconut flavor, or swirl in some berry puree. The possibilities are limitless!
- Budget-Friendly: Recreating your favorite theme park treats at home is a fantastic way to save money. A large bag of frozen pineapple costs a fraction of what you’d pay for a single serving at a specialty kiosk, allowing you to enjoy this treat whenever the craving strikes without breaking the bank.
- Instant Gratification: There’s no need to plan hours in advance or wait for an ice cream maker to churn and freeze. When you want a cold, refreshing dessert, you can have this ready to eat in under 10 minutes from start to finish. It’s the ultimate recipe for instant sweet-tooth satisfaction.
The Science Behind the Creaminess: Choosing Your Ingredients
The magic of this recipe is in its simplicity, but the choice of each ingredient plays a crucial role in achieving that perfect, dreamy texture. Understanding why each component is important will help you master the recipe every single time.
## Ingredients
- Frozen Pineapple Chunks (4 cups): This is the star of the show. Using pre-frozen chunks is essential as the ice crystals within the fruit are what create the thick, soft-serve consistency when blended. It provides all the flavor, sweetness, and structure.
- Full-Fat Canned Coconut Milk (1/2 cup, chilled): This is the secret to an ultra-creamy, rich texture. The high-fat content emulsifies beautifully when blended, preventing iciness and adding a subtle tropical note that complements the pineapple perfectly. Chilling the can helps it stay thick.
- Pineapple Juice (1/4 cup, optional): A small splash of pineapple juice can help the blender get moving if the mixture is too thick. It also amplifies the pineapple flavor for a more intense taste.
- Sweetener of Choice (1-2 tablespoons, optional): Depending on the sweetness of your pineapple, you may want a little extra sweetness. Maple syrup, agave nectar, or honey (if not vegan) are excellent choices as they blend in smoothly.
- Lime Juice (1 teaspoon, fresh): This is a non-negotiable flavor booster. A tiny amount of fresh lime juice doesn’t make it taste like lime; instead, it brightens and sharpens the pineapple flavor, cutting through the sweetness and making the whole dessert taste more vibrant and refreshing.
Step-by-Step Instructions to Pineapple Paradise
Follow these simple steps for a perfect whip every time. The key is to work quickly to maintain that perfect frozen texture.
## Instructions
- Prepare Your Equipment: Before you begin, make sure your blender or food processor is ready. If you plan to pipe the whip for a classic swirl look, fit a piping bag with a large star tip and have it standing by in a tall glass.
- Combine the Core Ingredients: Place the 4 cups of frozen pineapple chunks, 1/2 cup of chilled coconut milk, and 1 teaspoon of fresh lime juice into the canister of a high-powered blender or the bowl of a food processor.
- Blend Until Smooth: Secure the lid and begin blending on a low speed, gradually increasing to high. You will need to use your blender’s tamper tool to push the pineapple down into the blades continuously. If using a food processor, you’ll need to stop and scrape down the sides of the bowl several times. Be patient; it will look crumbly at first, but it will transform into a smooth, creamy whip.
- Adjust Consistency: If the mixture is too thick and the blades are struggling to turn, add the pineapple juice one tablespoon at a time until it reaches a smooth, thick, and churnable consistency.
- Taste and Sweeten: Once smooth, stop the blender and taste the whip. If your pineapple wasn’t super sweet, add 1-2 tablespoons of your preferred sweetener and blend for another 10 seconds to incorporate it fully.
- Serve Immediately: For the best soft-serve texture, spoon or pipe the pineapple whip into serving bowls or glasses immediately. Garnish as desired and enjoy your taste of the tropics!
Nutrition Facts
This recipe provides a lighter, fruit-forward alternative to traditional ice cream.
- Servings: 4 servings
- Calories per serving: Approximately 185 kcal
- Vitamin C: A single serving provides a significant portion of your daily Vitamin C, which is essential for immune function and skin health.
- Dietary Fiber: Pineapple is a good source of fiber, which aids in digestion and helps you feel full and satisfied.
- Natural Sugars: The majority of the sugar content comes naturally from the pineapple itself, not from refined added sugars.
- Healthy Fats: The use of coconut milk provides medium-chain triglycerides (MCTs), a type of fat that is more easily digested and used for energy.
Preparation Time
This is one of the fastest desserts you can make from scratch.
- Total Time: 5-10 minutes. The entire process, from gathering your ingredients to blending and serving, takes less than 10 minutes. The key factor influencing the time is the power of your blender and how frozen your fruit is. There is no pre-cooking or long freezing time required, making it the perfect instant treat.
How to Serve Your Frozen Pineapple Whip
Presentation can elevate this simple dessert into a show-stopping treat. Here are some creative and delicious ways to serve your homemade pineapple whip:
- The Classic Swirl:
- For that authentic theme-park look, transfer the freshly blended whip into a piping bag fitted with a large star tip (like a Wilton 1M).
- Pipe a tall, elegant swirl into a small bowl or a clear glass.
- Garnish with a fresh pineapple wedge and a maraschino cherry.
- Pineapple Whip Float:
- Fill a tall glass about halfway with cold pineapple juice.
- Carefully spoon or pipe a generous amount of the pineapple whip on top to create a fizzy, creamy float.
- Serve with a long spoon and a colorful straw.
- Tropical Parfait Layers:
- Create a beautiful and healthy parfait by layering the pineapple whip in a clear glass with other ingredients.
- Alternate layers of pineapple whip with:
- Toasted coconut flakes
- Granola for a crunchy texture
- Diced fresh mango or strawberries
- A drizzle of passion fruit puree
- In a Pineapple Boat:
- For a truly impressive presentation, slice a small pineapple in half lengthwise.
- Carefully hollow out the flesh (you can freeze this for your next batch of whip!).
- Fill the hollowed-out pineapple “boat” with the freshly made whip.
- Garnish with tropical flowers, a sprinkle of chili-lime seasoning (like Tajín), and a tiny cocktail umbrella.
- Frozen Pineapple Whip Pie:
- For a make-ahead dessert, press a mixture of crushed graham crackers and melted butter into a pie dish to form a crust.
- Spread the freshly blended pineapple whip evenly over the crust.
- Freeze for at least 4-6 hours, or until firm.
- Serve slices topped with whipped cream (or coconut cream) and toasted coconut.
Additional Tips for Pineapple Whip Perfection
Unlock the full potential of your recipe with these eight expert tips that will ensure a flawless result every single time.
1. Use Very Frozen Pineapple: The key to a thick, non-soupy whip is using pineapple that is frozen solid. If you’re freezing fresh pineapple, cut it into small, 1-inch chunks and spread them on a baking sheet in a single layer to freeze. This prevents them from clumping and makes them easier for your blender to handle.
2. Chill Everything: For the creamiest, coldest result, chill not only your can of coconut milk but also your blender canister if you have time. A cold canister prevents the whip from melting too quickly as it blends.
3. Don’t Over-blend: Blend only until the mixture is smooth and creamy. Over-blending can generate heat from the friction of the blades, which will start to melt your whip and make it runny. The goal is to process it as quickly and efficiently as possible.
4. The Tamper is Your Best Friend: If you have a high-powered blender like a Vitamix or Blendtec, the tamper tool is essential. Use it vigorously to push the frozen fruit down into the blades, ensuring a smooth, even blend without needing to add too much extra liquid.
5. For a Firmer, Scoopable Texture: If you prefer a texture closer to traditional ice cream or sorbet, transfer the freshly blended whip to a loaf pan or an airtight, freezer-safe container. Smooth the top, cover, and freeze for 2-3 hours. This will firm it up enough to scoop with an ice cream scoop.
6. Don’t Skip the Acidity: That small amount of fresh lime juice is a game-changer. It cuts through the richness and sweetness, making the pineapple flavor pop. If you don’t have a lime, a tiny splash of lemon juice will work in a pinch.
7. Use Full-Fat Coconut Milk: For the creamiest possible texture, use full-fat coconut milk from a can, not the thinner coconut milk beverage from a carton. The high-fat content is what prevents ice crystals from forming and gives the whip its luxurious mouthfeel.
8. Manage Your Batch Size: Don’t overload your blender. It’s better to make the recipe in two smaller batches than to try and force a huge batch through at once. An overfilled blender will struggle to circulate the ingredients, leading to an uneven blend and a higher chance of it melting.
Frequently Asked Questions (FAQ)
Here are answers to some of the most common questions about making this delicious Frozen Pineapple Whip.
1. Can I make this with a regular blender, or do I need a high-powered one?
You can absolutely make this with a regular blender, but it will require more patience. The key is to work in smaller batches and to stop frequently to scrape down the sides and push the fruit towards the blades. You may also need to add a little more liquid (pineapple juice or coconut milk) to help it blend. A food processor is also an excellent alternative if you don’t have a high-powered blender.
2. Can I use fresh pineapple instead of frozen?
No, you must use frozen pineapple for this recipe. The frozen state of the fruit is what creates the thick, soft-serve texture. Using fresh pineapple will result in a thin, drinkable smoothie, not a thick, spoonable whip. If you only have fresh pineapple, simply chop it into chunks and freeze it for at least 4-6 hours before using.
3. How do I store leftovers?
You can store leftover pineapple whip in an airtight, freezer-safe container in the freezer for up to a month. However, be aware that it will freeze solid like an ice block. To enjoy it again, you can either let it thaw on the counter for 15-20 minutes until it’s soft enough to scoop, or you can break it into chunks and re-blend it for a few seconds to return it to its soft-serve state.
4. My pineapple whip is too runny. What did I do wrong?
This usually happens for one of two reasons: you added too much liquid, or your pineapple wasn’t frozen enough. To fix it, simply add more frozen pineapple chunks to the blender and blend again until it thickens up. In the future, start with the minimum amount of liquid and only add more if absolutely necessary.
5. Can I substitute the coconut milk?
Yes, you can. While full-fat coconut milk provides the best creaminess, you can substitute it with other dairy-free milks like almond milk or oat milk, or even a splash of heavy cream if you are not dairy-free. You could also use a frozen banana to add creaminess. Keep in mind that these substitutions will alter the final flavor and may result in a slightly less creamy texture.
6. Is this recipe healthy?
Compared to most traditional ice creams and desserts, this pineapple whip is a much healthier option. It’s made primarily from fruit, is packed with vitamins, and contains no dairy or refined white sugar (if you opt not to add extra sweetener). It’s a guilt-free way to satisfy a dessert craving.
7. Can I add other fruits?
Absolutely! This recipe is a fantastic base for experimentation. Try substituting one cup of the frozen pineapple with a cup of other frozen fruits like mango, strawberries, or raspberries for a delicious flavor twist. A mango-pineapple whip is particularly divine.
8. What can I use instead of maple syrup or agave for sweetener?
If you need a little extra sweetness but want to avoid syrups, you can add a tablespoon or two of powdered sugar, which dissolves easily. For a naturally sweet, whole-food option, you can add one or two pitted Medjool dates to the blender with the other ingredients. They will add sweetness and a subtle caramel flavor.

Frozen Pineapple Whip Recipe
Ingredients
The magic of this recipe is in its simplicity, but the choice of each ingredient plays a crucial role in achieving that perfect, dreamy texture. Understanding why each component is important will help you master the recipe every single time.
## Ingredients
- Frozen Pineapple Chunks (4 cups): This is the star of the show. Using pre-frozen chunks is essential as the ice crystals within the fruit are what create the thick, soft-serve consistency when blended. It provides all the flavor, sweetness, and structure.
- Full-Fat Canned Coconut Milk (1/2 cup, chilled): This is the secret to an ultra-creamy, rich texture. The high-fat content emulsifies beautifully when blended, preventing iciness and adding a subtle tropical note that complements the pineapple perfectly. Chilling the can helps it stay thick.
- Pineapple Juice (1/4 cup, optional): A small splash of pineapple juice can help the blender get moving if the mixture is too thick. It also amplifies the pineapple flavor for a more intense taste.
- Sweetener of Choice (1-2 tablespoons, optional): Depending on the sweetness of your pineapple, you may want a little extra sweetness. Maple syrup, agave nectar, or honey (if not vegan) are excellent choices as they blend in smoothly.
- Lime Juice (1 teaspoon, fresh): This is a non-negotiable flavor booster. A tiny amount of fresh lime juice doesn’t make it taste like lime; instead, it brightens and sharpens the pineapple flavor, cutting through the sweetness and making the whole dessert taste more vibrant and refreshing.
Instructions
Follow these simple steps for a perfect whip every time. The key is to work quickly to maintain that perfect frozen texture.
## Instructions
- Prepare Your Equipment: Before you begin, make sure your blender or food processor is ready. If you plan to pipe the whip for a classic swirl look, fit a piping bag with a large star tip and have it standing by in a tall glass.
- Combine the Core Ingredients: Place the 4 cups of frozen pineapple chunks, 1/2 cup of chilled coconut milk, and 1 teaspoon of fresh lime juice into the canister of a high-powered blender or the bowl of a food processor.
- Blend Until Smooth: Secure the lid and begin blending on a low speed, gradually increasing to high. You will need to use your blender’s tamper tool to push the pineapple down into the blades continuously. If using a food processor, you’ll need to stop and scrape down the sides of the bowl several times. Be patient; it will look crumbly at first, but it will transform into a smooth, creamy whip.
- Adjust Consistency: If the mixture is too thick and the blades are struggling to turn, add the pineapple juice one tablespoon at a time until it reaches a smooth, thick, and churnable consistency.
- Taste and Sweeten: Once smooth, stop the blender and taste the whip. If your pineapple wasn’t super sweet, add 1-2 tablespoons of your preferred sweetener and blend for another 10 seconds to incorporate it fully.
- Serve Immediately: For the best soft-serve texture, spoon or pipe the pineapple whip into serving bowls or glasses immediately. Garnish as desired and enjoy your taste of the tropics!
Nutrition
- Serving Size: one normal portion
- Calories: 185