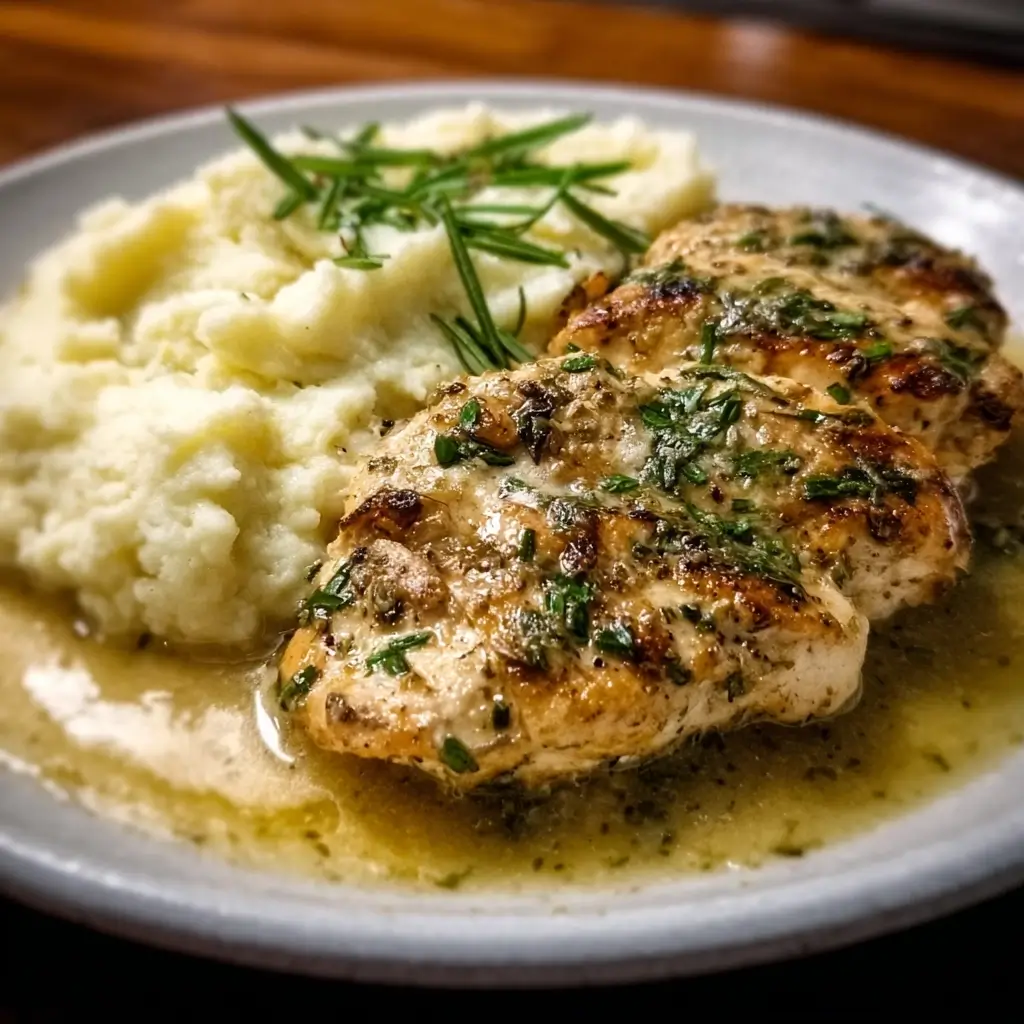
Of all the recipes that have graced my family’s dinner table, this Herbed Chicken with Garlic Mashed Cauliflower holds a special place. I remember the first time I made it, I was on a mission to find a meal that felt indulgent and comforting but still aligned with our goals of eating healthier, lower-carb meals. The skepticism from my kids was palpable when they heard “mashed cauliflower” instead of their beloved potatoes. But then, the aroma began to fill the kitchen—a rich, savory scent of garlic softening in butter, mingling with the fresh, earthy fragrance of herbs crisping up on pan-seared chicken. By the time I served it, the beautifully golden-brown chicken resting on a creamy, pillowy bed of garlic-infused cauliflower mash, the skepticism had turned to genuine curiosity. The first bite sealed the deal. My husband, who is usually a man of few words at the dinner table, looked up and said, “This is incredible. You can make this anytime.” The kids didn’t just eat it; they asked for seconds. It was a victory. This dish proved that healthy eating doesn’t mean sacrificing flavor or comfort. It’s a testament to how simple, whole ingredients, when prepared with a little care, can create a truly memorable meal that nourishes both body and soul. Now, it’s a staple in our rotation, a reliable go-to for a busy weeknight that feels like a weekend treat.
Ingredients
For the Herbed Chicken:
- 4 boneless, skinless chicken breasts (about 6 oz each): The lean protein powerhouse of our dish. Pound them to an even thickness for consistent cooking.
- 2 tablespoons olive oil: Used for pan-searing the chicken to achieve a perfect golden-brown crust.
- 1 teaspoon dried thyme: An earthy, slightly minty herb that pairs beautifully with chicken.
- 1 teaspoon dried rosemary: Provides a pine-like, aromatic flavor that infuses the chicken.
- 1 teaspoon garlic powder: For a deep, savory garlic flavor that coats the chicken evenly.
- 1/2 teaspoon onion powder: Adds a subtle, sweet, and savory undertone.
- 1 teaspoon paprika: Lends a beautiful color and a mild, sweet flavor to the chicken crust.
- Salt and black pepper to taste: Essential for seasoning and enhancing all the other flavors.
For the Garlic Mashed Cauliflower:
- 1 large head of cauliflower (about 2.5 lbs): The low-carb star that will transform into a creamy, potato-like mash.
- 4 cloves garlic, minced: The heart of our mash’s flavor, providing a pungent, aromatic kick.
- 4 tablespoons unsalted butter: Adds richness, flavor, and a creamy mouthfeel to the cauliflower.
- 1/4 cup heavy cream or full-fat coconut cream: This is the secret to an ultra-creamy, luxurious texture.
- 2 tablespoons grated Parmesan cheese (optional): For an extra layer of salty, nutty flavor.
- 2 tablespoons chopped fresh chives or parsley: For a fresh, vibrant finish and a pop of color.
- Salt and white pepper to taste: White pepper is used to maintain the pure white color of the mash while adding a gentle heat.
Instructions
This recipe is best approached in two parallel parts: preparing the cauliflower while the chicken is being prepped and cooked. This ensures everything comes together hot and fresh for serving.
Part 1: Preparing the Garlic Mashed Cauliflower
- Prep the Cauliflower: Begin by washing the head of cauliflower thoroughly. Remove the outer leaves and the tough core. Chop the cauliflower florets into uniform, bite-sized pieces. Uniformity is key here, as it ensures all the pieces cook at the same rate, preventing any hard, undercooked bits in your final mash.
- Steam the Cauliflower: Place the chopped cauliflower florets into a steamer basket set over a pot of simmering water. Cover the pot and let the cauliflower steam for about 12-15 minutes. You’ll know it’s ready when a fork can be inserted into a floret with absolutely no resistance—it should be exceptionally tender. Steaming is preferable to boiling as it prevents the cauliflower from becoming waterlogged, which is the number one cause of a runny or watery mash.
- Infuse the Cream with Garlic: While the cauliflower is steaming, melt the 4 tablespoons of unsalted butter in a small saucepan over medium-low heat. Add the 4 cloves of minced garlic and sauté for 1-2 minutes, or until the garlic is fragrant and just beginning to turn golden. Be very careful not to burn the garlic, as it will become bitter. Pour in the 1/4 cup of heavy cream and stir to combine. Let the mixture gently warm through for another minute, allowing the garlic flavor to infuse the butter and cream. Remove from the heat.
- Mash to Perfection: Once the cauliflower is perfectly tender, transfer it from the steamer basket to the bowl of a food processor or a high-powered blender. It’s important to do this while the cauliflower is still hot. Add the warm, garlic-infused butter and cream mixture to the food processor. Add the optional Parmesan cheese, salt, and white pepper.
- Blend Until Smooth: Secure the lid and pulse the mixture several times to break down the large pieces. Then, blend on high speed until the cauliflower is completely smooth and creamy, scraping down the sides of the bowl as needed. The final texture should be silky and light, resembling traditional mashed potatoes. If you don’t have a food processor, you can use an immersion blender directly in the pot or a traditional potato masher for a more rustic texture.
- Final Touches: Transfer the mashed cauliflower to a serving bowl. Stir in the freshly chopped chives or parsley, reserving a little for garnish. Taste and adjust the seasoning with more salt and pepper if needed. Cover to keep warm while you finish the chicken.
Part 2: Cooking the Herbed Chicken
- Prepare the Chicken: If your chicken breasts are thick, place them between two sheets of parchment paper or in a large zip-top bag and use a meat mallet or rolling pin to pound them to an even thickness of about 1/2 to 3/4 inch. This is the most important step for ensuring the chicken cooks evenly and stays juicy. Pat the chicken breasts completely dry with paper towels; a dry surface is essential for getting a beautiful sear.
- Create the Herb Rub: In a small bowl, combine the dried thyme, dried rosemary, garlic powder, onion powder, paprika, salt, and black pepper. Mix them together thoroughly to create a uniform seasoning blend.
- Season the Chicken: Drizzle the chicken breasts lightly with a small amount of olive oil, then generously sprinkle the herb mixture over all sides of the chicken. Use your hands to rub the seasoning into the meat, ensuring each breast is completely and evenly coated.
- Sear the Chicken: Heat the 2 tablespoons of olive oil in a large skillet or frying pan (cast iron works wonderfully here) over medium-high heat. The oil should shimmer but not smoke. Carefully place the seasoned chicken breasts in the hot pan, making sure not to overcrowd it. If necessary, cook the chicken in two batches.
- Cook to a Golden Brown: Let the chicken cook, undisturbed, for about 5-7 minutes on the first side. Resisting the urge to move the chicken allows it to develop a deep, golden-brown, flavorful crust. Flip the chicken breasts over and cook for another 5-7 minutes on the second side. The exact cooking time will depend on the thickness of your chicken. The chicken is done when it is opaque all the way through and the internal temperature reaches 165°F (74°C) when checked with a meat thermometer.
- Let It Rest: This step is non-negotiable for juicy chicken! Transfer the cooked chicken from the skillet to a clean cutting board or plate. Let the chicken rest for at least 5-10 minutes before slicing. This allows the juices to redistribute throughout the meat, ensuring every bite is moist and tender. If you cut into it immediately, all the delicious juices will run out onto the board.
- Slice and Serve: After resting, slice the chicken against the grain into thick strips or serve the breasts whole.
Nutrition Facts
- Servings: 4
- Calories Per Serving: Approximately 480 kcal
- Protein (38g): An excellent source of high-quality protein from the chicken breast, crucial for muscle repair, immune function, and satiety.
- Net Carbohydrates (9g): By swapping potatoes for cauliflower, this dish is significantly lower in carbohydrates, making it an ideal choice for low-carb, keto, and diabetic-friendly diets.
- Fat (32g): The majority of the fat comes from healthy olive oil and the butter and cream in the mash, providing flavor, energy, and helping with the absorption of fat-soluble vitamins.
Preparation Time
This meal is surprisingly quick to come together, making it perfect for a busy weeknight.
- Preparation Time: 15 minutes (chopping cauliflower, prepping and seasoning chicken).
- Cook Time: 25 minutes (steaming cauliflower and pan-searing chicken simultaneously).
- Total Time: Approximately 40 minutes from start to finish.
How to Serve
Presentation enhances the dining experience, turning a simple meal into something special. Here are a few ways to serve your Herbed Chicken with Garlic Mashed Cauliflower:
- Classic Plating:
- Spoon a generous, fluffy mound of the garlic mashed cauliflower onto the center of each plate.
- Use the back of the spoon to create a small well in the center of the mash.
- Slice the rested chicken breast into 1/2-inch thick slices and fan them out elegantly over the mashed cauliflower.
- Drizzle any resting juices from the cutting board over the chicken for extra flavor.
- Garnishes for a Finishing Touch:
- Sprinkle with the reserved fresh chives or parsley for a pop of green color and fresh flavor.
- A light dusting of extra paprika over the chicken can enhance its color.
- For a touch of elegance, add a single sprig of fresh thyme or rosemary on top.
- A final drizzle of high-quality extra virgin olive oil over the entire dish.
- Complete the Meal with Sides:
- Steamed or Roasted Greens: Serve alongside simple steamed green beans, tender-crisp asparagus, or sautéed spinach with garlic. The vibrant green color provides a beautiful contrast.
- A Simple Salad: A light arugula salad with a lemon vinaigrette can cut through the richness of the dish and add a fresh, peppery note.
- Roasted Vegetables: Roasted broccoli or Brussels sprouts tossed in a little olive oil and salt complement the flavors of the main course perfectly.
Additional Tips
Mastering this recipe is easy, but these eight professional tips will elevate it from great to unforgettable.
- Achieve the Perfect Chicken Sear: The key to a restaurant-quality crust is a very dry chicken breast and a properly heated pan. After patting the chicken dry, consider letting it sit in the fridge, uncovered, for 15-20 minutes. This further dries the surface. Ensure your oil is shimmering before adding the chicken, and don’t move it for the first few minutes of cooking.
- For the Creamiest Mashed Cauliflower: After steaming, let the cauliflower sit in the colander for an extra minute or two to allow any excess moisture to evaporate. For an even more decadent and tangy mash, substitute half of the heavy cream with 2 ounces of softened cream cheese or a quarter cup of full-fat sour cream.
- Experiment with Herb Combinations: While thyme and rosemary are a classic pairing, don’t be afraid to customize. A combination of dried sage, marjoram, and a pinch of oregano can give the chicken a more Mediterranean feel. You can also use fresh herbs; just remember the general rule is to use three times the amount of fresh herbs as dried.
- Meal Prep for Easy Weeknights: This recipe is fantastic for meal prep. Cook the chicken and prepare the mashed cauliflower completely. Portion them into individual airtight containers. They will stay fresh in the refrigerator for up to 4 days, giving you a delicious, healthy lunch or dinner in minutes.
- Proper Storage and Reheating: Store leftover chicken and mashed cauliflower in separate airtight containers in the refrigerator. To reheat, warm the mashed cauliflower gently on the stovetop or in the microwave with a splash of cream or milk to restore its creamy texture. The chicken can be reheated in a skillet over low heat or in the microwave until just warmed through to prevent it from drying out.
- Don’t Be Afraid of Chicken Thighs: For an even juicier and more flavorful result, substitute the chicken breasts with boneless, skinless chicken thighs. They have a higher fat content, which makes them more forgiving and less prone to drying out. You may need to adjust the cooking time slightly, cooking them for 6-8 minutes per side.
- Create a Simple Pan Sauce: After you’ve removed the chicken from the skillet to rest, don’t wash the pan! Those browned bits (the fond) are pure flavor. Deglaze the pan by adding a splash of chicken broth, white wine, or even just water. Scrape up the browned bits with a wooden spoon and let the liquid reduce by half. Whisk in a tablespoon of cold butter off the heat to create a silky, delicious sauce to drizzle over the chicken.
- Avoid Over-Processing the Cauliflower: When using a food processor or blender, blend the cauliflower until it is just smooth and creamy. If you over-blend it, the cell walls can break down too much, releasing excess water and turning your beautiful, fluffy mash into a gummy, watery paste. Pulse first, then blend in short bursts, checking the consistency frequently.
FAQ Section
1. Is this Herbed Chicken with Garlic Mashed Cauliflower recipe keto-friendly?
Absolutely. This recipe was designed to be low in carbohydrates and high in protein and healthy fats, making it perfectly suitable for a ketogenic diet. The main source of carbs, potatoes, is replaced with low-carb cauliflower, and the other ingredients like chicken, olive oil, and butter are all staples of a keto lifestyle.
2. Can I use frozen cauliflower florets instead of a fresh head?
Yes, you can definitely use frozen cauliflower, which can be a great time-saver. You can steam the frozen florets directly from frozen, though they may require a few extra minutes of steaming time. The most important step when using frozen cauliflower is to ensure it is drained extremely well after steaming, as it tends to hold more water than fresh cauliflower.
3. My mashed cauliflower turned out watery. What did I do wrong?
Watery mash is the most common issue and is almost always due to excess moisture. Here are the likely culprits:
- Boiling instead of steaming: Boiling introduces too much water into the cauliflower.
- Not draining properly: After steaming, let the cauliflower sit for a moment to steam-dry.
- Using cold ingredients: Adding cold cream or butter can cause the mixture to separate. Make sure your dairy is warmed through.
- Over-blending: Blending for too long can rupture the cell walls and release water.
4. How can I tell if my chicken is cooked through if I don’t have a meat thermometer?
While a meat thermometer is the most accurate method, you can check for doneness by slicing into the thickest part of the chicken breast. The juices should run clear, not pink, and the meat itself should be opaque and white all the way through with no pink or translucent spots.
5. Can I make this recipe dairy-free?
Yes, it’s easy to adapt. For the mashed cauliflower, use a high-quality dairy-free butter substitute or olive oil in place of the butter. Replace the heavy cream with full-fat canned coconut cream for richness, and for the cheesy flavor, you can use 2-3 tablespoons of nutritional yeast instead of Parmesan cheese.
6. I don’t have chicken breasts. What other cuts of beef or poultry can I use?
This recipe is very versatile. As mentioned in the tips, boneless, skinless chicken thighs are a fantastic alternative. You could also use thinly sliced beef sirloin, cooking it quickly in the pan for a delicious beef and cauliflower mash meal. Turkey cutlets would also work well, following the same preparation as the chicken breasts.
7. Can I grill the chicken instead of pan-searing it?
Grilling is an excellent option that will add a wonderful smoky flavor. Prepare and season the chicken as directed. Preheat your grill to medium-high heat. Grill the chicken for 5-7 minutes per side, or until the internal temperature reaches 165°F (74°C). Let it rest before slicing and serving with the mashed cauliflower.
8. Why does my chicken sometimes turn out dry? How can I prevent it?
Dry chicken is usually the result of three things: uneven thickness, overcooking, or not resting the meat.
- Pound it Out: Always pound the chicken to an even thickness to ensure it cooks at the same rate.
- Don’t Overcook: Use a meat thermometer to pull the chicken off the heat the moment it hits 165°F (74°C). Even a minute or two too long can dry it out.
- Let It Rest: The 5-10 minute resting period is essential. It allows the muscle fibers to relax and reabsorb all the flavorful juices.

Herbed Chicken with Garlic Mashed Cauliflower
Ingredients
For the Herbed Chicken:
- 4 boneless, skinless chicken breasts (about 6 oz each): The lean protein powerhouse of our dish. Pound them to an even thickness for consistent cooking.
- 2 tablespoons olive oil: Used for pan-searing the chicken to achieve a perfect golden-brown crust.
- 1 teaspoon dried thyme: An earthy, slightly minty herb that pairs beautifully with chicken.
- 1 teaspoon dried rosemary: Provides a pine-like, aromatic flavor that infuses the chicken.
- 1 teaspoon garlic powder: For a deep, savory garlic flavor that coats the chicken evenly.
- 1/2 teaspoon onion powder: Adds a subtle, sweet, and savory undertone.
- 1 teaspoon paprika: Lends a beautiful color and a mild, sweet flavor to the chicken crust.
- Salt and black pepper to taste: Essential for seasoning and enhancing all the other flavors.
For the Garlic Mashed Cauliflower:
- 1 large head of cauliflower (about 2.5 lbs): The low-carb star that will transform into a creamy, potato-like mash.
- 4 cloves garlic, minced: The heart of our mash’s flavor, providing a pungent, aromatic kick.
- 4 tablespoons unsalted butter: Adds richness, flavor, and a creamy mouthfeel to the cauliflower.
- 1/4 cup heavy cream or full-fat coconut cream: This is the secret to an ultra-creamy, luxurious texture.
- 2 tablespoons grated Parmesan cheese (optional): For an extra layer of salty, nutty flavor.
- 2 tablespoons chopped fresh chives or parsley: For a fresh, vibrant finish and a pop of color.
- Salt and white pepper to taste: White pepper is used to maintain the pure white color of the mash while adding a gentle heat.
Instructions
This recipe is best approached in two parallel parts: preparing the cauliflower while the chicken is being prepped and cooked. This ensures everything comes together hot and fresh for serving.
Part 1: Preparing the Garlic Mashed Cauliflower
- Prep the Cauliflower: Begin by washing the head of cauliflower thoroughly. Remove the outer leaves and the tough core. Chop the cauliflower florets into uniform, bite-sized pieces. Uniformity is key here, as it ensures all the pieces cook at the same rate, preventing any hard, undercooked bits in your final mash.
- Steam the Cauliflower: Place the chopped cauliflower florets into a steamer basket set over a pot of simmering water. Cover the pot and let the cauliflower steam for about 12-15 minutes. You’ll know it’s ready when a fork can be inserted into a floret with absolutely no resistance—it should be exceptionally tender. Steaming is preferable to boiling as it prevents the cauliflower from becoming waterlogged, which is the number one cause of a runny or watery mash.
- Infuse the Cream with Garlic: While the cauliflower is steaming, melt the 4 tablespoons of unsalted butter in a small saucepan over medium-low heat. Add the 4 cloves of minced garlic and sauté for 1-2 minutes, or until the garlic is fragrant and just beginning to turn golden. Be very careful not to burn the garlic, as it will become bitter. Pour in the 1/4 cup of heavy cream and stir to combine. Let the mixture gently warm through for another minute, allowing the garlic flavor to infuse the butter and cream. Remove from the heat.
- Mash to Perfection: Once the cauliflower is perfectly tender, transfer it from the steamer basket to the bowl of a food processor or a high-powered blender. It’s important to do this while the cauliflower is still hot. Add the warm, garlic-infused butter and cream mixture to the food processor. Add the optional Parmesan cheese, salt, and white pepper.
- Blend Until Smooth: Secure the lid and pulse the mixture several times to break down the large pieces. Then, blend on high speed until the cauliflower is completely smooth and creamy, scraping down the sides of the bowl as needed. The final texture should be silky and light, resembling traditional mashed potatoes. If you don’t have a food processor, you can use an immersion blender directly in the pot or a traditional potato masher for a more rustic texture.
- Final Touches: Transfer the mashed cauliflower to a serving bowl. Stir in the freshly chopped chives or parsley, reserving a little for garnish. Taste and adjust the seasoning with more salt and pepper if needed. Cover to keep warm while you finish the chicken.
Part 2: Cooking the Herbed Chicken
- Prepare the Chicken: If your chicken breasts are thick, place them between two sheets of parchment paper or in a large zip-top bag and use a meat mallet or rolling pin to pound them to an even thickness of about 1/2 to 3/4 inch. This is the most important step for ensuring the chicken cooks evenly and stays juicy. Pat the chicken breasts completely dry with paper towels; a dry surface is essential for getting a beautiful sear.
- Create the Herb Rub: In a small bowl, combine the dried thyme, dried rosemary, garlic powder, onion powder, paprika, salt, and black pepper. Mix them together thoroughly to create a uniform seasoning blend.
- Season the Chicken: Drizzle the chicken breasts lightly with a small amount of olive oil, then generously sprinkle the herb mixture over all sides of the chicken. Use your hands to rub the seasoning into the meat, ensuring each breast is completely and evenly coated.
- Sear the Chicken: Heat the 2 tablespoons of olive oil in a large skillet or frying pan (cast iron works wonderfully here) over medium-high heat. The oil should shimmer but not smoke. Carefully place the seasoned chicken breasts in the hot pan, making sure not to overcrowd it. If necessary, cook the chicken in two batches.
- Cook to a Golden Brown: Let the chicken cook, undisturbed, for about 5-7 minutes on the first side. Resisting the urge to move the chicken allows it to develop a deep, golden-brown, flavorful crust. Flip the chicken breasts over and cook for another 5-7 minutes on the second side. The exact cooking time will depend on the thickness of your chicken. The chicken is done when it is opaque all the way through and the internal temperature reaches 165°F (74°C) when checked with a meat thermometer.
- Let It Rest: This step is non-negotiable for juicy chicken! Transfer the cooked chicken from the skillet to a clean cutting board or plate. Let the chicken rest for at least 5-10 minutes before slicing. This allows the juices to redistribute throughout the meat, ensuring every bite is moist and tender. If you cut into it immediately, all the delicious juices will run out onto the board.
- Slice and Serve: After resting, slice the chicken against the grain into thick strips or serve the breasts whole.
Nutrition
- Serving Size: one normal portion
- Calories: 480
- Fat: 32g
- Carbohydrates: 9g
- Protein: 38g