I’ll be honest, the afternoon snack slump is a real battle in our house. For years, I struggled to find something that was both genuinely healthy and exciting enough to tempt my family away from the usual suspects in the pantry. We needed a champion, a snack that could deliver a satisfying crunch without the guilt. That’s when I stumbled upon the magic of roasting chickpeas. After a few experiments, this Mediterranean-inspired version was born, and it was an instant, resounding success. The aroma of garlic, oregano, and lemon zest filling the kitchen was the first clue I was onto something special. When my kids, who usually turn their noses up at beans, started grabbing them by the handful, calling them “crunchy flavor balls,” I knew I had a winner. Now, these golden, crispy gems are our go-to for everything from movie nights to a protein-packed topping for our salads. They are ridiculously easy to make, endlessly versatile, and have officially ended the great snack debate in our home.
Ingredients
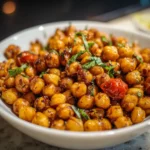
- 2 (15-ounce) cans of chickpeas (garbanzo beans): The star of the show. Using canned chickpeas makes this recipe incredibly fast and convenient.
- 2 tablespoons extra-virgin olive oil: This is essential for achieving that perfect crispy texture and imparting a rich, fruity flavor characteristic of Mediterranean cuisine.
- 1 teaspoon garlic powder: Provides a savory, aromatic depth without the risk of burning that fresh garlic would have in the high heat of the oven.
- 1 teaspoon dried oregano: This quintessential Mediterranean herb adds a peppery, slightly sweet, and earthy flavor.
- ½ teaspoon smoked paprika: Lends a beautiful reddish-gold color and a subtle, smoky complexity that elevates the entire flavor profile.
- ½ teaspoon fine sea salt: Crucial for enhancing all the other flavors and bringing out the natural nuttiness of the chickpeas.
- ¼ teaspoon black pepper: Freshly ground is best, adding a touch of pungent heat to balance the other spices.
- Zest of 1 lemon: Added after roasting, this provides a burst of bright, fresh citrus aroma and flavor that cuts through the richness and makes the chickpeas truly pop.
Instructions
- Preheat and Prepare: Begin by preheating your oven to 400°F (200°C). Line a large, rimmed baking sheet with parchment paper. This prevents sticking and makes cleanup a breeze.
- Rinse and Dry the Chickpeas: This is the most critical step for achieving maximum crispiness. Open the cans of chickpeas and pour them into a colander. Rinse them thoroughly under cold running water until the water runs clear. This removes the starchy liquid (aquafaba) and any “canned” taste.
- The Ultimate Drying Technique: After rinsing, you must dry the chickpeas as much as humanly possible. Moisture is the enemy of a crispy chickpea. Spread the rinsed chickpeas on a clean kitchen towel or a thick layer of paper towels. Gently pat them dry with another towel. For extra-crispy results, you can let them air-dry on the towel for 30-60 minutes. Some people even like to gently rub them to remove the loose skins, but this is optional.
- Initial Roast (The Secret Step): Place the completely dry chickpeas on the prepared baking sheet in a single layer. Do not add any oil or seasonings yet. Roast them plain for 15 minutes. This initial “naked” roast helps to dry out the exterior even further, creating the perfect canvas for a crunchy coating.
- Season the Chickpeas: Carefully remove the baking sheet from the oven. Drizzle the hot chickpeas with the extra-virgin olive oil. Sprinkle over the garlic powder, dried oregano, smoked paprika, sea salt, and black pepper. Use a spatula to toss everything together right on the baking sheet until every chickpea is evenly coated in the oil and spice mixture. Spread them back out into a single, even layer. It’s important not to overcrowd the pan, as this will cause them to steam rather than roast. Use two baking sheets if necessary.
- Final Roast for Crispiness: Return the seasoned chickpeas to the 400°F (200°C) oven. Roast for another 15-20 minutes, or until they are golden brown, firm to the touch, and make a rattling sound when you shake the pan. They will continue to crisp up as they cool.
- Add the Finishing Touch: Remove the chickpeas from the oven. While they are still hot, sprinkle the fresh lemon zest over them. Toss gently one last time to distribute the zest.
- Cool and Serve: Allow the chickpeas to cool on the baking sheet for at least 10-15 minutes before serving. This cooling period is when they achieve their ultimate, addictive crunch. Enjoy them warm or at room temperature.
Nutrition Facts
- Servings: This recipe yields approximately 4 servings.
- Calories per serving: Approximately 220 calories.
- Fiber (7g): An excellent source of dietary fiber, which is crucial for digestive health, promoting feelings of fullness, and helping to regulate blood sugar levels.
- Protein (7g): A fantastic source of plant-based protein, making these chickpeas a satisfying snack that helps with muscle repair and keeps you energized.
- Healthy Fats (9g): The majority of the fat comes from heart-healthy monounsaturated fats in the extra-virgin olive oil, a cornerstone of the beneficial Mediterranean diet.
Preparation time
The total preparation and cooking time for this Mediterranean Roasted Chickpeas recipe is approximately 45-50 minutes. This includes 10 minutes of active prep time for rinsing, drying, and seasoning, and 30-35 minutes of total roasting time in the oven. An optional 30-60 minute air-drying time can be added for even crispier results.
How to Serve
These Mediterranean Roasted Chickpeas are incredibly versatile. They are delicious on their own but can also be used to add flavor, texture, and nutrition to a wide variety of dishes. Here are some of the best ways to serve them:
- As a Healthy, Standalone Snack:
- Portion them into small bags or containers for a perfect on-the-go snack for work, school, or travel.
- Serve them in a bowl as a healthy alternative to chips or nuts during a movie night or when entertaining guests.
- Enjoy a handful post-workout for a satisfying, protein-rich recovery snack.
- As a Crunchy Salad Topper:
- Use them in place of traditional croutons on a Caesar or garden salad for a gluten-free, protein-packed crunch.
- They are the perfect addition to a classic Greek salad with feta, cucumbers, tomatoes, and olives.
- Sprinkle them over a bed of spinach with a lemon-tahini dressing for a simple, nutrient-dense lunch.
- In Nourishing Bowls and Soups:
- Add a generous scoop to a Mediterranean-inspired grain bowl with quinoa, roasted vegetables, hummus, and a drizzle of tahini.
- Sprinkle them over creamy soups like a roasted tomato basil soup or a creamy butternut squash soup just before serving to add a delightful textural contrast.
- Mix them into a couscous or orzo salad with fresh parsley, mint, and chopped bell peppers.
- Tucked into Wraps and Pitas:
- Fill a warm pita pocket with hummus, a handful of roasted chickpeas, and some fresh greens and tomato for a quick and satisfying vegetarian lunch.
- Roll them into a large tortilla wrap with tzatziki sauce, shredded lettuce, and pickled red onions.
- Use them as a protein element in vegetarian tacos, topped with avocado and a squeeze of lime.
The Science and Art of Perfect Roasted Chickpeas
Beyond the simple steps of the recipe lies a bit of food science that, once understood, can guarantee you perfectly crispy chickpeas every single time. It’s a combination of managing moisture and maximizing heat to achieve the coveted Maillard reaction and caramelization, which are responsible for the deep flavor and incredible texture we’re aiming for.
Think of each chickpea as a tiny, starchy sphere full of water. Our goal is to remove as much of that water as possible from the surface and the interior. This is why the rinsing and, more importantly, the extensive drying step is non-negotiable. Any residual surface moisture will turn to steam in the hot oven. Steam is the mortal enemy of crispiness; it will sog your chickpeas before they ever have a chance to roast properly. The initial 15-minute roast without oil is a pro-level trick that essentially dehydrates the exterior of the chickpeas, creating a dry, porous surface.
When you then add the oil and return them to the high heat, magic happens. The oil, now able to cling to the dry surface, acts as a conductor, transferring the oven’s heat efficiently to the chickpeas. This high, dry heat triggers the Maillard reaction, a complex chemical process between amino acids and reducing sugars. It’s the same reaction that gives a seared steak its crust, toast its brown color, and coffee its aroma. It creates hundreds of new flavor compounds, giving our chickpeas that deep, nutty, roasted taste. At the same time, the natural sugars in the chickpeas begin to caramelize, adding notes of sweetness and contributing to the brittle, crunchy texture. Understanding this process transforms you from simply following a recipe to mastering a technique.
Exploring the Health Benefits of a Mediterranean Diet Snack
These roasted chickpeas are more than just a tasty snack; they are a delicious embodiment of the principles of the Mediterranean diet, widely regarded as one of the healthiest eating patterns in the world. This diet emphasizes whole foods, plant-based proteins, healthy fats, and an abundance of herbs and spices over processed ingredients and unhealthy fats.
- Chickpeas (Garbanzo Beans): As a legume, chickpeas are a nutritional powerhouse. They are packed with plant-based protein and dietary fiber. This combination is incredibly effective at promoting satiety, the feeling of fullness and satisfaction after a meal. This can help prevent overeating and support weight management goals. Furthermore, the high fiber content aids in digestion, supports a healthy gut microbiome, and helps stabilize blood sugar levels by slowing the absorption of sugar into the bloodstream.
- Extra-Virgin Olive Oil: This is the signature fat of the Mediterranean region for a reason. It is rich in monounsaturated fats, particularly oleic acid, which has been linked to reduced inflammation and a lower risk of heart disease. Extra-virgin olive oil is also loaded with powerful antioxidants, such as polyphenols and vitamin E, which help protect the body’s cells from damage caused by free radicals.
- Herbs and Spices: The use of garlic powder, oregano, and smoked paprika isn’t just for flavor. It’s a key tenet of the Mediterranean diet to season food generously with herbs and spices rather than relying solely on salt. These spices contain their own unique sets of antioxidants and anti-inflammatory compounds, adding another layer of health benefits to every crunchy bite.
By choosing these roasted chickpeas over a bag of potato chips or pretzels, you’re not just making a smarter snack choice; you’re nourishing your body with high-quality ingredients that support long-term health and well-being.
Additional tips
- Embrace the Air Dryer: For an even faster and arguably crispier result, use an air fryer. Prepare the chickpeas exactly as described (drying is still key!). Cook them at 390°F (195°C) for 12-15 minutes, shaking the basket every 5 minutes to ensure they cook evenly.
- Spice Variation is Key: Don’t be afraid to experiment with the spice blend. Try a smoky BBQ version with chili powder, cumin, and a pinch of brown sugar. Or go for an Indian-inspired blend with curry powder, turmeric, and coriander. A simple ranch seasoning packet also works wonders.
- The Cool-Down is Crucial: For the crispiest possible texture, turn off the oven when they’re done, crack the door open, and let the chickpeas cool down slowly inside the oven for 20-30 minutes. This extra drying time helps them stay crunchy for longer.
- Proper Storage for Lasting Crunch: The best way to store roasted chickpeas is in a loosely covered container or a paper bag at room temperature. Storing them in a completely airtight container can trap residual moisture and cause them to soften. They are best enjoyed within 2-3 days.
- Don’t Add Spices Too Early: Powdery spices like garlic powder can burn and become bitter in high heat. That’s why this recipe calls for a pre-roast before adding the seasonings. Tossing them in oil first also helps the spices adhere better.
- Use High-Quality Oil: The flavor of the olive oil really shines through in this simple recipe. Using a good quality, flavorful extra-virgin olive oil will make a noticeable difference in the final taste compared to a lighter, more processed oil.
- Don’t Skip the Lemon Zest: While optional, the final hit of fresh lemon zest is what truly elevates these chickpeas. It’s added at the end so its volatile oils don’t cook off, providing a bright, aromatic finish that cuts through the savory spices beautifully.
- Batch Cook for the Week: This recipe is easily doubled or tripled. Use multiple baking sheets to ensure the chickpeas are always in a single layer. Having a large batch ready to go makes healthy snacking and meal-prepping for the week incredibly simple.
FAQ section
1. Why are my roasted chickpeas not crispy?
The most common culprit is moisture. If the chickpeas are not dried thoroughly before roasting, they will steam instead of roast, resulting in a soft or chewy texture. The second most common reason is overcrowding the pan. The chickpeas need space for hot air to circulate around them. If they are piled on top of each other, they will steam. Make sure they are in a single, even layer, and use two pans if needed.
2. Can I use dried chickpeas instead of canned?
Absolutely! Using dried chickpeas can result in an even better texture, but it requires more prep time. You will need to soak about 1 cup of dried chickpeas in water overnight. The next day, drain them and cook them in a pot of simmering water for 60-90 minutes, or until tender. Once cooked, drain and dry them thoroughly, then proceed with the recipe as written.
3. How long do these roasted chickpeas stay crispy?
When stored correctly (in a paper bag or a container with the lid slightly ajar at room temperature), they will maintain a good crunch for 2-3 days. They are at their absolute crispiest on the day they are made. If they do soften slightly, you can often revive them by popping them back into a 350°F (175°C) oven or an air fryer for 3-5 minutes.
4. Are these Mediterranean Roasted Chickpeas gluten-free?
Yes, this recipe is naturally gluten-free. All the ingredients—chickpeas, olive oil, and spices—do not contain gluten. It makes them a fantastic and safe snack or salad topper for individuals with celiac disease or gluten sensitivity.
5. Can I make this recipe oil-free?
You can, but you will have to manage your expectations regarding texture. Oil is a key component in achieving that super-crispy, satisfying crunch. To make them oil-free, you can toss the dried chickpeas directly with the spices and roast. They will be dry and slightly crisp, but more “dehydrated” in texture rather than “fried-crisp.” They will still be flavorful but less rich.
6. Can I freeze roasted chickpeas?
It is not recommended to freeze roasted chickpeas. The freezing and thawing process introduces moisture, which will completely ruin their crispy texture, making them soft and mushy. This recipe is quick to make, so it’s best to prepare them fresh when you want to enjoy them.
7. Are roasted chickpeas a good snack for weight loss?
Yes, they can be an excellent snack for weight management. The combination of high protein and high fiber promotes feelings of fullness, which can help reduce overall calorie intake by curbing hunger and preventing mindless snacking on less nutritious foods. They are a much more nutrient-dense option than many processed snacks.
8. What other beans or legumes can I roast using this method?
This roasting method works beautifully with other legumes! Try it with fava beans, edamame (shelled), or even giant white beans (butter beans). You can also use it for lentils, particularly brown or green lentils. Cooking times may vary slightly depending on the size and moisture content of the bean, so keep a close eye on them in the oven.
Mediterranean Roasted Chickpeas Recipe
Ingredients
- 2 (15-ounce) cans of chickpeas (garbanzo beans): The star of the show. Using canned chickpeas makes this recipe incredibly fast and convenient.
- 2 tablespoons extra-virgin olive oil: This is essential for achieving that perfect crispy texture and imparting a rich, fruity flavor characteristic of Mediterranean cuisine.
- 1 teaspoon garlic powder: Provides a savory, aromatic depth without the risk of burning that fresh garlic would have in the high heat of the oven.
- 1 teaspoon dried oregano: This quintessential Mediterranean herb adds a peppery, slightly sweet, and earthy flavor.
- ½ teaspoon smoked paprika: Lends a beautiful reddish-gold color and a subtle, smoky complexity that elevates the entire flavor profile.
- ½ teaspoon fine sea salt: Crucial for enhancing all the other flavors and bringing out the natural nuttiness of the chickpeas.
- ¼ teaspoon black pepper: Freshly ground is best, adding a touch of pungent heat to balance the other spices.
- Zest of 1 lemon: Added after roasting, this provides a burst of bright, fresh citrus aroma and flavor that cuts through the richness and makes the chickpeas truly pop.
Instructions
- Preheat and Prepare: Begin by preheating your oven to 400°F (200°C). Line a large, rimmed baking sheet with parchment paper. This prevents sticking and makes cleanup a breeze.
- Rinse and Dry the Chickpeas: This is the most critical step for achieving maximum crispiness. Open the cans of chickpeas and pour them into a colander. Rinse them thoroughly under cold running water until the water runs clear. This removes the starchy liquid (aquafaba) and any “canned” taste.
- The Ultimate Drying Technique: After rinsing, you must dry the chickpeas as much as humanly possible. Moisture is the enemy of a crispy chickpea. Spread the rinsed chickpeas on a clean kitchen towel or a thick layer of paper towels. Gently pat them dry with another towel. For extra-crispy results, you can let them air-dry on the towel for 30-60 minutes. Some people even like to gently rub them to remove the loose skins, but this is optional.
- Initial Roast (The Secret Step): Place the completely dry chickpeas on the prepared baking sheet in a single layer. Do not add any oil or seasonings yet. Roast them plain for 15 minutes. This initial “naked” roast helps to dry out the exterior even further, creating the perfect canvas for a crunchy coating.
- Season the Chickpeas: Carefully remove the baking sheet from the oven. Drizzle the hot chickpeas with the extra-virgin olive oil. Sprinkle over the garlic powder, dried oregano, smoked paprika, sea salt, and black pepper. Use a spatula to toss everything together right on the baking sheet until every chickpea is evenly coated in the oil and spice mixture. Spread them back out into a single, even layer. It’s important not to overcrowd the pan, as this will cause them to steam rather than roast. Use two baking sheets if necessary.
- Final Roast for Crispiness: Return the seasoned chickpeas to the 400°F (200°C) oven. Roast for another 15-20 minutes, or until they are golden brown, firm to the touch, and make a rattling sound when you shake the pan. They will continue to crisp up as they cool.
- Add the Finishing Touch: Remove the chickpeas from the oven. While they are still hot, sprinkle the fresh lemon zest over them. Toss gently one last time to distribute the zest.
- Cool and Serve: Allow the chickpeas to cool on the baking sheet for at least 10-15 minutes before serving. This cooling period is when they achieve their ultimate, addictive crunch. Enjoy them warm or at room temperature.
Nutrition
- Serving Size: one normal portion
- Calories: 220
- Fat: 9g
- Fiber: 7g
- Protein: 7g
