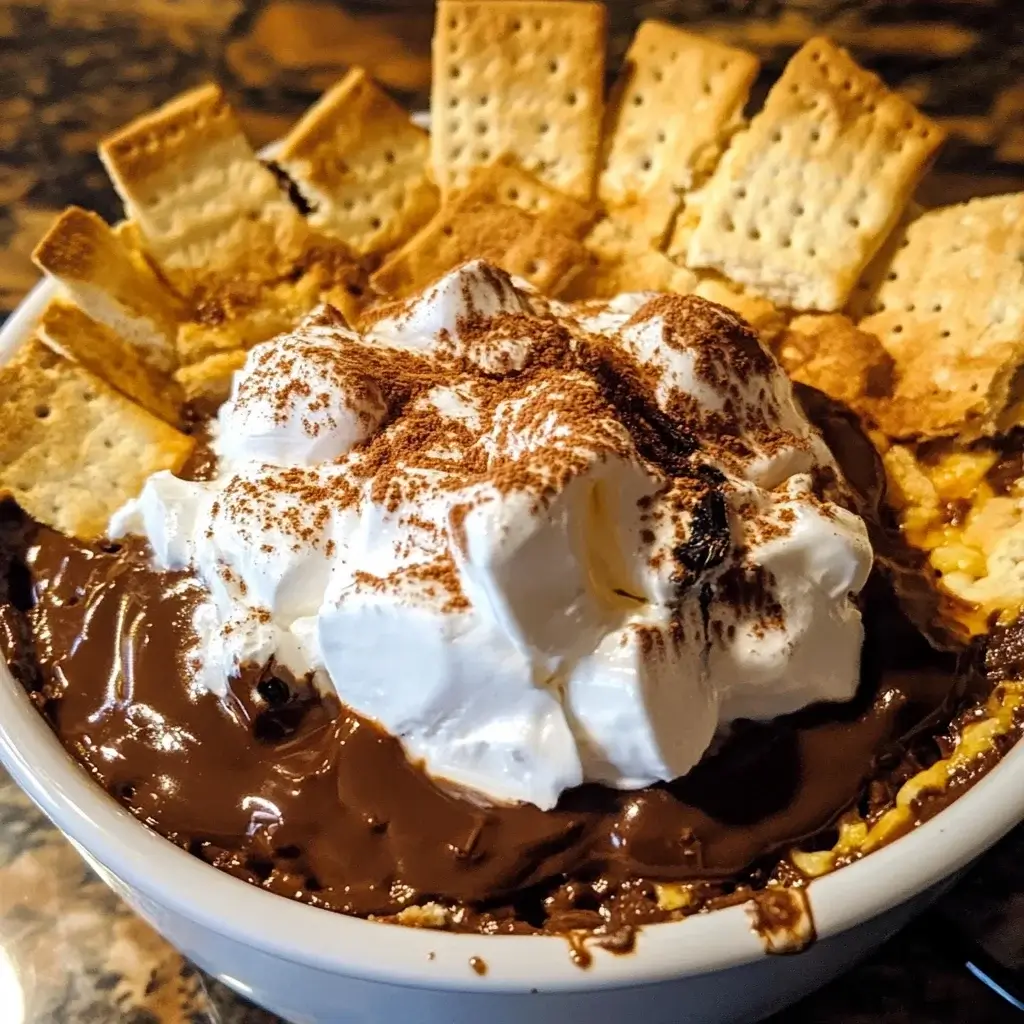
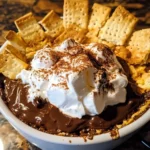
I still remember the first time I whipped up this Microwave S’mores Dip. It was a rainy Tuesday, the kids were restless, and the usual snacks just weren’t cutting it. I’d seen similar ideas floating around but was skeptical about achieving that campfire s’mores magic indoors, let alone in a microwave. But desperation (and a craving for chocolate) is a powerful motivator! I grabbed a bag of chocolate chips, some marshmallows, and a microwave-safe dish. Five minutes later, the kitchen smelled heavenly – a warm blend of toasted sugar and melting chocolate. We gathered around the counter, armed with graham crackers, and dipped in. The verdict? Instant family favorite. The gooey, melted chocolate combined with the lightly “toasted” marshmallow topping was pure comfort food bliss. It wasn’t exactly like a campfire s’more, but it captured the essence – the warmth, the sweetness, the sheer fun of dipping – with unbelievable ease. Since then, it’s become our go-to for movie nights, impromptu sleepovers, and even simple weeknight treats. It’s proof that sometimes the simplest recipes, born out of necessity or whim, become the most cherished. This dip isn’t just food; it’s a shortcut to smiles and sticky fingers, a little pot of happiness made in minutes.
Ingredients
- 1 ½ cups (about 9 oz or 255g) Milk Chocolate Chips: The heart of the dip, providing that classic, sweet, and creamy s’mores chocolate flavor. Good quality chips melt more smoothly.
- 1 ½ cups Mini Marshmallows: These melt more evenly and create a better top layer than large marshmallows in the microwave. They provide the gooey, slightly toasted sweetness characteristic of s’mores.
- (Optional) 1 tablespoon Butter or Heavy Cream: Adding a small amount of fat can help the chocolate melt smoother and stay dippable longer, though it’s not strictly necessary.
- Graham Crackers, Cookies, Fruit, Pretzels: For dipping! The classic choice is graham crackers, but the possibilities are endless.
Instructions
- Prepare the Dish: Choose a microwave-safe dish, approximately 8-9 inches in diameter (a pie plate or shallow casserole dish works well). Ensure it’s clean and completely dry, as water can cause chocolate to seize.
- Layer the Chocolate: Pour the milk chocolate chips evenly into the bottom of the dish. If using butter or heavy cream, drizzle it over the chocolate chips now. This helps create a smoother, richer melt.
- First Microwave Stage (Melting Chocolate): Place the dish in the microwave. Heat on HIGH power for 60 seconds. Carefully remove the dish (it might be hot!). Stir the chocolate chips thoroughly with a silicone spatula or spoon. Even if they don’t look fully melted, stirring helps distribute the heat.
- Second Microwave Stage (Continue Melting): Return the dish to the microwave and heat on HIGH for another 30 seconds. Remove and stir again until the chocolate is smooth and completely melted. If small lumps remain, microwave in additional 15-second bursts, stirring well after each, until perfectly smooth. Be careful not to overheat, as chocolate can burn quickly in the microwave.
- Add the Marshmallows: Once the chocolate is smooth, sprinkle the mini marshmallows evenly over the top, completely covering the chocolate layer.
- Final Microwave Stage (Melting Marshmallows): Return the dish to the microwave. Heat on HIGH for 30-60 seconds. Watch very carefully during this stage. You want the marshmallows to puff up and become soft and gooey. They might slightly brown in spots, mimicking a toasted effect, but avoid letting them burn or deflate completely. The exact time will depend heavily on your microwave’s wattage. Start with 30 seconds and add 10-15 seconds if needed.
- Rest (Optional but Recommended): Let the dip sit for a minute or two after removing it from the microwave. This allows the marshmallows to set slightly and the intense heat to subside, making it safer and easier to dip.
- Serve Immediately: Place the hot dish on a heat-safe surface and serve immediately with your chosen dippers.
Nutrition Facts
(Approximate values based on 8 servings, using milk chocolate chips and no optional butter/cream. Actual values vary based on specific ingredients and serving size.)
- Servings: 8
- Calories per Serving: Approximately 250-300 kcal. Primarily from the sugar and fat in the chocolate and marshmallows, providing quick energy.
- Total Fat: Approximately 12-15g. Mostly from the cocoa butter in the chocolate chips.
- Total Carbohydrates: Approximately 35-40g. The main source of energy, largely coming from sugars in both the chocolate and marshmallows.
- Sugars: Approximately 30-35g. A significant portion of the carbohydrates is sugar, making this a definite sweet treat.
- Protein: Approximately 2-3g. A small amount derived mainly from the milk solids in the chocolate.
Disclaimer: These are estimates. For precise nutritional information, calculate based on the specific brands and quantities of ingredients used.
Preparation Time
- Total Time: Approximately 5-7 minutes. This includes about 2 minutes of preparation (gathering ingredients, layering) and 3-5 minutes of microwave cooking time, depending on your microwave’s power and the number of heating intervals needed. It’s exceptionally fast, making it perfect for last-minute cravings or quick entertaining.
How to Serve
Serving this Microwave S’mores Dip is all about embracing the gooey fun! Here’s how to make the most of it:
- The Vessel:
- Serve the dip directly in the microwave-safe dish it was cooked in (ensure it’s presentable, like a glass pie plate or a ceramic dish).
- Place the hot dish on a trivet or heat-resistant mat to protect your table surface.
- Warn guests that the dish and dip are hot!
- Classic Dippers:
- Graham Crackers: The quintessential s’mores partner. Offer squares or sticks for easy dipping. Honey, cinnamon, or chocolate graham crackers all work well.
- Cookies: Shortbread cookies, vanilla wafers, digestive biscuits, or even chocolate chip cookies (for the ultimate indulgence) are fantastic alternatives. Choose sturdy ones that won’t break easily.
- Creative Dippers:
- Fruit: Strawberries, banana slices, apple wedges, or pineapple chunks offer a refreshing contrast to the sweetness.
- Salty Snacks: Pretzels (rods, twists, or crisps) provide a delicious sweet-and-salty combination. Potato chips (especially sturdy, ridged ones) are another surprisingly good salty option.
- Other Treats: Cubes of pound cake or angel food cake, crispy rice treats cut into squares, or even churro bites work wonderfully.
- Presentation:
- Arrange a variety of dippers attractively on a platter surrounding the central bowl of dip.
- Consider a slight sprinkle of sea salt over the top just before serving to enhance the chocolate flavor.
- A tiny drizzle of caramel or a sprinkle of extra mini chocolate chips over the marshmallows after cooking can add visual appeal.
- Keeping it Warm (for Parties):
- This dip is best served immediately as the chocolate and marshmallows will start to set as they cool.
- For longer events, you could try placing the dish on a warming tray set to low, but be cautious as this can sometimes make the chocolate too runny or cause the marshmallows to deflate sadly. Reheating briefly in the microwave (15-20 seconds) is often a better option if it cools too much.
Additional Tips
- Chocolate Choices Matter: While milk chocolate chips are classic, feel free to experiment! Semi-sweet chips offer a less sweet, richer chocolate flavor. Dark chocolate provides an intense, slightly bitter contrast. White chocolate chips work too, but melt differently and can be sweeter. A mix (like half milk, half semi-sweet) is also delicious. High-quality chocolate chips generally melt smoother. Avoid using candy melts unless specifically desired, as their flavor and texture are different.
- Marshmallow Management: Mini marshmallows are strongly recommended because they cover the surface area evenly and melt/puff more uniformly in the microwave’s quick cooking time. If you only have large marshmallows, you can snip them into smaller pieces with kitchen shears (lightly grease the shears to prevent sticking) or try arranging them cut-side down, knowing the melting might be less even.
- Avoid Overheating the Chocolate: This is crucial! Chocolate scorches easily in the microwave. Stick to short bursts (60 seconds initially, then 15-30 seconds) and stir thoroughly between each interval, even if it doesn’t look fully melted. The residual heat will continue melting the chips as you stir. If chocolate seizes (becomes thick, grainy, and dull), you’ve likely overheated it or introduced moisture.
- Watch Marshmallows Like a Hawk: The final microwaving stage for the marshmallows is very fast. They will puff dramatically. A few seconds too long and they can start to burn from the center or deflate into a sticky mess. Watch through the microwave door and stop as soon as they are nicely puffed and soft. A little browning is okay, but aim for puffy and gooey.
- Dish Size and Material: A shallow, wider dish (like a pie plate) promotes more even heating and provides a larger surface area for dipping compared to a deeper, narrower bowl. Glass or ceramic dishes tend to heat evenly. Avoid metal in the microwave!
- Stirring is Key: Don’t skip the stirring steps for the chocolate. Microwaves heat unevenly, and stirring distributes the heat, prevents hot spots, and ensures a smooth, homogenous melt. Use a silicone spatula or wooden spoon.
- Flavor Enhancements: Get creative! Stir a tablespoon or two of peanut butter, Nutella, or Biscoff spread into the chocolate after it’s melted but before adding the marshmallows. A dash of cinnamon or a pinch of chili powder in the chocolate can add warmth. A swirl of caramel sauce on top after cooking is also divine.
- Scaling the Recipe: This recipe is easily halved or doubled. If halving, use a smaller microwave-safe dish and reduce microwave times slightly. If doubling, use a larger dish (like a 9×13 inch baking dish, microwave-safe of course!) and increase microwave times, remembering to stir frequently and watch carefully, especially during the marshmallow stage. Ensure the chocolate layer isn’t too thick, or it won’t melt evenly.
FAQ Section
1. Can I use chocolate bars instead of chocolate chips?
Yes, you absolutely can! Just make sure to chop the chocolate bars into small, relatively uniform pieces (similar in size to chocolate chips). This helps them melt evenly and at a similar rate to chips. Use the same weight equivalent (around 9 oz or 255g for this recipe). The type of chocolate bar (milk, dark, semi-sweet) will affect the flavor just like chips do.
2. How can I make this Microwave S’mores Dip vegan?
Easily! Use dairy-free chocolate chips (many brands offer vegan semi-sweet or dark chocolate chips). For marshmallows, look for specifically vegan marshmallows (traditional ones contain gelatin). Dandies is a popular brand. Ensure any optional additions (like butter) are replaced with a vegan alternative (like vegan butter or a bit of coconut oil). Double-check your dippers (graham crackers sometimes contain honey or dairy) to ensure they are vegan as well.
3. Why did my chocolate become thick and grainy (seize)?
Chocolate seizing is usually caused by one of two things: overheating or contact with water. Microwaves can create intense hot spots, so cooking in short bursts and stirring frequently is vital. Even a tiny drop of water (from a wet spoon or condensation) can cause the chocolate particles to clump together. Ensure your bowl and utensils are perfectly dry. If it seizes slightly, sometimes stirring in a tiny bit more fat (like vegetable oil or coconut oil, about 1 tsp at a time) can sometimes smooth it out, but severe seizing is hard to reverse.
4. Can I make this S’mores Dip in the oven instead of the microwave?
Yes, S’mores Dip is often made in the oven, which provides a more genuinely “toasted” marshmallow topping. To adapt: Preheat your oven to 350°F (175°C). Place the chocolate chips (and optional butter/cream) in an oven-safe skillet or dish. Bake for 3-5 minutes, or until the chips are melty. Remove, stir until smooth. Top with marshmallows and return to the oven for another 5-8 minutes, or until the marshmallows are puffed and golden brown (watch carefully!). Oven-baked often yields a slightly better texture but takes longer.
5. How long does Microwave S’mores Dip stay good? Can I make it ahead?
This dip is definitely best served fresh and warm, right out of the microwave. As it cools, the chocolate will firm up, and the marshmallows will lose their puffiness. You can technically store leftovers covered at room temperature for a day or so (or longer in the fridge), but the texture changes significantly. Reheating in the microwave in short bursts (15-20 seconds), stirring gently, can revive it somewhat, but it won’t be quite the same as freshly made. It’s not ideal for making far ahead; its beauty lies in its speed and immediacy.
6. I only have large marshmallows. Will they work?
They can work, but mini marshmallows are superior for this microwave method. Large marshmallows don’t cover the surface as easily and tend to puff unevenly or develop tough spots in the microwave. If using large ones, try cutting them in half horizontally with lightly greased kitchen shears and arranging them cut-side down over the chocolate. You might need to adjust the final microwaving time and watch very closely. The texture might be slightly different than with minis.
7. What’s the best type of dish to use for Microwave S’mores Dip?
A shallow, round, microwave-safe glass pie plate (around 8-9 inches) is often considered ideal. Glass heats evenly and allows you to see the melting process. Ceramic dishes also work well. The shallow shape provides a good surface area for the marshmallows and makes dipping easier than a deep bowl. Avoid plastic unless it’s specifically rated for high heat and microwave cooking, as the hot sugar can sometimes damage or warp lesser plastics. And absolutely no metal!
8. Can I add other toppings like nuts or sprinkles?
Yes! You can add toppings either mixed into the chocolate or sprinkled on top after cooking.
- In the Chocolate: Stir in chopped nuts (like pecans or walnuts), shredded coconut, or even a swirl of peanut butter after the chocolate is melted but before adding the marshmallows.
- On Top: Sprinkle chopped nuts, sprinkles, mini M&Ms, crushed graham crackers, a drizzle of caramel or chocolate sauce, or a pinch of flaky sea salt over the puffed marshmallows immediately after taking the dip out of the microwave, just before serving. This adds extra flavor, texture, and visual appeal.
Microwave S’mores Dip
Ingredients
- 1 ½ cups (about 9 oz or 255g) Milk Chocolate Chips: The heart of the dip, providing that classic, sweet, and creamy s’mores chocolate flavor. Good quality chips melt more smoothly.
- 1 ½ cups Mini Marshmallows: These melt more evenly and create a better top layer than large marshmallows in the microwave. They provide the gooey, slightly toasted sweetness characteristic of s’mores.
- (Optional) 1 tablespoon Butter or Heavy Cream: Adding a small amount of fat can help the chocolate melt smoother and stay dippable longer, though it’s not strictly necessary.
- Graham Crackers, Cookies, Fruit, Pretzels: For dipping! The classic choice is graham crackers, but the possibilities are endless.
Instructions
- Prepare the Dish: Choose a microwave-safe dish, approximately 8-9 inches in diameter (a pie plate or shallow casserole dish works well). Ensure it’s clean and completely dry, as water can cause chocolate to seize.
- Layer the Chocolate: Pour the milk chocolate chips evenly into the bottom of the dish. If using butter or heavy cream, drizzle it over the chocolate chips now. This helps create a smoother, richer melt.
- First Microwave Stage (Melting Chocolate): Place the dish in the microwave. Heat on HIGH power for 60 seconds. Carefully remove the dish (it might be hot!). Stir the chocolate chips thoroughly with a silicone spatula or spoon. Even if they don’t look fully melted, stirring helps distribute the heat.
- Second Microwave Stage (Continue Melting): Return the dish to the microwave and heat on HIGH for another 30 seconds. Remove and stir again until the chocolate is smooth and completely melted. If small lumps remain, microwave in additional 15-second bursts, stirring well after each, until perfectly smooth. Be careful not to overheat, as chocolate can burn quickly in the microwave.
- Add the Marshmallows: Once the chocolate is smooth, sprinkle the mini marshmallows evenly over the top, completely covering the chocolate layer.
- Final Microwave Stage (Melting Marshmallows): Return the dish to the microwave. Heat on HIGH for 30-60 seconds. Watch very carefully during this stage. You want the marshmallows to puff up and become soft and gooey. They might slightly brown in spots, mimicking a toasted effect, but avoid letting them burn or deflate completely. The exact time will depend heavily on your microwave’s wattage. Start with 30 seconds and add 10-15 seconds if needed.
- Rest (Optional but Recommended): Let the dip sit for a minute or two after removing it from the microwave. This allows the marshmallows to set slightly and the intense heat to subside, making it safer and easier to dip.
- Serve Immediately: Place the hot dish on a heat-safe surface and serve immediately with your chosen dippers.
Nutrition
- Serving Size: one normal portion
- Calories: 300
- Sugar: 35g
- Fat: 15g
- Carbohydrates: 40g
- Protein: 3g