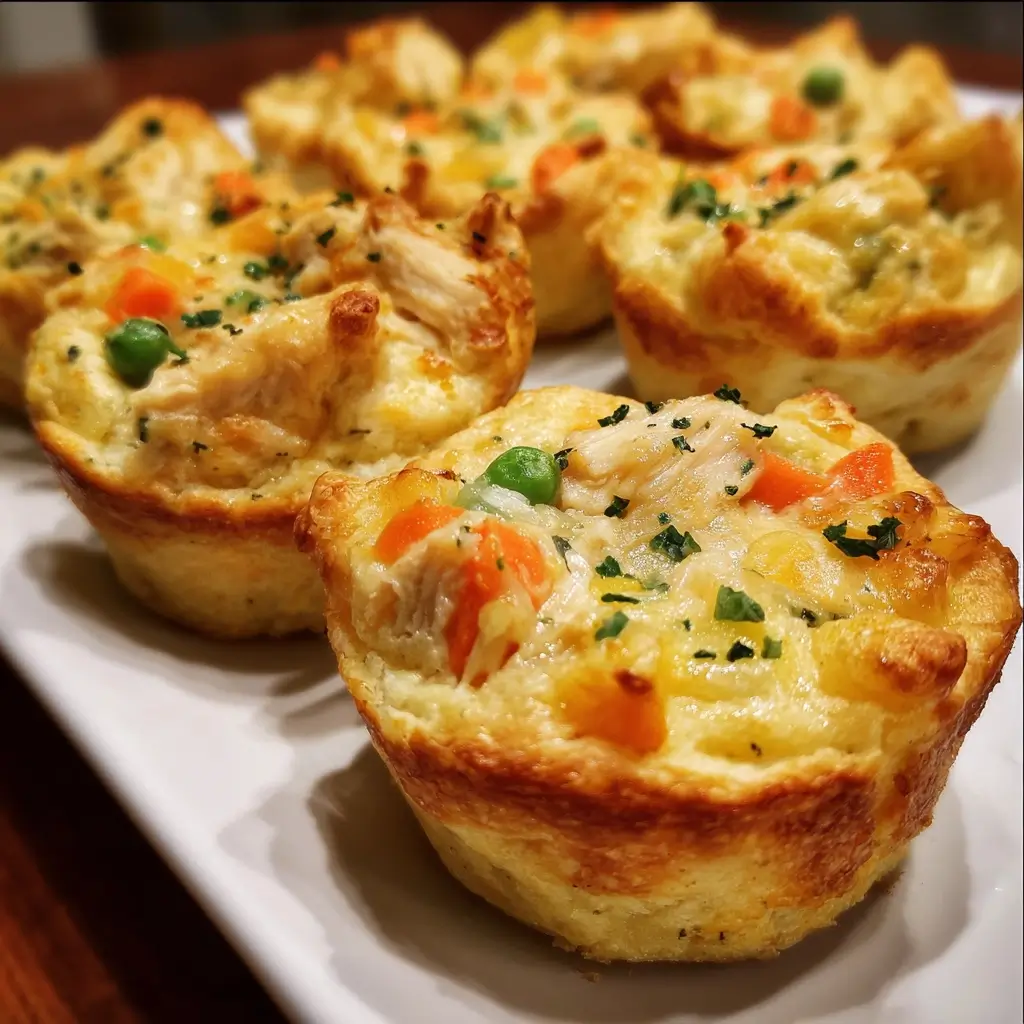
Of all the recipes that have graced my family’s dinner table, few have been met with the universal, wide-eyed delight as these Mini Chicken Pot Pie Muffins. I still remember the first time I made them. It was one of those hectic Tuesday evenings where the thought of cooking a complex meal felt like climbing a mountain. I had some leftover chicken, a handful of vegetables, and a roll of pie crust that was nearing its expiration date. I had seen similar ideas floating around, but the classic chicken pot pie, while a champion of comfort food, always felt a bit too cumbersome for a weeknight. The idea of individual, handheld portions was a spark of genius. I got to work, skeptical but hopeful. The aroma that began to fill the kitchen was the first sign of success—that unmistakable, heartwarming scent of buttery crust and savory, creamy filling. When I pulled the muffin tin from the oven, revealing twelve perfectly golden, bubbling little domes, I knew I was onto something special. My kids, usually picky about mixed vegetables, devoured them without a second thought, their little hands perfectly suited to holding the muffin-sized pies. My husband, a connoisseur of classic comfort food, declared them a “top-tier innovation.” They were everything we loved about the original—the flaky crust, the rich, creamy chicken and vegetable filling—but without the need for plates and forks, and with a fun, novel twist. They’ve since become a staple in our home, serving as a quick dinner, a packed lunchbox hero, and even a crowd-pleasing appetizer for gatherings. This recipe isn’t just about food; it’s about creating a moment of simple, shared joy, one delicious, handheld bite at a time.
Ingredients
Here is the simple list of wholesome ingredients you will need to create these delightful mini pot pies. Each component is chosen specifically to build layers of classic, comforting flavor and the perfect texture.
- Unsalted Butter (3 tablespoons): This is the foundation of our creamy sauce, or “roux.” Using unsalted butter allows you to control the final sodium content of the dish perfectly.
- Yellow Onion (1 small, finely diced): The onion provides a sweet, aromatic base flavor that is essential for any good pot pie. Dicing it finely ensures it melts into the sauce beautifully.
- All-Purpose Flour (¼ cup): This is our thickening agent. When toasted in the butter with the onions, it loses its raw taste and works to transform the chicken broth and cream into a luscious, velvety sauce that clings to the chicken and vegetables.
- Chicken Broth (1 cup): This injects a deep, savory chicken flavor into the very heart of the filling. Opt for a low-sodium version if you are mindful of salt intake.
- Heavy Cream (½ cup): This is the secret to an extra rich and decadent filling. It adds a luxurious silkiness that milk alone cannot replicate, making each bite feel indulgent.
- Shredded or Diced Cooked Chicken (2 cups): This is the star of the show. Using pre-cooked chicken, such as from a rotisserie chicken or leftovers from a roast, makes this recipe incredibly fast and convenient.
- Frozen Mixed Vegetables (1 ½ cups, thawed): A classic blend of peas, carrots, corn, and green beans is perfect here. Using frozen vegetables is a major time-saver, and they retain their color and texture beautifully when baked.
- Dried Thyme (½ teaspoon): This herb is a classic pairing with chicken. Its earthy, slightly minty notes cut through the richness of the cream and complement the vegetables perfectly.
- Salt and Black Pepper (to taste): Essential for seasoning. Be sure to taste the filling before you assemble the pies to adjust the seasoning to your preference.
- Refrigerated Pie Crusts (1 box, containing 2 crusts): For convenience and a consistently flaky result, refrigerated pie crusts are a fantastic shortcut. They are easy to work with and bake up golden and delicious.
- Egg (1 large, beaten with 1 tablespoon of water): This creates an egg wash. Brushing it on top of the pies before baking is the key to achieving that beautiful, glossy, deep golden-brown finish you see in a professional bakery.
Instructions
Follow these detailed steps to ensure your Mini Chicken Pot Pie Muffins turn out perfectly every single time. We will first create the rich filling and then assemble our individual pies for baking.
- Prepare the Oven and Muffin Tin: Begin by preheating your oven to 400°F (200°C). This is a crucial first step, as a hot oven ensures the pie crust starts baking immediately, preventing a soggy bottom. Generously grease a standard 12-cup muffin tin with non-stick cooking spray or by wiping it with butter. This will guarantee your mini pies release easily after baking.
- Sauté the Aromatics: In a large skillet or saucepan, melt the 3 tablespoons of unsalted butter over medium heat. Once the butter is melted and begins to shimmer, add the finely diced yellow onion. Sauté the onion, stirring occasionally, for about 3-4 minutes. You are looking for the onion to become soft, translucent, and fragrant, but not browned. This process sweetens the onion and builds the first layer of flavor for our filling.
- Create the Roux and Sauce Base: Sprinkle the ¼ cup of all-purpose flour over the softened onions in the skillet. Stir continuously for about one minute until the flour is fully incorporated with the butter and onion. This step, known as making a roux, is essential for thickening the sauce. Toasting the flour for a minute cooks out any raw, pasty flavor.
- Build the Creamy Sauce: While stirring or whisking constantly to prevent lumps, slowly pour in the 1 cup of chicken broth. The mixture will begin to thicken almost immediately. Once the broth is incorporated, slowly whisk in the ½ cup of heavy cream. Continue to cook, stirring frequently, until the sauce is smooth, bubbly, and has thickened enough to coat the back of a spoon. This should take about 3-5 minutes.
- Combine the Filling Ingredients: Turn the heat down to low. To the thickened sauce, add the 2 cups of cooked chicken, the 1 ½ cups of thawed mixed vegetables, the ½ teaspoon of dried thyme, and a generous pinch of salt and black pepper. Stir everything together until the chicken and vegetables are evenly coated in the creamy sauce. Let it simmer gently for another minute for the flavors to meld. Remove the skillet from the heat and set it aside to cool slightly while you prepare the crusts.
- Prepare the Pie Crusts: Unroll the two refrigerated pie crusts onto a lightly floured surface to prevent sticking. Using a 4-inch round cookie cutter or the rim of a wide-mouthed glass, cut out 12 circles from the dough. You may need to gently re-roll the scraps to get all 12 circles.
- Assemble the Mini Pies: Carefully press each of the 12 dough circles into the cups of your prepared muffin tin. Gently guide the dough down to line the bottom and up the sides of each cup, creating a small pie shell. A small tart tamper or the back of a spoon can be helpful here.
- Fill the Pies: Spoon the slightly cooled chicken pot pie filling evenly into each of the 12 pie crust shells. Be careful not to overfill them; fill them just to the top of the crust’s edge. Overfilling can cause the filling to bubble over and make a mess in your oven.
- Add the Top Crust (Optional but Recommended): If you want a full “lid” on your pot pies, you can use the dough scraps to cut out smaller, 1.5 to 2-inch circles or decorative shapes (like leaves or stars) to place on top of the filling. Alternatively, you can leave them open-faced for a rustic look.
- Apply the Egg Wash: In a small bowl, whisk together the large egg and 1 tablespoon of water to create an egg wash. Using a pastry brush, lightly brush the tops of the exposed crust edges (and the top crusts, if you added them). This step is the secret to a shiny, beautifully golden-brown finish.
- Bake to Perfection: Place the muffin tin on a baking sheet to catch any potential drips. Bake in the preheated 400°F (200°C) oven for 20-25 minutes. The pies are done when the filling is hot and bubbly and the crust is a deep golden brown.
- Rest and Serve: Remove the muffin tin from the oven and let the mini pot pies rest in the tin for at least 5-10 minutes. This is a critical step that allows the filling to set up slightly and the pies to firm up, making them much easier to remove without falling apart. Carefully run a thin knife around the edge of each muffin to loosen, then gently lift them out. Serve warm and enjoy!
Nutrition Facts
Please note that these values are an approximation and can vary based on the specific ingredients used. The following is based on a serving size of one mini pot pie muffin.
- Calories (per serving): Approx. 260 kcal. A perfectly portion-controlled serving of classic comfort food, making it a satisfying yet reasonable choice for a meal.
- Protein: Approx. 12g. The chicken provides a substantial amount of protein, which is essential for building and repairing tissues and helps keep you feeling full and satisfied longer.
- Carbohydrates: Approx. 20g. Primarily from the flaky pie crust and the medley of vegetables, providing the necessary energy to power you through your day.
- Fat: Approx. 15g. Sourced from the butter, heavy cream, and pie crust, this fat content is what gives the pot pies their rich flavor and satisfying, melt-in-your-mouth quality.
- Fiber: Approx. 2g. The vegetables contribute dietary fiber, which is important for digestive health and contributes to the feeling of fullness.
Preparation Time
This recipe is designed to be efficient, especially when using pre-cooked chicken and refrigerated pie crusts, making it an ideal choice for a busy weeknight.
- Active Preparation Time: 20 minutes. This includes dicing the onion, preparing the creamy filling on the stovetop, and assembling the mini pies in the muffin tin.
- Baking Time: 20-25 minutes. This is the hands-off time where the oven does all the work, transforming your assembled pies into golden, bubbling delights.
- Total Time: Approximately 45 minutes. From start to finish, you can have these incredible Mini Chicken Pot Pie Muffins on the table in under an hour.
How to Serve
These versatile little pies can be served in a variety of ways, fitting seamlessly into different meal plans and occasions. Here are a few popular serving suggestions:
- As a Complete Weeknight Meal:
- Serve two to three mini pot pies per person as the main course.
- Pair them with a simple side salad with a light vinaigrette. The freshness of the salad beautifully balances the richness of the pies.
- Alternatively, serve alongside a cup of light soup, like a clear tomato or vegetable broth, for a classic “soup and pie” combination.
- For Lunchboxes (Kid and Adult Approved):
- Allow the muffins to cool completely before packing. They are delicious even at room temperature.
- Pack one or two in a lunch container alongside some fresh fruit, yogurt, or a handful of pretzels for a well-rounded and exciting midday meal.
- They hold their shape perfectly, eliminating the mess of a traditional pot pie slice.
- As a Party Appetizer or Finger Food:
- Arrange the warm mini pot pies on a large platter for guests to easily grab.
- Their individual, handheld nature makes them perfect for mingling at parties, baby showers, or game day events.
- Consider serving them with a dipping sauce on the side, such as a creamy ranch dip, a garlic aioli, or even a dollop of cranberry sauce for a festive touch.
- With a Comforting Garnish:
- For an elevated presentation, garnish each mini pie right before serving.
- A sprinkle of fresh chopped parsley or chives adds a pop of color and fresh flavor.
- A small dollop of sour cream or crème fraîche on top can add a pleasant, tangy contrast to the rich filling.
Additional Tips
To elevate your Mini Chicken Pot Pie Muffins from great to absolutely unforgettable, keep these eight expert tips in mind.
- Don’t Skip Cooling the Filling: While it’s tempting to spoon the hot filling directly into the crusts, letting it cool for 5-10 minutes first is a crucial pro tip. A piping hot filling can start to melt the raw pie dough, leading to a weaker, potentially soggy bottom crust. A slightly cooled filling is much easier to work with and helps maintain the integrity of the pastry.
- The Secret to Flaky Bottoms: The biggest enemy of any pie is a soggy bottom. Besides preheating your oven properly, ensure you are using a metal muffin tin, not silicone. Metal conducts heat more effectively and efficiently, ensuring the bottom crust gets crisp and golden brown right along with the top.
- Embrace Veggie Variations: Don’t feel locked into the classic pea and carrot mix. This recipe is a fantastic way to use up whatever vegetables you have on hand. Try adding finely chopped mushrooms, celery, potatoes (dice them very small and pre-cook them), or even some pearl onions. It’s a great way to customize the flavor and boost the nutritional value.
- Shortcut with Rotisserie Chicken: The single best time-saving hack for this recipe is using a store-bought rotisserie chicken. It’s already cooked, seasoned, and tender. Simply pull the meat from the bones and shred or dice it. You’ll need about two cups, which is roughly the amount of meat from half of a standard rotisserie chicken.
- Don’t Overwork the Pie Dough: When you are re-rolling the scraps of pie dough to get your final circles, handle the dough as little as possible. Overworking pastry develops the gluten, which can make your baked crust tough and dense instead of light and flaky.
- Let Them Rest Before Removing: This tip is worth repeating because it’s so important. After pulling the tin from the oven, you must let the mini pies rest for at least 5, and preferably 10, minutes. This allows the molten-hot filling to cool and set slightly. If you try to remove them immediately, they are much more likely to fall apart. Patience is key to a perfect presentation.
- Spice It Up Your Way: Dried thyme is a classic, but feel free to experiment with other herbs and spices. A pinch of rosemary, sage, or a poultry seasoning blend would be delicious. For a little kick, add a dash of cayenne pepper or a sprinkle of red pepper flakes into the sauce.
- Batch Cook and Freeze for Later: These muffins freeze beautifully. Make a double batch and let the baked muffins cool completely. Place them on a baking sheet and freeze until solid, then transfer them to a freezer-safe zip-top bag or container. They can be stored for up to 3 months. To reheat, simply bake them from frozen in a 350°F (175°C) oven for 15-20 minutes, or until warmed through.
FAQ Section
Here are answers to some of the most frequently asked questions about making Mini Chicken Pot Pie Muffins.
1. Can I make these ahead of time?
Yes, absolutely! You have two great options. You can fully bake the muffins, let them cool completely, and store them in an airtight container in the refrigerator for up to 3 days. Reheat in the oven or air fryer for best results. Alternatively, you can assemble the unbaked muffins in the tin, cover them tightly with plastic wrap, and refrigerate for up to 24 hours before baking. You may need to add a few extra minutes to the baking time if baking from cold.
2. How do I store and reheat leftovers?
Store any leftover mini pot pies in an airtight container in the refrigerator for up to 3 days. The best way to reheat them to maintain a crisp crust is in an oven or toaster oven at 350°F (175°C) for about 10-15 minutes, or until heated through. An air fryer also works wonderfully for about 5-7 minutes. While you can use a microwave, be aware that it will soften the crust.
3. Can I use puff pastry instead of pie crust?
Yes, you can, and it creates a wonderfully light and airy version! Puff pastry will be much more delicate and will puff up significantly. Follow the same instructions for cutting and lining the muffin tin, but be aware you may not get as neat of a “cup” shape. The baking time might also be slightly shorter, so keep an eye on them—they are done when they are puffed and deeply golden.
4. My filling seems too runny. What did I do wrong?
A runny filling is usually due to one of two things. First, you may not have cooked the roux (the flour and butter mixture) and the subsequent sauce long enough for it to properly thicken. It should be thick enough to coat a spoon. Second, if you used frozen vegetables and didn’t thaw and drain them well, they could have released excess water into your sauce, thinning it out. To fix a runny sauce, you can let it simmer on the stove for a few extra minutes to reduce and thicken.
5. Can I make this recipe vegetarian?
Definitely! To make a vegetarian version, simply omit the chicken and replace the chicken broth with a good quality vegetable broth. To make the filling more substantial, you can increase the amount of vegetables or add other ingredients like sautéed mushrooms, chickpeas, or small cubes of firm tofu. It will be just as comforting and delicious.
6. Can I use a different kind of meat?
Yes, this recipe is incredibly adaptable. It’s a fantastic way to use up leftovers. Try using diced leftover holiday turkey for a classic alternative. Leftover pot roast, shredded beef, or even diced ham also work wonderfully. Just substitute it 1:1 for the chicken and enjoy a new flavor profile.
7. What is the best type of muffin pan to use?
For this recipe, a standard-sized, light-colored metal muffin pan is the ideal choice. Metal conducts heat very efficiently, which helps the bottom and sides of the pie crust to become crisp and golden. Darker pans can sometimes cause the crust to brown too quickly. While you can use a silicone pan, you may find the bottom crust doesn’t get as crisp.
8. Can I make one large pot pie with this recipe instead?
Yes, this recipe can easily be converted back into a traditional 9-inch pot pie. Simply prepare the filling as directed. Place one of the pie crusts in the bottom of a 9-inch pie dish. Pour the filling in. Top with the second pie crust, crimp the edges to seal, and cut a few slits in the top to allow steam to escape. Brush with the egg wash and bake at 400°F (200°C) for 30-40 minutes, or until the crust is golden and the filling is bubbly.

Mini Chicken Pot Pie Muffins
Ingredients
Here is the simple list of wholesome ingredients you will need to create these delightful mini pot pies. Each component is chosen specifically to build layers of classic, comforting flavor and the perfect texture.
- Unsalted Butter (3 tablespoons): This is the foundation of our creamy sauce, or “roux.” Using unsalted butter allows you to control the final sodium content of the dish perfectly.
- Yellow Onion (1 small, finely diced): The onion provides a sweet, aromatic base flavor that is essential for any good pot pie. Dicing it finely ensures it melts into the sauce beautifully.
- All-Purpose Flour (¼ cup): This is our thickening agent. When toasted in the butter with the onions, it loses its raw taste and works to transform the chicken broth and cream into a luscious, velvety sauce that clings to the chicken and vegetables.
- Chicken Broth (1 cup): This injects a deep, savory chicken flavor into the very heart of the filling. Opt for a low-sodium version if you are mindful of salt intake.
- Heavy Cream (½ cup): This is the secret to an extra rich and decadent filling. It adds a luxurious silkiness that milk alone cannot replicate, making each bite feel indulgent.
- Shredded or Diced Cooked Chicken (2 cups): This is the star of the show. Using pre-cooked chicken, such as from a rotisserie chicken or leftovers from a roast, makes this recipe incredibly fast and convenient.
- Frozen Mixed Vegetables (1 ½ cups, thawed): A classic blend of peas, carrots, corn, and green beans is perfect here. Using frozen vegetables is a major time-saver, and they retain their color and texture beautifully when baked.
- Dried Thyme (½ teaspoon): This herb is a classic pairing with chicken. Its earthy, slightly minty notes cut through the richness of the cream and complement the vegetables perfectly.
- Salt and Black Pepper (to taste): Essential for seasoning. Be sure to taste the filling before you assemble the pies to adjust the seasoning to your preference.
- Refrigerated Pie Crusts (1 box, containing 2 crusts): For convenience and a consistently flaky result, refrigerated pie crusts are a fantastic shortcut. They are easy to work with and bake up golden and delicious.
- Egg (1 large, beaten with 1 tablespoon of water): This creates an egg wash. Brushing it on top of the pies before baking is the key to achieving that beautiful, glossy, deep golden-brown finish you see in a professional bakery.
Instructions
Follow these detailed steps to ensure your Mini Chicken Pot Pie Muffins turn out perfectly every single time. We will first create the rich filling and then assemble our individual pies for baking.
- Prepare the Oven and Muffin Tin: Begin by preheating your oven to 400°F (200°C). This is a crucial first step, as a hot oven ensures the pie crust starts baking immediately, preventing a soggy bottom. Generously grease a standard 12-cup muffin tin with non-stick cooking spray or by wiping it with butter. This will guarantee your mini pies release easily after baking.
- Sauté the Aromatics: In a large skillet or saucepan, melt the 3 tablespoons of unsalted butter over medium heat. Once the butter is melted and begins to shimmer, add the finely diced yellow onion. Sauté the onion, stirring occasionally, for about 3-4 minutes. You are looking for the onion to become soft, translucent, and fragrant, but not browned. This process sweetens the onion and builds the first layer of flavor for our filling.
- Create the Roux and Sauce Base: Sprinkle the ¼ cup of all-purpose flour over the softened onions in the skillet. Stir continuously for about one minute until the flour is fully incorporated with the butter and onion. This step, known as making a roux, is essential for thickening the sauce. Toasting the flour for a minute cooks out any raw, pasty flavor.
- Build the Creamy Sauce: While stirring or whisking constantly to prevent lumps, slowly pour in the 1 cup of chicken broth. The mixture will begin to thicken almost immediately. Once the broth is incorporated, slowly whisk in the ½ cup of heavy cream. Continue to cook, stirring frequently, until the sauce is smooth, bubbly, and has thickened enough to coat the back of a spoon. This should take about 3-5 minutes.
- Combine the Filling Ingredients: Turn the heat down to low. To the thickened sauce, add the 2 cups of cooked chicken, the 1 ½ cups of thawed mixed vegetables, the ½ teaspoon of dried thyme, and a generous pinch of salt and black pepper. Stir everything together until the chicken and vegetables are evenly coated in the creamy sauce. Let it simmer gently for another minute for the flavors to meld. Remove the skillet from the heat and set it aside to cool slightly while you prepare the crusts.
- Prepare the Pie Crusts: Unroll the two refrigerated pie crusts onto a lightly floured surface to prevent sticking. Using a 4-inch round cookie cutter or the rim of a wide-mouthed glass, cut out 12 circles from the dough. You may need to gently re-roll the scraps to get all 12 circles.
- Assemble the Mini Pies: Carefully press each of the 12 dough circles into the cups of your prepared muffin tin. Gently guide the dough down to line the bottom and up the sides of each cup, creating a small pie shell. A small tart tamper or the back of a spoon can be helpful here.
- Fill the Pies: Spoon the slightly cooled chicken pot pie filling evenly into each of the 12 pie crust shells. Be careful not to overfill them; fill them just to the top of the crust’s edge. Overfilling can cause the filling to bubble over and make a mess in your oven.
- Add the Top Crust (Optional but Recommended): If you want a full “lid” on your pot pies, you can use the dough scraps to cut out smaller, 1.5 to 2-inch circles or decorative shapes (like leaves or stars) to place on top of the filling. Alternatively, you can leave them open-faced for a rustic look.
- Apply the Egg Wash: In a small bowl, whisk together the large egg and 1 tablespoon of water to create an egg wash. Using a pastry brush, lightly brush the tops of the exposed crust edges (and the top crusts, if you added them). This step is the secret to a shiny, beautifully golden-brown finish.
- Bake to Perfection: Place the muffin tin on a baking sheet to catch any potential drips. Bake in the preheated 400°F (200°C) oven for 20-25 minutes. The pies are done when the filling is hot and bubbly and the crust is a deep golden brown.
- Rest and Serve: Remove the muffin tin from the oven and let the mini pot pies rest in the tin for at least 5-10 minutes. This is a critical step that allows the filling to set up slightly and the pies to firm up, making them much easier to remove without falling apart. Carefully run a thin knife around the edge of each muffin to loosen, then gently lift them out. Serve warm and enjoy!
Nutrition
- Serving Size: one normal portion
- Calories: 260
- Fat: 15g
- Carbohydrates: 20g
- Fiber: 2g
- Protein: 12g