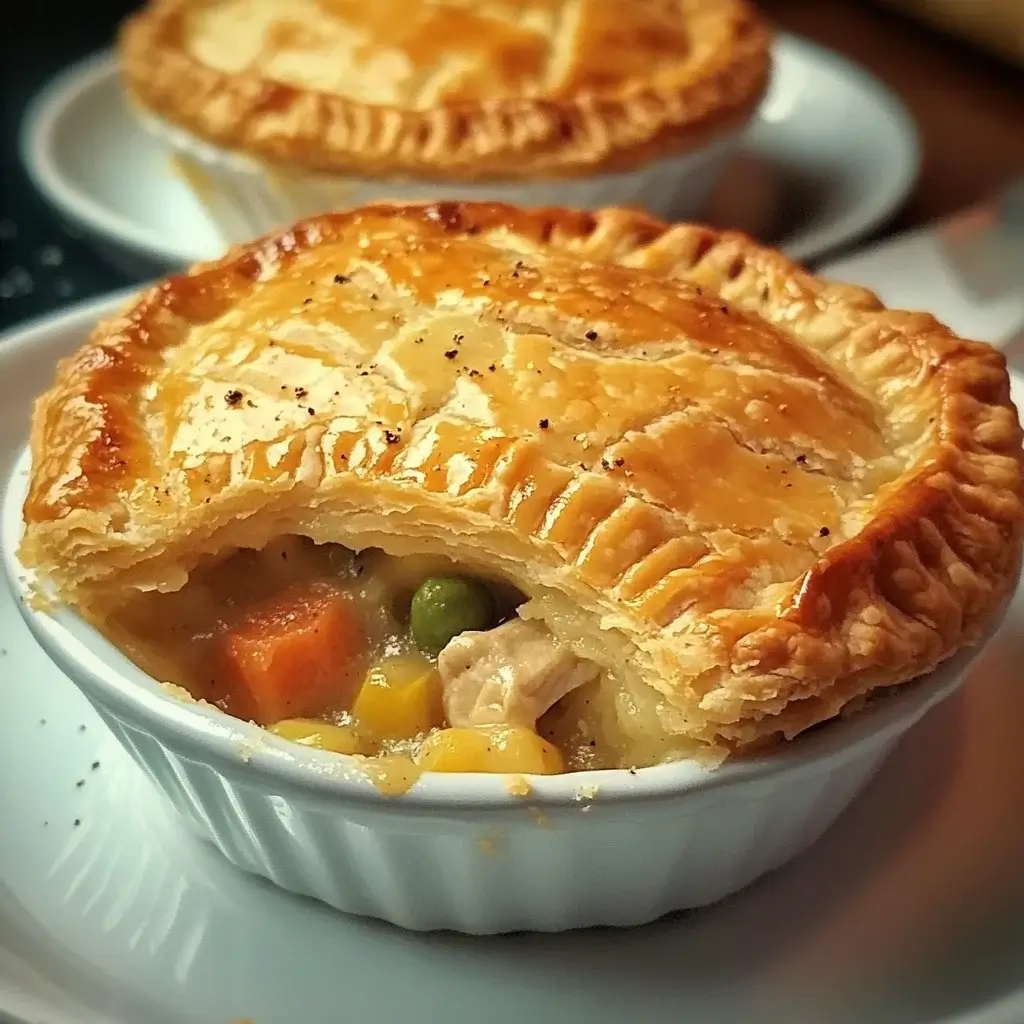
There’s something undeniably magical about a chicken pot pie. That golden, flaky crust giving way to a creamy, savory filling brimming with tender chicken and vegetables – it’s the epitome of comfort food. For years, I’d make a large family-sized pie, which, while delicious, sometimes felt a bit too cumbersome for a weeknight or a smaller gathering. Then, I discovered the joy of Mini Chicken Pot Pies, and our mealtime game changed forever! These individual portions are not only adorable but incredibly practical. My kids, who can sometimes be picky, absolutely devour them; they love having their “own” little pie. They’re perfect for portion control, fantastic for packing in lunchboxes (once cooled, of course!), and make a wonderful appetizer for parties. The flaky, buttery crust encasing that rich, flavourful chicken and vegetable stew is just as satisfying, if not more so, in this miniature form. They’ve become a regular rotation in our household, a guaranteed crowd-pleaser that feels both homey and a little bit special.
Ingredients
- For the Filling:
- 2 tablespoons unsalted butter: Provides richness and helps sauté the vegetables.
- 1 medium yellow onion, finely chopped (about 1 cup): Forms the aromatic base of the filling.
- 2 carrots, peeled and diced small (about 1 cup): Adds sweetness and color.
- 2 celery stalks, diced small (about 1 cup): Contributes a subtle savory note and texture.
- 1/2 cup all-purpose flour: Thickens the sauce to a luscious, creamy consistency.
- 2 cups chicken broth (low sodium preferred): The liquid base for the creamy sauce; low sodium allows better control over seasoning.
- 1 cup heavy cream or whole milk: Adds richness and creaminess to the sauce. Heavy cream will result in a richer sauce.
- 2 cups cooked chicken, shredded or diced: The star protein. Rotisserie chicken or leftover cooked chicken works perfectly.
- 1 cup frozen peas: Adds a pop of color and sweetness; add at the end to retain vibrancy.
- 1/2 cup frozen corn (optional): Provides extra sweetness and texture.
- 1 teaspoon dried thyme: A classic herb pairing for chicken pot pie.
- 1/2 teaspoon dried rosemary, crushed (optional): Adds a lovely piney, aromatic note.
- Salt and freshly ground black pepper to taste: Essential for flavour enhancement.
- Pinch of nutmeg (optional): Adds a warm, subtle depth to the creamy sauce.
- For the Crust:
- 2 (14.1 ounce) packages refrigerated pie crusts (4 crusts total): For convenience and a reliably flaky result. You can also use your favorite homemade pie crust recipe.
- 1 large egg, beaten (for egg wash): Gives the crust a beautiful golden-brown sheen.
- 1 tablespoon water or milk (mixed with egg for wash): Thins the egg wash for easier brushing.
Instructions
- Prepare Your Workstation and Preheat Oven:
Preheat your oven to 400°F (200°C). Lightly grease a standard 12-cup muffin tin. If you have two muffin tins, you can prepare more pies at once, or bake in batches. - Sauté the Aromatics and Vegetables:
Melt the butter in a large skillet or Dutch oven over medium heat. Add the chopped onion, diced carrots, and diced celery. Sauté for 7-10 minutes, or until the vegetables are softened but not browned. Stir occasionally to prevent sticking. This step builds the foundational flavors for your pot pie filling. - Create the Roux and Sauce Base:
Sprinkle the all-purpose flour over the softened vegetables. Stir constantly for 1-2 minutes, allowing the flour to cook slightly. This is your roux, which will thicken the sauce. Gradually whisk in the chicken broth, ensuring there are no lumps. Continue whisking until the mixture begins to thicken. - Add Creaminess and Seasonings:
Pour in the heavy cream (or whole milk) and continue to stir until the sauce is smooth and has thickened to a gravy-like consistency, usually about 3-5 minutes. Bring it to a gentle simmer. - Incorporate Chicken and Remaining Vegetables:
Stir in the cooked, shredded or diced chicken, frozen peas, frozen corn (if using), dried thyme, and crushed rosemary (if using). Season generously with salt, freshly ground black pepper, and a pinch of nutmeg (if desired). Cook for another 2-3 minutes, allowing the flavors to meld and the frozen vegetables to heat through. Taste and adjust seasonings as needed. The filling should be flavourful and well-seasoned. Remove from heat and let it cool slightly while you prepare the crusts. - Prepare the Pie Crusts:
Unroll the refrigerated pie crusts onto a lightly floured surface. Using a round cookie cutter or the rim of a wide-mouth glass (approximately 4-5 inches in diameter), cut out 12 circles for the bottom crusts. Gently press these circles into the cups of your prepared muffin tin, ensuring they line the bottom and sides. If you have leftover dough, you can re-roll it to cut more circles. - Fill the Pies:
Spoon the prepared chicken filling evenly into each pastry-lined muffin cup. Be careful not to overfill, as the filling might bubble over during baking. - Create the Top Crusts:
Using a slightly smaller round cookie cutter (approximately 3-3.5 inches in diameter) or a knife, cut out 12 circles or decorative shapes for the top crusts from the remaining pie dough. You can also cut strips to create a lattice top if you’re feeling ambitious. - Assemble and Seal the Pies:
Place the top crusts over the filling. You can gently press the edges of the top crust to the bottom crust to seal, or simply lay them on top for a more rustic look. If using solid top crusts, cut small slits in the top of each pie with a sharp knife to allow steam to escape during baking. This prevents the crust from puffing up too much and helps it cook evenly. - Egg Wash for a Golden Finish:
In a small bowl, whisk together the beaten egg with 1 tablespoon of water or milk. Lightly brush the tops of the mini pies with the egg wash. This will give them a beautiful, glossy, golden-brown finish. - Bake to Perfection:
Place the muffin tin in the preheated oven. Bake for 20-25 minutes, or until the crusts are golden brown and the filling is bubbly. If the crusts start to brown too quickly, you can loosely tent the muffin tin with aluminum foil. - Cool and Serve:
Once baked, carefully remove the muffin tin from the oven. Let the mini chicken pot pies cool in the tin for at least 5-10 minutes before attempting to remove them. This allows the filling to set slightly and makes them easier to handle. You can use a small offset spatula or a butter knife to gently loosen the edges and lift them out. Serve warm and enjoy your delightful individual comfort food!
Nutrition Facts
- Servings: This recipe makes approximately 12 mini chicken pot pies (depending on the size of your muffin tin cups and crust cutouts).
- Calories per serving (approximate): Around 350-450 calories per mini pie. (This is an estimate and can vary based on specific ingredients used, particularly the type of pie crust and whether milk or cream is used).
- Protein: A good source of protein, primarily from the chicken, essential for muscle repair and growth.
- Fat: Contains saturated and unsaturated fats from the butter, cream/milk, and pie crust. Choosing lean chicken and whole milk over cream can reduce fat content.
- Carbohydrates: Primarily from the pie crust and vegetables, providing energy.
- Fiber: Contains some dietary fiber from the vegetables like carrots, celery, and peas, aiding in digestion.
Preparation Time
- Prep Time: Approximately 30-40 minutes (includes chopping vegetables, making the filling, and preparing crusts). Using pre-cooked chicken (like rotisserie) significantly speeds this up.
- Cook Time: 20-25 minutes (baking time).
- Total Time: Approximately 50-65 minutes.
This recipe involves a few steps, but each is straightforward. The active preparation is manageable, and the baking time allows you to relax or prepare a simple side dish.
How to Serve
These Mini Chicken Pot Pies are delightful on their own, but here are some serving suggestions to make them a complete and even more satisfying meal:
- As a Main Course:
- Serve 2-3 mini pies per person for a hearty dinner.
- Pair with a light, crisp green salad dressed with a simple vinaigrette to balance the richness of the pies. Arugula or mixed greens work well.
- A side of steamed green beans or roasted asparagus adds a fresh, vibrant element.
- For a truly comforting meal, serve alongside a small portion of creamy mashed potatoes or buttered egg noodles – the extra sauce from the pies will be delicious over them.
- For Lunch or Brunch:
- One or two mini pies make a perfect, satisfying lunch.
- They can be served warm or even at room temperature (though warm is best!).
- Accompany with a cup of tomato soup or a fruit salad for a balanced mid-day meal.
- As Appetizers or Party Food:
- Their individual size makes them ideal for gatherings.
- Arrange them on a platter for easy self-service.
- Consider making them even smaller by using a mini-muffin tin for bite-sized pot pie perfection (adjust baking time accordingly).
- Offer a dollop of cranberry sauce or a savory chutney on the side for an interesting flavor contrast.
- Garnishes:
- A sprinkle of fresh parsley or chives over the top before serving adds a touch of color and freshness.
- A tiny sprig of fresh thyme can also be a lovely aromatic garnish.
Additional Tips
- Rotisserie Chicken for Speed: Save time by using a store-bought rotisserie chicken. Simply shred or dice the meat, and you’re ready to go. This is my go-to hack for weeknight versions.
- Vegetable Variations: Feel free to customize the vegetables. Diced potatoes (par-cook them first), green beans, mushrooms, or even sweet potatoes can be delicious additions or substitutions. Ensure they are diced small for even cooking.
- Crust Customization: While refrigerated crusts are convenient, homemade pie crust will elevate these pies even further. You can also use puff pastry for an extra flaky, light top crust. Cut the puff pastry into squares and simply lay them over the filling.
- Make-Ahead Magic: You can prepare the filling a day in advance and store it in an airtight container in the refrigerator. When ready to bake, assemble the pies with the crusts and bake as directed. This splits the workload nicely.
- Freezing for Later: Mini chicken pot pies freeze wonderfully! Bake them as directed, let them cool completely, then wrap each pie individually in plastic wrap and then in foil, or place them in a freezer-safe container. They can be frozen for up to 3 months.
- Reheating Instructions: To reheat frozen pies, you can bake them directly from frozen at 350°F (175°C) for about 20-30 minutes, or until heated through and the crust is crisp. If reheating refrigerated pies, 10-15 minutes at 350°F should suffice. Microwaving is possible but can make the crust less crispy.
- Prevent Soggy Bottoms: Ensure your filling isn’t too watery. If it seems thin, simmer it a bit longer to thicken. Also, don’t let the assembled, unbaked pies sit for too long before baking, as the moisture from the filling can seep into the bottom crust.
- Seasoning is Key: Don’t skimp on seasoning! Taste the filling before assembling the pies and adjust salt, pepper, and herbs as needed. A well-seasoned filling is crucial for the best flavour. A dash of Worcestershire sauce or a squeeze of lemon juice can also brighten the flavours.
FAQ Section
- Q: Can I use a different type of meat instead of chicken?
A: Absolutely! Cooked, diced turkey (great for Thanksgiving leftovers!), tender beef stew meat, or even ground meat (cooked and drained) can be used. Adjust seasonings accordingly to complement the chosen protein. For a vegetarian version, use a medley of hearty vegetables like mushrooms, potatoes, and butternut squash, and use vegetable broth. - Q: Can I make these mini chicken pot pies gluten-free?
A: Yes, you can. Use your favorite gluten-free all-purpose flour blend to make the roux for the filling. For the crust, you can purchase gluten-free pie crusts or make your own using a reliable gluten-free pie crust recipe. - Q: How do I prevent the bottom crust from getting soggy?
A: A few tricks can help: ensure your filling has cooled slightly and isn’t too thin before adding it to the crusts. Don’t let the unbaked pies sit too long before baking. Some people also like to blind-bake the bottom crusts for a few minutes before adding the filling, but for muffin tin pies, this can be a bit fiddly. Generally, a well-thickened filling and prompt baking do the trick. - Q: How should I store leftover mini chicken pot pies?
A: Once cooled completely, store leftover mini chicken pot pies in an airtight container in the refrigerator for up to 3-4 days. For longer storage, follow the freezing tips mentioned above. - Q: Can I make one large chicken pot pie with this recipe instead of mini ones?
A: Yes, this recipe can be adapted for a standard 9-inch pie dish. You’ll use one full crust for the bottom and one for the top (or create a lattice). The baking time will likely need to be increased to 35-45 minutes, or until the crust is golden and the filling is bubbly. - Q: Why use a muffin tin for these pot pies?
A: Muffin tins are perfect for creating individual, portion-controlled servings. They ensure each pie is uniformly sized and bakes evenly. Plus, they’re incredibly cute and make serving easy, especially for kids or at parties. - Q: What’s the best type of chicken to use?
A: Any cooked chicken works! Rotisserie chicken is convenient. You can also use leftover baked or poached chicken breasts or thighs. If cooking chicken specifically for this recipe, poaching or baking boneless, skinless chicken breasts or thighs until cooked through, then dicing or shredding, is ideal. - Q: Can I skip the bottom crust to make them lighter?
A: Yes, you can make “crustless bottom” pot pies. Simply grease the muffin tin cups well, add the filling, and then top with your chosen top crust (circle, lattice, or puff pastry). This reduces calories and carbs, but you’ll miss out on the full pie experience. They will still be delicious!

Mini Chicken Pot Pies
Ingredients
- For the Filling:
- 2 tablespoons unsalted butter: Provides richness and helps sauté the vegetables.
- 1 medium yellow onion, finely chopped (about 1 cup): Forms the aromatic base of the filling.
- 2 carrots, peeled and diced small (about 1 cup): Adds sweetness and color.
- 2 celery stalks, diced small (about 1 cup): Contributes a subtle savory note and texture.
- 1/2 cup all-purpose flour: Thickens the sauce to a luscious, creamy consistency.
- 2 cups chicken broth (low sodium preferred): The liquid base for the creamy sauce; low sodium allows better control over seasoning.
- 1 cup heavy cream or whole milk: Adds richness and creaminess to the sauce. Heavy cream will result in a richer sauce.
- 2 cups cooked chicken, shredded or diced: The star protein. Rotisserie chicken or leftover cooked chicken works perfectly.
- 1 cup frozen peas: Adds a pop of color and sweetness; add at the end to retain vibrancy.
- 1/2 cup frozen corn (optional): Provides extra sweetness and texture.
- 1 teaspoon dried thyme: A classic herb pairing for chicken pot pie.
- 1/2 teaspoon dried rosemary, crushed (optional): Adds a lovely piney, aromatic note.
- Salt and freshly ground black pepper to taste: Essential for flavour enhancement.
- Pinch of nutmeg (optional): Adds a warm, subtle depth to the creamy sauce.
- For the Crust:
- 2 (14.1 ounce) packages refrigerated pie crusts (4 crusts total): For convenience and a reliably flaky result. You can also use your favorite homemade pie crust recipe.
- 1 large egg, beaten (for egg wash): Gives the crust a beautiful golden-brown sheen.
- 1 tablespoon water or milk (mixed with egg for wash): Thins the egg wash for easier brushing.
Instructions
- Prepare Your Workstation and Preheat Oven:
Preheat your oven to 400°F (200°C). Lightly grease a standard 12-cup muffin tin. If you have two muffin tins, you can prepare more pies at once, or bake in batches. - Sauté the Aromatics and Vegetables:
Melt the butter in a large skillet or Dutch oven over medium heat. Add the chopped onion, diced carrots, and diced celery. Sauté for 7-10 minutes, or until the vegetables are softened but not browned. Stir occasionally to prevent sticking. This step builds the foundational flavors for your pot pie filling. - Create the Roux and Sauce Base:
Sprinkle the all-purpose flour over the softened vegetables. Stir constantly for 1-2 minutes, allowing the flour to cook slightly. This is your roux, which will thicken the sauce. Gradually whisk in the chicken broth, ensuring there are no lumps. Continue whisking until the mixture begins to thicken. - Add Creaminess and Seasonings:
Pour in the heavy cream (or whole milk) and continue to stir until the sauce is smooth and has thickened to a gravy-like consistency, usually about 3-5 minutes. Bring it to a gentle simmer. - Incorporate Chicken and Remaining Vegetables:
Stir in the cooked, shredded or diced chicken, frozen peas, frozen corn (if using), dried thyme, and crushed rosemary (if using). Season generously with salt, freshly ground black pepper, and a pinch of nutmeg (if desired). Cook for another 2-3 minutes, allowing the flavors to meld and the frozen vegetables to heat through. Taste and adjust seasonings as needed. The filling should be flavourful and well-seasoned. Remove from heat and let it cool slightly while you prepare the crusts. - Prepare the Pie Crusts:
Unroll the refrigerated pie crusts onto a lightly floured surface. Using a round cookie cutter or the rim of a wide-mouth glass (approximately 4-5 inches in diameter), cut out 12 circles for the bottom crusts. Gently press these circles into the cups of your prepared muffin tin, ensuring they line the bottom and sides. If you have leftover dough, you can re-roll it to cut more circles. - Fill the Pies:
Spoon the prepared chicken filling evenly into each pastry-lined muffin cup. Be careful not to overfill, as the filling might bubble over during baking. - Create the Top Crusts:
Using a slightly smaller round cookie cutter (approximately 3-3.5 inches in diameter) or a knife, cut out 12 circles or decorative shapes for the top crusts from the remaining pie dough. You can also cut strips to create a lattice top if you’re feeling ambitious. - Assemble and Seal the Pies:
Place the top crusts over the filling. You can gently press the edges of the top crust to the bottom crust to seal, or simply lay them on top for a more rustic look. If using solid top crusts, cut small slits in the top of each pie with a sharp knife to allow steam to escape during baking. This prevents the crust from puffing up too much and helps it cook evenly. - Egg Wash for a Golden Finish:
In a small bowl, whisk together the beaten egg with 1 tablespoon of water or milk. Lightly brush the tops of the mini pies with the egg wash. This will give them a beautiful, glossy, golden-brown finish. - Bake to Perfection:
Place the muffin tin in the preheated oven. Bake for 20-25 minutes, or until the crusts are golden brown and the filling is bubbly. If the crusts start to brown too quickly, you can loosely tent the muffin tin with aluminum foil. - Cool and Serve:
Once baked, carefully remove the muffin tin from the oven. Let the mini chicken pot pies cool in the tin for at least 5-10 minutes before attempting to remove them. This allows the filling to set slightly and makes them easier to handle. You can use a small offset spatula or a butter knife to gently loosen the edges and lift them out. Serve warm and enjoy your delightful individual comfort food!
Nutrition
- Serving Size: one normal portion
- Calories: 450