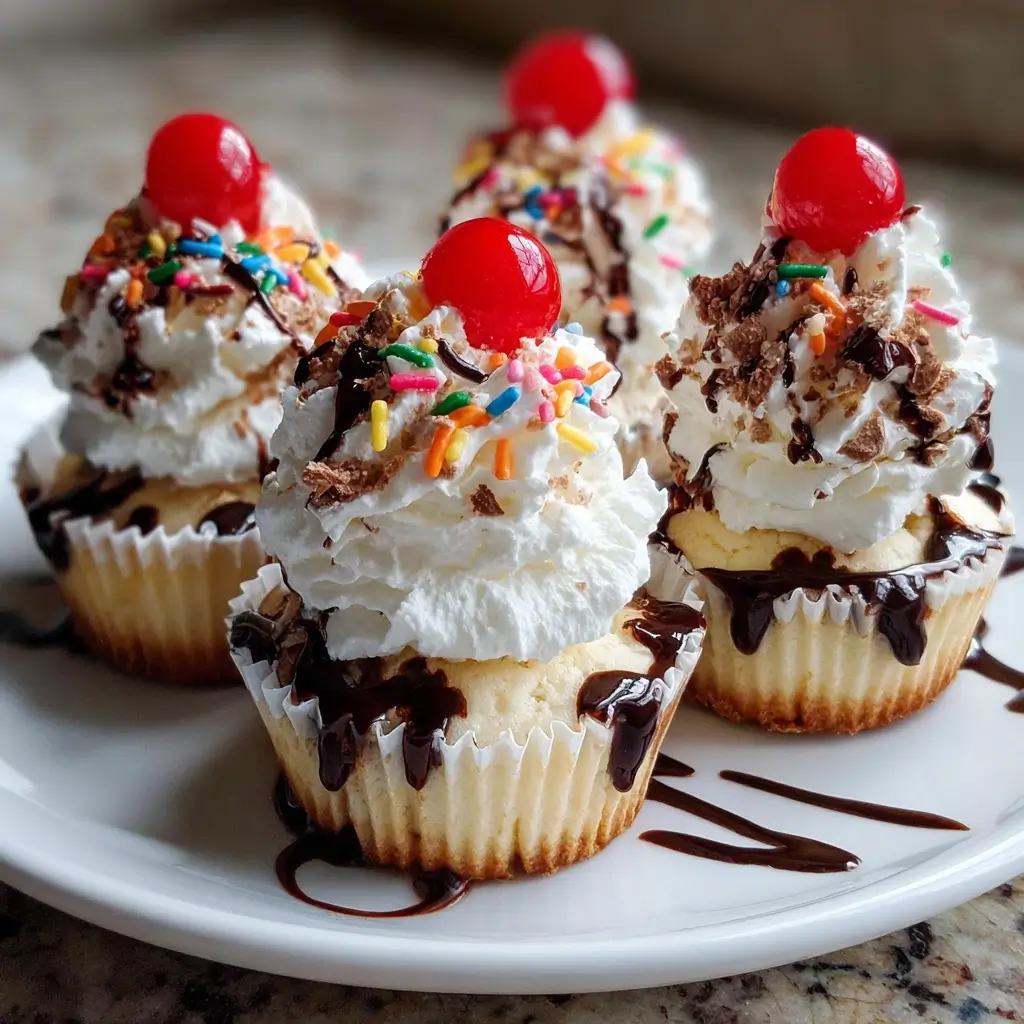
Of all the recipes I’ve developed and shared over the years, there are a few that have become legendary in my own home. This Mini Ice Cream Cupcakes recipe isn’t just a dessert; it’s a memory-maker. I first whipped these up for my daughter’s 8th birthday party. I was looking for something that had the “wow” factor of a big, elaborate cake but was infinitely easier to serve to a dozen screaming, excited kids. I wanted to avoid the messy, unequal slicing of a traditional ice cream cake and give each child their own perfect, personal treat. The moment I brought out the tray, a hush fell over the backyard chaos. Each child’s eyes lit up at the sight of their very own cupcake, complete with a chocolate shell and a cloud of whipped cream. They were an absolute smash hit. Since that day, they’ve become our go-to for summer barbecues, movie nights, and any celebration that calls for a touch of something special and fun. They are deceptively simple to make, yet they look and taste like they came from a gourmet ice cream parlor. The combination of the crunchy chocolate cookie crust, the creamy, cold ice cream center, and the rich chocolate ganache topping is pure, unadulterated joy in every single bite. This is more than just a recipe; it’s a guaranteed smile-inducer, a party-saver, and a delicious tradition I’m so excited to share with you.
Ingredients
Here is the simple list of components you’ll need to create these delightful frozen treats. Each ingredient is chosen for its specific role in building the perfect texture and flavor profile.
- Chocolate Sandwich Cookies (e.g., Oreos): 24 cookies. These form the base of our recipe, creating a rich, crunchy, and flavorful crust that requires no baking. The cream filling adds a touch of sweetness, eliminating the need for extra sugar in the crust.
- Unsalted Butter: 4 tablespoons, melted. This is the magic ingredient that binds the cookie crumbs together, transforming them from a loose powder into a firm, sliceable crust that holds its shape perfectly.
- Ice Cream: 1.5 quarts (about 6 cups), slightly softened. This is the star of the show! You can use any flavor you love. Classic vanilla or chocolate is a great starting point, but strawberry, mint chocolate chip, or even cookie dough would be phenomenal. Softening it slightly makes it easy to scoop and press into the cupcake liners.
- Semi-Sweet Chocolate Chips: 1 cup. These are for creating the luscious, decadent ganache topping. Semi-sweet chocolate provides a perfect balance, offering rich chocolate flavor without being overly sweet, which complements the ice cream beautifully.
- Heavy Cream: 1/2 cup. When heated and combined with the chocolate chips, the heavy cream creates a smooth, pourable, and glossy ganache that sets into a delightful shell-like topping.
- Whipped Cream and Sprinkles: For topping (optional). These are the finishing touches that take the cupcakes from delicious to dazzling. A swirl of whipped cream and a festive dash of sprinkles add a professional, celebratory look.
Instructions
Follow these step-by-step instructions carefully to ensure your mini ice cream cupcakes are a stunning success. The key to this recipe is working in stages and allowing for adequate freezing time.
Step 1: Prepare the Muffin Tin
First, prepare your workspace. You will need a standard 12-cup muffin tin. To ensure easy removal of the finished cupcakes, line each cup with a paper or foil cupcake liner. Foil liners are particularly sturdy and helpful for frozen desserts. Set the prepared tin aside.
Step 2: Make the Chocolate Cookie Crust
Place the 24 chocolate sandwich cookies into the bowl of a food processor. Pulse several times to break them up, then process on high until they are reduced to fine, consistent crumbs. If you don’t have a food processor, you can place the cookies in a large, sealed zip-top bag and crush them with a rolling pin or the bottom of a heavy pan. Pour the fine crumbs into a medium-sized mixing bowl.
Step 3: Bind the Crust
Pour the 4 tablespoons of melted butter over the cookie crumbs in the bowl. Using a fork or a small spatula, mix thoroughly until all the crumbs are evenly moistened. The mixture should resemble wet sand.
Step 4: Form the Crust in the Tin
Distribute the buttery crumb mixture evenly among the 12 lined muffin cups. This will be approximately 1.5 to 2 tablespoons of the mixture per cup. Use the back of a spoon, a small glass, or your fingers to press the crumbs down firmly and evenly into the bottom of each liner, creating a compact base.
Step 5: First Freeze
Place the entire muffin tin into the freezer for at least 30 minutes. This step is crucial as it allows the butter to solidify, creating a hard, stable crust that won’t mix with the ice cream when you add it.
Step 6: Add the Ice Cream Layer
While the crusts are chilling, remove your ice cream from the freezer and let it sit on the counter for about 10-15 minutes. You want it to be soft enough to scoop easily, but not melted. Once the crusts are firm, remove the muffin tin from the freezer. Working quickly, scoop the softened ice cream on top of each crust, filling each liner almost to the top. Use the back of a spoon to smooth the surface of the ice cream in each cup.
Step 7: Second Freeze
Carefully return the muffin tin to the freezer. Let the cupcakes freeze for at least 2 hours, or until the ice cream is completely firm to the touch. This ensures the ice cream is solid enough to support the warm ganache topping without melting instantly.
Step 8: Prepare the Chocolate Ganache
About 15 minutes before you’re ready to top the cupcakes, prepare the ganache. Place the 1 cup of semi-sweet chocolate chips in a heat-proof bowl. Pour the 1/2 cup of heavy cream into a small saucepan and heat over medium heat until it just begins to simmer around the edges. Do not let it come to a rolling boil.
Step 9: Create the Ganache
Immediately pour the hot cream over the chocolate chips in the bowl. Let the mixture sit, undisturbed, for 5 minutes. This allows the heat from the cream to gently melt the chocolate. After 5 minutes, whisk the mixture slowly, starting from the center and working your way out, until it is completely smooth, glossy, and uniform.
Step 10: Top the Cupcakes
Remove the hardened ice cream cupcakes from the freezer. Spoon a layer of the warm (but not hot) chocolate ganache over the top of each cupcake, spreading it gently to the edges with the back of your spoon.
Step 11: Final Freeze and Serve
Return the ganache-topped cupcakes to the freezer one last time for at least 1 hour. This allows the ganache to set into a firm, delicious chocolate shell. Once set, you can serve them immediately or store them in the freezer. Just before serving, you can add a swirl of whipped cream and a shower of colorful sprinkles for a festive touch.
Nutrition Facts
Please note that these are estimates and can vary based on the specific brands of ingredients used, especially the type of ice cream.
- Servings: 12 mini cupcakes
- Calories per serving: Approximately 350 kcal. This is a rich and decadent treat, perfect for a special occasion or celebration.
- Carbohydrates: Roughly 35g. The primary source of carbohydrates comes from the sugars in the cookie crust, ice cream, and chocolate topping.
- Fat: Approximately 22g. The fat content is derived from the butter in the crust, the heavy cream in the ganache, and the dairy in the ice cream, contributing to the rich, creamy texture.
- Sugars: Approximately 28g. As a dessert, this recipe is high in sugar, which provides its sweet, satisfying flavor.
- Protein: Around 4g. A small amount of protein is present from the dairy components (ice cream and cream).
Preparation Time
This recipe is simple in execution but requires patience due to the necessary freezing intervals. Planning is key.
- Active Preparation Time: 25-30 minutes. This includes the time spent crushing cookies, mixing the crust, scooping the ice cream, and making the ganache.
- Inactive Freezing Time: 3.5 hours (minimum). This is the total time the cupcakes need to spend in the freezer to set properly at each stage. This hands-off time is essential for the perfect texture and structure.
How to Serve
These mini ice cream cupcakes are versatile and can be presented in many fun and creative ways. Here are a few ideas to inspire you:
- The Classic Birthday Party Treat:
- Arrange the cupcakes on a festive platter or cake stand.
- Top each one with a generous swirl of whipped cream and a cascade of rainbow sprinkles.
- For a birthday, place a single candle in the center of each cupcake for a magical presentation.
- The Elegant Dessert Course:
- Serve each cupcake on a small, individual dessert plate.
- Create a simple sauce by slightly warming raspberry or strawberry preserves and drizzle it artfully around the plate.
- Garnish with a fresh mint leaf and a few fresh berries (raspberries or sliced strawberries) on the side for a pop of color and freshness.
- The Summer BBQ Finale:
- Keep the cupcakes in the freezer until the very moment you are ready to serve to combat the summer heat.
- Serve them directly from the muffin tin for a rustic, casual feel.
- Offer bowls of toppings on the side so guests can customize their treats.
- The Ultimate DIY Topping Bar:
- This is a fantastic way to get guests involved and add an element of fun.
- Serve the cupcakes plain, with just the set ganache topping.
- Set up a “bar” with various bowls of toppings, such as:
- Sauces: Chocolate syrup, caramel sauce, strawberry sauce.
- Candies: Crushed toffee bits, mini M&Ms, chopped peanut butter cups.
- Nuts: Chopped peanuts, sliced almonds, toasted pecans.
- Fruits: Diced fresh strawberries, blueberries, maraschino cherries.
Additional Tips
Master this recipe with these eight pro tips that will help you troubleshoot common issues and customize your cupcakes to perfection.
- Use Foil Liners for Best Results: While paper liners work, heavy-duty foil liners are superior for frozen desserts. They are sturdier, hold their shape better, and peel away from the frozen cupcake much more cleanly, preserving the perfect look of your treat.
- Pre-Scoop Your Ice Cream: For super-fast assembly, line a small baking sheet with parchment paper. Scoop 12 balls of ice cream and place them on the sheet. Freeze these scoops for at least an hour until they are solid. Then, you can simply place one frozen scoop into each crust-filled cup, press it down slightly, and proceed to the next step. This minimizes the melting time of the bulk ice cream container.
- Experiment with Flavor Combinations: Don’t limit yourself to vanilla! Think of the crust as a canvas. Try mint chocolate chip ice cream for a classic combo, strawberry ice cream for a Neapolitan vibe, or coffee ice cream for a more adult-friendly mocha flavor. You can even use different cookies for the crust.
- Achieve Ganache Perfection: The key to a smooth ganache is patience. Don’t stir the cream and chocolate for the full 5 minutes. Let the residual heat of the cream do the work. Also, ensure your cream is hot but not boiling. Boiling can cause the chocolate to seize or the fat to separate, resulting in a grainy texture.
- Work Quickly and Keep Things Cold: Your biggest enemy in this recipe is heat. Always return the muffin tin to the freezer between steps if you get interrupted. When adding the ice cream and ganache, work as quickly as possible to prevent a melted mess. A cold kitchen environment helps.
- Make-Ahead Champions: These are the perfect make-ahead dessert. You can prepare them completely, including the ganache and toppings, and store them in the freezer for up to two weeks. Place them in a single layer in an airtight, freezer-safe container to prevent freezer burn and protect them from being crushed.
- Customize Your Crust: The chocolate sandwich cookie crust is a classic, but you can easily swap it out. Try using graham cracker crumbs (add 2 tablespoons of sugar), Biscoff cookie crumbs, or even crushed pretzels for a sweet and salty twist. The method remains the same: crush, mix with melted butter, and press into the pan.
- Easy Ganache Spreading: When you pour the ganache on top, it may be a bit thick. To help it spread into a perfect, smooth circle, you can gently tap the muffin tin on the counter a few times. This will help the ganache settle and even itself out before it sets.
FAQ Section
Here are answers to some of the most frequently asked questions about making mini ice cream cupcakes.
1. How do I store the leftover ice cream cupcakes?
The best way to store them is in a freezer-safe, airtight container. Arrange them in a single layer to prevent them from sticking together or getting crushed. If you need to stack them, place a layer of parchment or wax paper between the layers. They will keep well in the freezer for up to 2 weeks.
2. Can I make this recipe gluten-free?
Absolutely! To make a gluten-free version, simply substitute the regular chocolate sandwich cookies with your favorite brand of gluten-free chocolate sandwich cookies. Also, ensure your chosen ice cream flavor is certified gluten-free, as some varieties can contain gluten-based add-ins like cookie dough or brownie pieces.
3. My ice cream layer melted when I added the ganache. What did I do wrong?
This usually happens for one of two reasons. Either the ice cream layer was not frozen solid enough before adding the ganache, or the ganache was too hot. Ensure the cupcakes freeze for at least 2 hours until rock-solid. After making the ganache, let it cool for 5-10 minutes. It should be pourable and warm, but not steaming hot, before you spoon it over the frozen ice cream.
4. Can I make one large ice cream cake with this recipe instead of mini cupcakes?
Yes, this recipe adapts beautifully into a single cake. Use a 9-inch springform pan or a pie plate. Press the entire crust mixture into the bottom of the pan. Freeze, then top with the entire quantity of softened ice cream and freeze again until solid. Finally, pour the ganache over the top. To serve, let it sit at room temperature for 5-10 minutes before slicing.
5. Do I have to use cupcake liners?
While you can make them without liners by greasing the muffin tin very well, it is highly recommended to use them. Liners make removal a breeze. Without them, you risk breaking the crust or having the cupcake stick to the pan, even when frozen. Foil liners are the best choice for easy and clean removal.
6. What’s the best way to transport these to a party or event?
Transportation requires a good cooler. Keep the cupcakes in the freezer until the last possible moment. Pack them snugly in a single layer inside a container, then place the container in a cooler with several ice packs. Fill any empty space in the cooler with towels to minimize air circulation. They should stay frozen for a couple of hours this way.
7. My ganache seems too thick or too thin. How can I fix it?
If your ganache is too thick, you can whisk in a tiny bit more warm heavy cream (a teaspoon at a time) until it reaches the desired pourable consistency. If it’s too thin, it may be because the ratio of cream to chocolate was off. You can let it cool a bit longer to thicken, or, in a pinch, melt in a few more chocolate chips to thicken it up.
8. Can I use a different topping instead of chocolate ganache?
Of course! While ganache is a classic, you can get creative. A “magic shell” (the kind that hardens instantly) works wonderfully. You could also top them with caramel sauce, a fruit coulis, or simply skip the topping and just add whipped cream and sprinkles just before serving.
Mini Ice Cream Cupcakes Recipe
Ingredients
Here is the simple list of components you’ll need to create these delightful frozen treats. Each ingredient is chosen for its specific role in building the perfect texture and flavor profile.
- Chocolate Sandwich Cookies (e.g., Oreos): 24 cookies. These form the base of our recipe, creating a rich, crunchy, and flavorful crust that requires no baking. The cream filling adds a touch of sweetness, eliminating the need for extra sugar in the crust.
- Unsalted Butter: 4 tablespoons, melted. This is the magic ingredient that binds the cookie crumbs together, transforming them from a loose powder into a firm, sliceable crust that holds its shape perfectly.
- Ice Cream: 1.5 quarts (about 6 cups), slightly softened. This is the star of the show! You can use any flavor you love. Classic vanilla or chocolate is a great starting point, but strawberry, mint chocolate chip, or even cookie dough would be phenomenal. Softening it slightly makes it easy to scoop and press into the cupcake liners.
- Semi-Sweet Chocolate Chips: 1 cup. These are for creating the luscious, decadent ganache topping. Semi-sweet chocolate provides a perfect balance, offering rich chocolate flavor without being overly sweet, which complements the ice cream beautifully.
- Heavy Cream: 1/2 cup. When heated and combined with the chocolate chips, the heavy cream creates a smooth, pourable, and glossy ganache that sets into a delightful shell-like topping.
- Whipped Cream and Sprinkles: For topping (optional). These are the finishing touches that take the cupcakes from delicious to dazzling. A swirl of whipped cream and a festive dash of sprinkles add a professional, celebratory look.
Instructions
Follow these step-by-step instructions carefully to ensure your mini ice cream cupcakes are a stunning success. The key to this recipe is working in stages and allowing for adequate freezing time.
Step 1: Prepare the Muffin Tin
First, prepare your workspace. You will need a standard 12-cup muffin tin. To ensure easy removal of the finished cupcakes, line each cup with a paper or foil cupcake liner. Foil liners are particularly sturdy and helpful for frozen desserts. Set the prepared tin aside.
Step 2: Make the Chocolate Cookie Crust
Place the 24 chocolate sandwich cookies into the bowl of a food processor. Pulse several times to break them up, then process on high until they are reduced to fine, consistent crumbs. If you don’t have a food processor, you can place the cookies in a large, sealed zip-top bag and crush them with a rolling pin or the bottom of a heavy pan. Pour the fine crumbs into a medium-sized mixing bowl.
Step 3: Bind the Crust
Pour the 4 tablespoons of melted butter over the cookie crumbs in the bowl. Using a fork or a small spatula, mix thoroughly until all the crumbs are evenly moistened. The mixture should resemble wet sand.
Step 4: Form the Crust in the Tin
Distribute the buttery crumb mixture evenly among the 12 lined muffin cups. This will be approximately 1.5 to 2 tablespoons of the mixture per cup. Use the back of a spoon, a small glass, or your fingers to press the crumbs down firmly and evenly into the bottom of each liner, creating a compact base.
Step 5: First Freeze
Place the entire muffin tin into the freezer for at least 30 minutes. This step is crucial as it allows the butter to solidify, creating a hard, stable crust that won’t mix with the ice cream when you add it.
Step 6: Add the Ice Cream Layer
While the crusts are chilling, remove your ice cream from the freezer and let it sit on the counter for about 10-15 minutes. You want it to be soft enough to scoop easily, but not melted. Once the crusts are firm, remove the muffin tin from the freezer. Working quickly, scoop the softened ice cream on top of each crust, filling each liner almost to the top. Use the back of a spoon to smooth the surface of the ice cream in each cup.
Step 7: Second Freeze
Carefully return the muffin tin to the freezer. Let the cupcakes freeze for at least 2 hours, or until the ice cream is completely firm to the touch. This ensures the ice cream is solid enough to support the warm ganache topping without melting instantly.
Step 8: Prepare the Chocolate Ganache
About 15 minutes before you’re ready to top the cupcakes, prepare the ganache. Place the 1 cup of semi-sweet chocolate chips in a heat-proof bowl. Pour the 1/2 cup of heavy cream into a small saucepan and heat over medium heat until it just begins to simmer around the edges. Do not let it come to a rolling boil.
Step 9: Create the Ganache
Immediately pour the hot cream over the chocolate chips in the bowl. Let the mixture sit, undisturbed, for 5 minutes. This allows the heat from the cream to gently melt the chocolate. After 5 minutes, whisk the mixture slowly, starting from the center and working your way out, until it is completely smooth, glossy, and uniform.
Step 10: Top the Cupcakes
Remove the hardened ice cream cupcakes from the freezer. Spoon a layer of the warm (but not hot) chocolate ganache over the top of each cupcake, spreading it gently to the edges with the back of your spoon.
Step 11: Final Freeze and Serve
Return the ganache-topped cupcakes to the freezer one last time for at least 1 hour. This allows the ganache to set into a firm, delicious chocolate shell. Once set, you can serve them immediately or store them in the freezer. Just before serving, you can add a swirl of whipped cream and a shower of colorful sprinkles for a festive touch.
Nutrition
- Serving Size: one normal portion
- Calories: 350
- Sugar: 28g
- Fat: 22g
- Carbohydrates: 35g
- Protein: 4g