Introduction
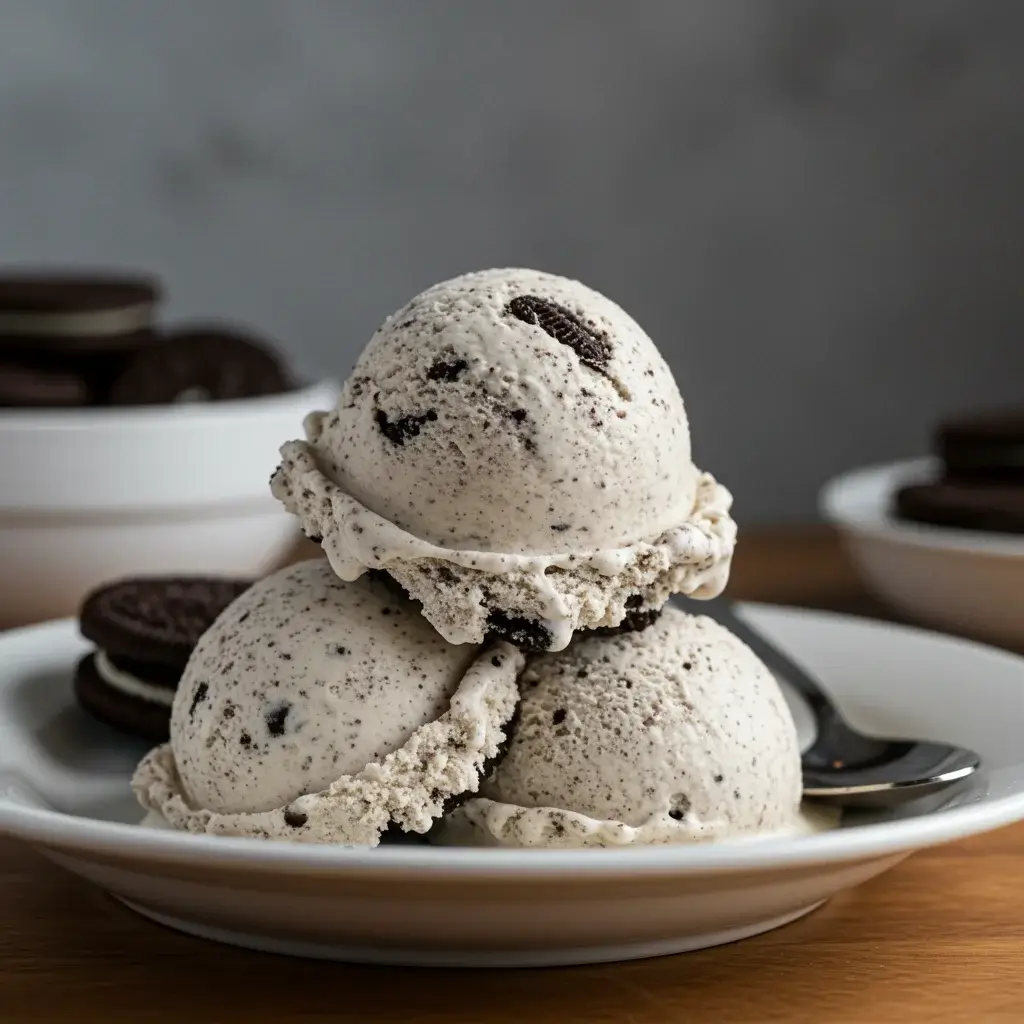
If you’ve ever found yourself torn between the rich, creamy delight of cheesecake and the sweet, crunchy goodness of Oreos, you’re in for a treat. Oreo Cheesecake Ice Cream is a no-churn ice cream that perfectly marries these two beloved desserts into one glorious creation. This delectable dessert is easy to make, requiring no special equipment, and it’s perfect for satisfying your sweet tooth on a hot summer day. In this article, we will guide you through making this delightful dessert, from the ingredients to serving suggestions, and everything in between.
Ingredients
Creating this luscious Oreo Cheesecake Ice Cream is a breeze, thanks to its simple ingredients. Here’s what you’ll need:
- 2 cups heavy whipping cream
- 1 can (14 ounces) sweetened condensed milk
- 8 ounces cream cheese, softened
- 1 teaspoon vanilla extract
- 20 Oreo cookies, crushed
- Optional: additional Oreo pieces for topping
These ingredients are easy to find in any grocery store, making this recipe not only delicious but also convenient.
Instructions
Follow these simple steps to whip up your own batch of Oreo Cheesecake Ice Cream:
- Prepare the Base:
- In a large bowl, beat the softened cream cheese with an electric mixer on medium speed until smooth and creamy.
- Add the sweetened condensed milk and vanilla extract to the cream cheese. Mix until everything is well combined and smooth.
- Whip the Cream:
- In a separate bowl, pour the heavy whipping cream. Using clean beaters, whip the cream on high speed until stiff peaks form. This should take about 3-4 minutes.
- Combine Mixtures:
- Gently fold the whipped cream into the cream cheese mixture. Use a spatula to combine them carefully, ensuring you maintain the airiness of the whipped cream.
- Add the Oreos:
- Once the mixtures are combined, gently fold in the crushed Oreo cookies. Ensure they’re evenly distributed throughout the mixture.
- Freeze:
- Pour the mixture into a loaf pan or a freezer-safe container. Smooth out the top with a spatula. If desired, sprinkle additional Oreo pieces on top for extra crunch.
- Cover the container with plastic wrap or a lid to prevent ice crystals from forming.
- Place the container in the freezer for at least 6 hours, or until the ice cream is firm.
- Serve and Enjoy:
- Once the ice cream is fully frozen, scoop and serve in bowls or cones. Enjoy the creamy, Oreo-packed goodness!
Nutrition Facts
Understanding the nutritional content of your indulgences is important. Here are the estimated nutrition facts for a serving of Oreo Cheesecake Ice Cream, assuming the recipe yields about 10 servings:
- Calories: 350
- Total Fat: 22g
- Saturated Fat: 13g
- Cholesterol: 70mg
Keep in mind that these values can vary based on the specific brands of ingredients used.
How to Serve
Oreo Cheesecake Ice Cream is a versatile dessert that can be served in various delightful ways, each offering a unique experience that enhances its rich flavor and creamy texture. Here are some comprehensive ideas to elevate your serving game:
Classic Scoop
One of the simplest and most popular ways to enjoy Oreo Cheesecake Ice Cream is by serving it in a bowl or cone. This classic presentation allows the creamy, dreamy texture of the ice cream to shine. To elevate this experience, consider these enhancements:
- Toppings: Add a generous sprinkle of crushed Oreos on top for added crunch and flavor. You can also drizzle some chocolate syrup or hot fudge over the ice cream for a luxurious touch.
- Garnishing: Fresh mint leaves or a dusting of cocoa powder can provide a pop of color and contrast against the creamy white of the ice cream. Consider serving with a side of whipped cream for added indulgence.
- Serving Temperature: For the best experience, let the ice cream sit at room temperature for about 5 minutes before serving. This slight warming will make it easier to scoop and enhance the creaminess.
Ice Cream Sandwich
Transform your Oreo Cheesecake Ice Cream into a delightful handheld treat by creating an ice cream sandwich. Here’s how to do it:
- Cookie Selection: Use two whole Oreos or chocolate cookies as the base. If you’re feeling adventurous, try using flavored cookies like peanut butter or mint for a twist.
- Assembly: Place a generous scoop of Oreo Cheesecake Ice Cream between the two cookies and gently press them together. For an added touch, roll the edges in mini chocolate chips or additional crushed Oreos for extra texture and flavor.
- Freeze: Place the assembled sandwiches back in the freezer for about 30 minutes to firm up before serving. This will help prevent any melting mishaps and make for a more enjoyable, less messy experience.
Sundae Style
Take your Oreo Cheesecake Ice Cream to the next level by creating a sundae that is both visually stunning and delicious:
- Building the Sundae: Start with a generous scoop of ice cream in a tall glass or bowl. Layer with hot fudge or chocolate sauce, and then add a dollop of whipped cream on top.
- Creative Toppings: Add additional toppings such as crushed Oreos, chocolate sprinkles, or even a drizzle of caramel sauce for a sweet contrast. A maraschino cherry on top adds a classic touch, while a few mini chocolate chips can add extra richness.
- Layering: For an impressive presentation, you can layer the ingredients in a parfait glass, alternating between ice cream, toppings, and sauces to create a visually appealing dessert.
Milkshake
For a decadent treat that’s perfect for warm weather, consider transforming your Oreo Cheesecake Ice Cream into a milkshake. Here’s how to achieve that creamy, dreamy consistency:
- Blending: In a blender, combine a few scoops of Oreo Cheesecake Ice Cream with milk. Start with a ratio of about 2 scoops of ice cream to 1 cup of milk, adjusting to your desired thickness.
- Flavor Boost: For an extra flavor kick, add a splash of vanilla extract or a tablespoon of chocolate syrup before blending. If you want a more intense Oreo flavor, toss in a few extra crushed Oreos to the mix.
- Serving: Pour the milkshake into a tall glass and top it with whipped cream, a drizzle of chocolate syrup, and even some crumbled Oreos for a delightful finish. A wide straw or a long spoon makes it easy to enjoy every last sip.
Creative Presentation Ideas
To make your serving options even more exciting, consider these creative presentation ideas:
- Dessert Board: Create a dessert board featuring scoops of Oreo Cheesecake Ice Cream alongside a variety of toppings and mix-ins, such as crushed cookies, fresh fruits, and different sauces. This allows guests to customize their own creations.
- Themed Parties: Incorporate Oreo Cheesecake Ice Cream into themed parties or gatherings. For example, during a movie night, serve the ice cream alongside a selection of fun toppings that reflect the movie theme.
- Personalized Bowls: Offer guests the opportunity to create their own personalized ice cream bowls by providing an array of toppings and mix-ins. This interactive element adds a fun touch to any gathering.
By exploring these various serving methods and presentation ideas, you can ensure that your Oreo Cheesecake Ice Cream is not only a delicious treat but also a memorable experience for everyone involved. Whether you opt for classic scoops, ice cream sandwiches, sundaes, or milkshakes, the possibilities are endless, allowing you to showcase your creativity and impress your guests. Enjoy the delightful flavors and textures of this versatile dessert in whichever way you choose to serve it!et creative and serve this ice cream in any way that satisfies your cravings!
Additional Tips
Creating a delicious Oreo Cheesecake Ice Cream at home can be a delightful experience, and while the process is relatively simple, there are several tips that can enhance your final product. Here’s a comprehensive guide to ensure your ice cream turns out creamy, flavorful, and visually appealing:
1. Room Temperature Cream Cheese
One of the most crucial steps in achieving a smooth and creamy texture in your Oreo Cheesecake Ice Cream is ensuring that your cream cheese is at room temperature before you start mixing. Cold cream cheese can lead to lumps in your mixture, resulting in an uneven texture. To soften cream cheese quickly, you can cut it into smaller chunks and leave it out on the counter for about 30 minutes. Alternatively, if you’re short on time, you can microwave it in 10-second intervals, keeping a close eye to prevent it from melting. A smooth base will not only enhance the flavor but also improve the mouthfeel of your ice cream.
2. Chill Your Mixing Tools
For those who want to achieve the ultimate fluffy whipped cream, chilling your mixing bowl and beaters is key. By placing these tools in the freezer for about 10-15 minutes before whipping the cream, you help to stabilize the whipped cream, allowing it to hold its shape better when mixed into the cheesecake base. This step is particularly important if you’re in a warmer environment, as it prevents the cream from becoming too soft during the whipping process. The cooler temperature helps to incorporate air into the cream more effectively, resulting in a light and airy texture that complements the richness of the cheesecake.
3. Layering Option
To elevate the visual appeal and texture of your Oreo Cheesecake Ice Cream, consider using a layering technique. Instead of mixing all the crushed Oreos into the base, reserve a portion of the crushed cookies and layer them throughout the ice cream mixture. Start by spooning a layer of the cheesecake ice cream into your storage container, followed by a generous sprinkle of crushed Oreos, then repeat the process until the container is full. This not only creates a stunning marbled effect when you scoop the ice cream but also provides a delightful crunch in every bite. The contrast of the creamy cheesecake base with the crunchy Oreo layers enhances the overall eating experience.
4. Storage Tips
Proper storage is essential to maintain the quality of your homemade ice cream. After making your Oreo Cheesecake Ice Cream, transfer it to an airtight container, ensuring that the lid fits snugly to prevent air from entering. This step is crucial to maintaining freshness and preventing freezer burn, which can negatively impact the flavor and texture of the ice cream. For optimal results, you should consume the ice cream within two weeks. However, if you find yourself with leftovers, you can extend its shelf life by storing it properly. For longer storage, you might consider placing a piece of parchment paper directly on the surface of the ice cream before sealing the container. This additional barrier can help minimize ice crystals from forming, keeping your ice cream creamy and delicious.
5. Flavor Variations
While the classic Oreo Cheesecake Ice Cream is a treat in itself, don’t hesitate to experiment with different flavor variations. You can incorporate other mix-ins like chocolate chips, caramel swirl, or even a splash of vanilla extract to enhance the flavor profile. For a more decadent treat, consider adding a layer of fudge or cookie butter in between the layers of ice cream and Oreos. Remember to adjust the sweetness according to your taste preferences, as some mix-ins may add additional sweetness.
6. Serving Suggestions
When it’s time to serve your Oreo Cheesecake Ice Cream, consider garnishing it with additional crushed Oreos, a drizzle of chocolate or caramel sauce, or a dollop of whipped cream for an extra touch. Using a warm scoop or spoon can help to easily serve the ice cream, as it will cut through the frozen texture more smoothly. If you’re feeling adventurous, serve it in a chocolate-dipped cone or bowl for an indulgent dessert that’s sure to impress.
By following these additional tips, you can ensure that your Oreo Cheesecake Ice Cream is not only delicious but also visually stunning and perfectly textured. Enjoy the process, and most importantly, savor the delightful results!
FAQs
1. Can I use low-fat cream cheese?
Yes, you can substitute low-fat or Neufchâtel cheese for regular cream cheese. However, the texture may be slightly less creamy.
2. Can I add other mix-ins to the ice cream?
Absolutely! Feel free to add chocolate chips, nuts, or even caramel swirls to the mix for an additional flavor dimension.
3. How long does it take to freeze no-churn ice cream?
Typically, no-churn ice cream requires at least 6 hours to freeze completely. For best results, leave it overnight.
4. Can I use a different type of cookie?
Certainly! If Oreos aren’t your favorite, you can substitute with any cookie of your choice, such as graham crackers or chocolate chip cookies.
5. Is it possible to make this recipe dairy-free?
To make a dairy-free version, use coconut cream instead of heavy cream, a vegan cream cheese alternative, and a dairy-free sweetened condensed milk substitute.
Conclusion
Oreo Cheesecake Ice Cream is a delightful, no-churn dessert that’s perfect for any occasion. With its rich cheesecake flavor and crunchy Oreo bits, it’s sure to be a hit with friends and family. Whether you’re hosting a summer barbecue or simply craving something sweet, this ice cream is a must-try recipe. Easy to make and delicious to eat, this dessert will quickly become a favorite in your household. So, gather your ingredients, follow the simple steps, and enjoy the blissful combination of Oreo and cheesecake in every bite!
Print
Oreo Cheesecake Ice Cream
Ingredients
Creating this luscious Oreo Cheesecake Ice Cream is a breeze, thanks to its simple ingredients. Here’s what you’ll need:
- 2 cups heavy whipping cream
- 1 can (14 ounces) sweetened condensed milk
- 8 ounces cream cheese, softened
- 1 teaspoon vanilla extract
- 20 Oreo cookies, crushed
- Optional: additional Oreo pieces for topping
These ingredients are easy to find in any grocery store, making this recipe not only delicious but also convenient.
Instructions
Follow these simple steps to whip up your own batch of Oreo Cheesecake Ice Cream:
- Prepare the Base:
- In a large bowl, beat the softened cream cheese with an electric mixer on medium speed until smooth and creamy.
- Add the sweetened condensed milk and vanilla extract to the cream cheese. Mix until everything is well combined and smooth.
- Whip the Cream:
- In a separate bowl, pour the heavy whipping cream. Using clean beaters, whip the cream on high speed until stiff peaks form. This should take about 3-4 minutes.
- Combine Mixtures:
- Gently fold the whipped cream into the cream cheese mixture. Use a spatula to combine them carefully, ensuring you maintain the airiness of the whipped cream.
- Add the Oreos:
- Once the mixtures are combined, gently fold in the crushed Oreo cookies. Ensure they’re evenly distributed throughout the mixture.
- Freeze:
- Pour the mixture into a loaf pan or a freezer-safe container. Smooth out the top with a spatula. If desired, sprinkle additional Oreo pieces on top for extra crunch.
- Cover the container with plastic wrap or a lid to prevent ice crystals from forming.
- Place the container in the freezer for at least 6 hours, or until the ice cream is firm.
- Serve and Enjoy:
- Once the ice cream is fully frozen, scoop and serve in bowls or cones. Enjoy the creamy, Oreo-packed goodness!
Nutrition
- Serving Size: one normal portion
- Calories: 350
- Fat: 22g
- Saturated Fat: 13g
- Cholesterol: 70mg