The first time I served this Quick Lemon Yogurt Mousse, it was on a whim. We had just finished a hearty Sunday dinner, and while everyone was content, there was a quiet craving for something sweet to cap off the meal. I didn’t have the energy for a complex baking project, but I remembered a simple, elegant dessert I’d been meaning to try. With just a handful of ingredients I almost always have on hand—lemons, yogurt, a bit of cream—I whipped it up in under 15 minutes. After a couple of hours in the fridge, I brought out these beautiful, pale-yellow clouds of mousse in small glass cups. The reaction was immediate. My husband, who usually prefers rich chocolate desserts, took one spoonful and his eyes lit up. The kids, initially skeptical of a “yogurt dessert,” were scraping the bottoms of their cups with their spoons, asking for more. It has since become our go-to dessert for everything from weeknight treats to special occasions. It’s the perfect embodiment of “less is more”—a recipe that delivers a spectacular, sophisticated result with minimal effort. This mousse is pure sunshine in a bowl; it’s light as air, refreshingly tart, and just sweet enough to feel like a true indulgence. It has the magical ability to feel both healthy and decadent at the same time, a culinary paradox that makes it a constant winner in my home.
Ingredients
- 1 cup (245g) Full-fat Greek Yogurt: This is the star of the show. Use a thick, full-fat Greek yogurt for the richest flavor and creamiest, most stable texture. It should be chilled.
- 1 cup (240ml) Heavy Whipping Cream: Must be very cold to whip up to stiff peaks, which gives the mousse its signature airy and light structure.
- 1/2 cup (100g) Granulated Sugar: Provides the necessary sweetness to balance the tartness of the lemon and yogurt. You can adjust this slightly to your preference.
- 1/4 cup (60ml) Freshly Squeezed Lemon Juice: Fresh juice is non-negotiable for the brightest, most authentic flavor. This will be approximately the juice from 1 to 2 medium lemons.
- 1 tablespoon Finely Grated Lemon Zest: This is where the intense lemon aroma and essential oils come from. Zest the lemons before you juice them.
- 1 teaspoon Vanilla Extract: A small amount enhances the other flavors and adds a subtle warmth and complexity to the mousse.
Instructions
- Prepare Your Lemons: Begin by thoroughly washing and drying your lemons. Using a microplane or the finest side of a box grater, carefully zest the lemons, making sure to only remove the yellow part of the peel, avoiding the bitter white pith underneath. You will need about one tablespoon of zest. Once zested, cut the lemons in half and squeeze them to get ¼ cup of fresh juice. Set both the zest and the juice aside.
- Combine the Base Ingredients: In a medium-sized mixing bowl, combine the full-fat Greek yogurt, granulated sugar, fresh lemon juice, and the reserved lemon zest. Whisk these ingredients together until the sugar is completely dissolved and the mixture is smooth and uniform. You can test this by rubbing a small amount of the mixture between your fingers; you shouldn’t feel any sugar granules. Stir in the vanilla extract.
- Whip the Heavy Cream: In a separate, large, and well-chilled mixing bowl, pour in the cold heavy whipping cream. Using an electric hand mixer or a stand mixer with the whisk attachment, begin whipping the cream on medium speed. As it starts to thicken, gradually increase the speed to high. Continue to whip until the cream forms stiff peaks. You’ll know it’s ready when you can lift the beaters out of the cream and the peaks that form hold their shape firmly without slumping over. Be careful not to over-whip, as the cream can turn grainy and eventually become butter.
- Fold the Mixtures Together (The Mousse Magic): This is the most crucial step for achieving a light, airy texture. Take about one-third of the whipped cream and gently fold it into the yogurt mixture using a rubber spatula. This initial addition lightens the dense yogurt base, making it easier to incorporate the rest of the cream without deflating it. To fold, cut the spatula down through the center of the mixture, scrape along the bottom of the bowl, and gently lift and turn the mixture over on itself. Rotate the bowl and repeat. Once the first third is loosely combined, add the remaining whipped cream. Continue to fold gently and patiently until the mixture is just combined and no white streaks of cream remain. The goal is to maintain as much of the air from the whipped cream as possible.
- Portion and Chill: Carefully spoon or pipe the finished mousse mixture into your desired serving dishes. Small glass cups, ramekins, wine glasses, or even small mason jars work beautifully. Dividing the mousse into 4-6 individual portions is ideal.
- The Essential Chill Time: Cover the dishes with plastic wrap, pressing it gently against the surface of the mousse to prevent a skin from forming. Place the mousse in the refrigerator to chill and set for at least 2 hours. This time is critical; it allows the mousse to firm up to the perfect consistency and for the lemon flavor to meld and intensify. For an even firmer set, you can chill for up to 4 hours.
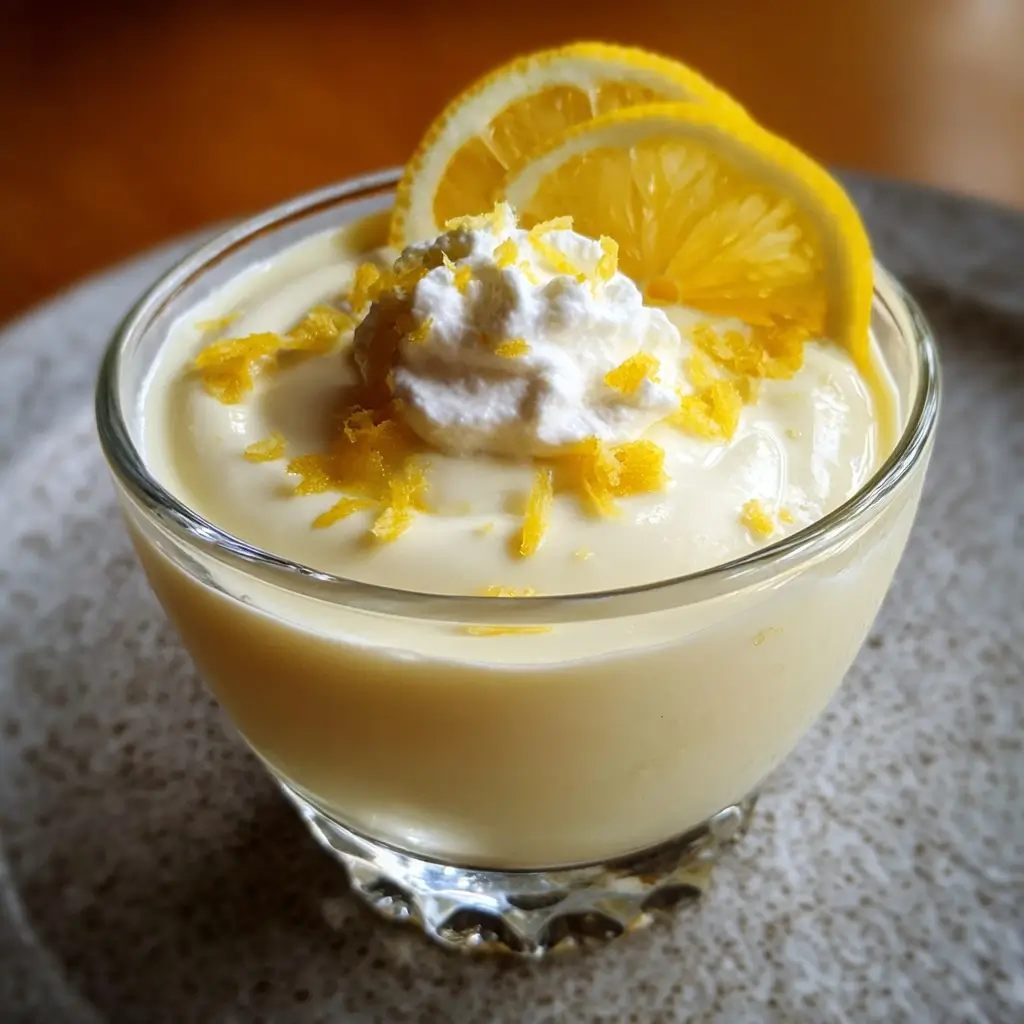
- Garnish and Serve: Just before serving, uncover the chilled mousse. You can garnish it with a sprinkle of extra lemon zest, a thin lemon slice, a fresh mint sprig, or a few fresh berries. Serve immediately while it’s cold and refreshing.
Nutrition Facts
- Servings: 4-6
- Calories: Approximately 280-320 kcal per serving (based on 4 servings)
- Protein: High in protein from the Greek yogurt, which helps make this a more satisfying dessert and aids in muscle repair and satiety.
- Fat: Contains healthy fats from the full-fat dairy, which are essential for nutrient absorption and contribute to the rich, creamy mouthfeel.
- Carbohydrates: Primarily from the sugar, providing a quick source of energy. The amount can be adjusted to suit dietary preferences.
- Vitamin C: A good source of Vitamin C from the fresh lemon juice, a powerful antioxidant that supports the immune system.
Preparation Time
This recipe is prized for its speed and simplicity. The active preparation time is remarkably short, making it an ideal last-minute dessert.
- Active Preparation: 15 minutes
- Chilling Time: 2 hours (minimum)
- Total Time: 2 hours and 15 minutes
The 15 minutes of active time involves zesting and juicing the lemons, mixing the yogurt base, and whipping the cream. The rest of the time is completely hands-off as the mousse sets and chills to perfection in the refrigerator, allowing you to focus on other things.
How to Serve
The presentation of this Quick Lemon Yogurt Mousse can elevate it from a simple treat to a show-stopping dessert. Its versatility allows it to be served in numerous ways to suit any occasion.
- Classic and Elegant:
- Serve in sophisticated martini or coupe glasses for a dinner party.
- Pipe the mousse using a piping bag with a star tip for a professional, swirled look.
- Garnish with a delicate, paper-thin slice of lemon and a single, perfect raspberry.
- Rustic and Casual:
- Spoon into small mason jars or rustic ceramic ramekins for a charming, farm-to-table feel.
- Top with a generous crumble of crushed shortbread cookies or digestive biscuits for a delightful textural contrast.
- Garnish with a sprig of fresh mint or a few blueberries.
- Interactive Dessert Bar:
- Serve the plain mousse in small bowls and create a “toppings bar” for guests to customize their own dessert.
- Topping Ideas:
- Fresh Fruit: Sliced strawberries, raspberries, blueberries, blackberries, or pomegranate seeds.
- Crunchy Elements: Toasted coconut flakes, chopped pistachios, slivered almonds, or granola.
- Sauces & Drizzles: A light raspberry coulis, a drizzle of honey, or a white chocolate sauce.
- Herbs & Zest: Fresh mint leaves, basil leaves, or extra lemon/lime zest.
- As a Filling:
- This mousse is stable enough to be used as a light and refreshing filling for pre-baked tart shells. Simply prepare the mousse, fill the tart shell, and let it set completely in the fridge for an easy lemon cream tart.
Additional Tips
- Chill Everything: For the best results, ensure your ingredients and tools are cold. Place your mixing bowl and beater attachments in the freezer for 10-15 minutes before whipping the cream. A cold bowl helps the cream whip up faster and creates a more stable, voluminous foam. Your heavy cream and Greek yogurt should also be used straight from the refrigerator.
- The Importance of Full-Fat: Do not substitute low-fat or non-fat Greek yogurt in this recipe. The fat content is essential for creating a thick, creamy, and stable mousse that doesn’t become watery or icy. The fat contributes directly to the luxurious mouthfeel and structure.
- Master the Fold: The folding technique is the difference between a dense pudding and an airy mousse. Be patient and gentle. The goal is to incorporate the whipped cream into the yogurt base while deflating it as little as possible. Use a wide rubber spatula and a gentle hand. It’s better to have a few tiny streaks of cream than to overmix and lose all the air you worked so hard to create.
- Fresh Lemon is Best: Bottled lemon juice can contain preservatives and often has a muted, slightly bitter, or metallic taste compared to its fresh counterpart. The bright, zesty, and aromatic flavor of a freshly squeezed lemon is the heart of this dessert. The zest, which contains the lemon’s essential oils, is impossible to replicate and adds an incredible depth of flavor.
- Adjust Sweetness to Your Liking: The recipe calls for ½ cup of sugar, which creates a nice balance between tart and sweet. However, taste preferences vary, and lemons can differ in their tartness. Feel free to adjust the sugar content slightly. Add a little less at first, taste the yogurt base before adding the whipped cream, and add more if needed.
- Don’t Skip the Chill Time: This step is non-negotiable. Chilling does two critical things: it allows the fats in the cream and yogurt to solidify, which firms up the mousse to the perfect spoonable texture. It also gives the flavors time to meld and deepen, resulting in a more pronounced and delicious lemon flavor.
- Zest, Then Juice: It is significantly easier to zest a whole, firm lemon than it is to zest a squeezed, floppy lemon half. Always perform your zesting first, then cut the lemon in half to juice it. This simple workflow tip will save you a lot of frustration.
- Flavor Variations: This mousse recipe is a fantastic base for other citrus fruits. Try swapping the lemon with an equal amount of lime juice and zest for a Key Lime Pie-inspired mousse. You could also use blood orange or grapefruit for a unique and sophisticated twist. Just be mindful of the sweetness of the fruit and adjust the sugar accordingly.
FAQ Section
1. Can I make this lemon yogurt mousse ahead of time?
Absolutely! This is a perfect make-ahead dessert. You can prepare it up to 2 days in advance. Simply follow the recipe, portion it into your serving dishes, cover them with plastic wrap, and store them in the refrigerator. The flavors will actually meld and become even more delicious overnight. For best results, wait to add any crunchy garnishes like cookie crumbles or nuts until just before serving to ensure they stay crisp.
2. Why is my mousse runny and not setting up properly?
There are a few potential culprits if your mousse is too loose. The most common reasons are:
- Insufficient Chilling: The mousse needs a minimum of 2 hours in the fridge to set. If you’re short on time, it won’t have a chance to firm up.
- Under-whipped Cream: Your heavy cream must be whipped to stiff peaks. If it’s only at the soft peak stage, it won’t have the structure to hold the mousse together.
- Over-mixing: If you were too aggressive when folding the whipped cream into the yogurt base, you may have deflated all the air, resulting in a denser, runnier final product.
- Using Low-Fat Yogurt: Low-fat or non-fat yogurt has a higher water content and lacks the fat needed to create a stable, creamy set.
3. Can I use regular yogurt instead of Greek yogurt?
You can, but the texture will be significantly different. Regular plain yogurt is much thinner and has a higher water content than Greek yogurt. If you choose to use it, your mousse will be much looser and less creamy. To achieve a similar thickness, you would need to strain the regular yogurt through a cheesecloth-lined sieve for several hours to drain off the excess whey, which essentially turns it into Greek-style yogurt.
4. Is this recipe gluten-free?
Yes, the core recipe for the Quick Lemon Yogurt Mousse is naturally gluten-free. All the ingredients—yogurt, cream, sugar, lemons, and vanilla—do not contain gluten. Just be mindful of your garnishes. If you choose to top it with cookie crumbles or certain types of granola, ensure you are using a certified gluten-free product to keep the entire dessert safe for those with gluten sensitivities.
5. How should I store leftovers?
Leftover mousse should be stored in the refrigerator. Cover the serving dishes tightly with plastic wrap or transfer the mousse to an airtight container. It will keep well for up to 3 days. Note that after the first day, it might release a tiny bit of liquid (whey) at the bottom, which is normal and doesn’t affect the taste. Simply pour it off or gently stir it back in.
6. My mousse has a grainy texture. What went wrong?
A grainy texture in mousse is almost always caused by one of two things. The most likely cause is that the heavy cream was over-whipped. Once you pass the stiff peak stage, the fat globules in the cream begin to clump together, turning grainy on their way to becoming butter. The second, less common reason could be that your yogurt and cream were at drastically different temperatures, causing a slight separation when combined. Ensure both are well-chilled for a smooth emulsion.
7. Can I make this recipe dairy-free or vegan?
Yes, you can make a dairy-free and vegan version with some careful substitutions. Use a thick, creamy, unsweetened coconut yogurt or another high-fat vegan yogurt alternative in place of the Greek yogurt. For the heavy cream, substitute with a high-quality, full-fat canned coconut cream (use only the thick, solidified cream from the top of a chilled can) or a commercial vegan whipping cream. The results will have a slightly different flavor profile, with a hint of coconut, but will be equally delicious.
8. Can I double this recipe for a larger crowd?
Certainly! This recipe scales up very easily. Simply double or triple all the ingredient quantities. The only thing to keep in mind is the size of your equipment. Ensure you have a large enough mixing bowl to whip the larger quantity of cream without it splashing everywhere, and a second large bowl to fold the final mixture together without making a mess. The method and chilling time remain the same.

Quick Lemon Yogurt Mousse
Ingredients
- 1 cup (245g) Full-fat Greek Yogurt: This is the star of the show. Use a thick, full-fat Greek yogurt for the richest flavor and creamiest, most stable texture. It should be chilled.
- 1 cup (240ml) Heavy Whipping Cream: Must be very cold to whip up to stiff peaks, which gives the mousse its signature airy and light structure.
- 1/2 cup (100g) Granulated Sugar: Provides the necessary sweetness to balance the tartness of the lemon and yogurt. You can adjust this slightly to your preference.
- 1/4 cup (60ml) Freshly Squeezed Lemon Juice: Fresh juice is non-negotiable for the brightest, most authentic flavor. This will be approximately the juice from 1 to 2 medium lemons.
- 1 tablespoon Finely Grated Lemon Zest: This is where the intense lemon aroma and essential oils come from. Zest the lemons before you juice them.
- 1 teaspoon Vanilla Extract: A small amount enhances the other flavors and adds a subtle warmth and complexity to the mousse.
Instructions
- Prepare Your Lemons: Begin by thoroughly washing and drying your lemons. Using a microplane or the finest side of a box grater, carefully zest the lemons, making sure to only remove the yellow part of the peel, avoiding the bitter white pith underneath. You will need about one tablespoon of zest. Once zested, cut the lemons in half and squeeze them to get ¼ cup of fresh juice. Set both the zest and the juice aside.
- Combine the Base Ingredients: In a medium-sized mixing bowl, combine the full-fat Greek yogurt, granulated sugar, fresh lemon juice, and the reserved lemon zest. Whisk these ingredients together until the sugar is completely dissolved and the mixture is smooth and uniform. You can test this by rubbing a small amount of the mixture between your fingers; you shouldn’t feel any sugar granules. Stir in the vanilla extract.
- Whip the Heavy Cream: In a separate, large, and well-chilled mixing bowl, pour in the cold heavy whipping cream. Using an electric hand mixer or a stand mixer with the whisk attachment, begin whipping the cream on medium speed. As it starts to thicken, gradually increase the speed to high. Continue to whip until the cream forms stiff peaks. You’ll know it’s ready when you can lift the beaters out of the cream and the peaks that form hold their shape firmly without slumping over. Be careful not to over-whip, as the cream can turn grainy and eventually become butter.
- Fold the Mixtures Together (The Mousse Magic): This is the most crucial step for achieving a light, airy texture. Take about one-third of the whipped cream and gently fold it into the yogurt mixture using a rubber spatula. This initial addition lightens the dense yogurt base, making it easier to incorporate the rest of the cream without deflating it. To fold, cut the spatula down through the center of the mixture, scrape along the bottom of the bowl, and gently lift and turn the mixture over on itself. Rotate the bowl and repeat. Once the first third is loosely combined, add the remaining whipped cream. Continue to fold gently and patiently until the mixture is just combined and no white streaks of cream remain. The goal is to maintain as much of the air from the whipped cream as possible.
- Portion and Chill: Carefully spoon or pipe the finished mousse mixture into your desired serving dishes. Small glass cups, ramekins, wine glasses, or even small mason jars work beautifully. Dividing the mousse into 4-6 individual portions is ideal.
- The Essential Chill Time: Cover the dishes with plastic wrap, pressing it gently against the surface of the mousse to prevent a skin from forming. Place the mousse in the refrigerator to chill and set for at least 2 hours. This time is critical; it allows the mousse to firm up to the perfect consistency and for the lemon flavor to meld and intensify. For an even firmer set, you can chill for up to 4 hours.
- Garnish and Serve: Just before serving, uncover the chilled mousse. You can garnish it with a sprinkle of extra lemon zest, a thin lemon slice, a fresh mint sprig, or a few fresh berries. Serve immediately while it’s cold and refreshing.
Nutrition
- Serving Size: one normal portion
- Calories: 320