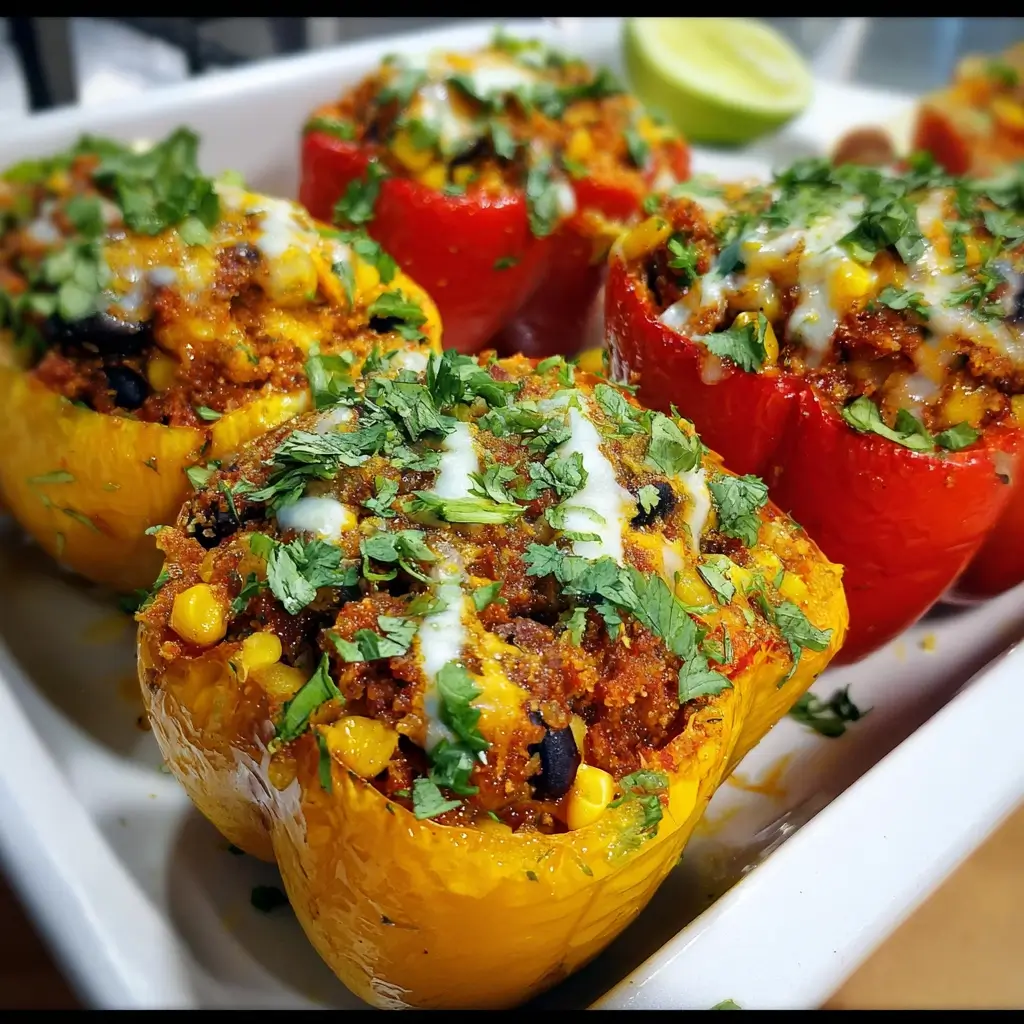
Of all the weeknight dinners that have graced our family table, this Stuffed Bell Peppers with Black Beans and Corn recipe holds a special place in my heart. I first made it on a whim, looking for a way to use up a colorful array of bell peppers and a pantry full of staples. I wasn’t expecting a culinary revolution, just a healthy, filling meal. What I got was so much more. The moment they came out of the oven, the kitchen filled with an incredible aroma—a savory, slightly spicy, and wonderfully fresh scent. The kids, who usually approach new vegetable-heavy dishes with a healthy dose of skepticism, were immediately intrigued by the vibrant “boats” of color on the baking sheet. To my delight, they devoured them, scooping out every last bit of the hearty filling with their forks. It’s since become a staple in our rotation, a dish that proves healthy eating can be incredibly delicious and satisfying. It’s a meal that feels like a warm hug—comforting, nourishing, and loved by everyone. This isn’t just a recipe; it’s a guaranteed dinner win, a testament to how simple, wholesome ingredients can come together to create something truly memorable.
Ingredients
Here are the simple, wholesome components you’ll need to create these vibrant and flavorful stuffed bell peppers. Each ingredient plays a crucial role in building the layers of texture and taste that make this dish a standout.
- 4 large bell peppers (any color): These are the star of the show, acting as edible bowls. Choose peppers that are firm, glossy, and can sit upright when cut in half. A mix of red, yellow, and orange peppers adds a beautiful sweetness and visual appeal.
- 1 tbsp olive oil: Used for sautéing the aromatics, this adds a foundational layer of flavor and helps prevent sticking.
- 1 medium yellow onion, finely diced: The aromatic base of the filling, providing a sweet and savory depth once cooked down.
- 3 cloves garlic, minced: An essential aromatic that adds a pungent, savory kick that complements the other ingredients perfectly.
- 1 can (15 oz) black beans, rinsed and drained: These provide a hearty, plant-based protein source and a wonderful, creamy texture to the filling. Rinsing removes excess sodium.
- 1 can (15 oz) corn, drained: Adds pops of sweetness and a satisfying texture that contrasts beautifully with the soft beans and quinoa. Frozen corn works just as well.
- 1 cup cooked quinoa (or brown rice): This is the backbone of the filling, making it substantial and adding a delightful, slightly nutty flavor and a boost of protein and fiber.
- 1 can (15 oz) diced tomatoes, undrained: These bring moisture, acidity, and a rich tomato flavor that binds the filling together. Fire-roasted diced tomatoes are a great option for an extra layer of smoky depth.
- 1 tsp chili powder: Provides a mild, earthy heat and a classic Tex-Mex flavor profile.
- 1 tsp ground cumin: Adds a warm, nutty, and slightly citrusy note that is essential for the overall savory taste.
- ½ tsp smoked paprika: This is a secret weapon, lending a subtle smokiness that elevates the entire dish, making it taste like it was slow-cooked for hours.
- ½ tsp dried oregano: Contributes a peppery, herbaceous note that balances the richness of the other spices.
- Salt and black pepper to taste: To enhance all the other flavors and tie the dish together.
- 1 cup shredded Monterey Jack or cheddar cheese (or a Mexican blend): The glorious melted topping that adds a creamy, savory, and slightly salty finish. For a vegan option, use a dairy-free shredded cheese.
- Optional for garnish: fresh cilantro, sour cream or Greek yogurt, sliced avocado: These fresh toppings add a final touch of brightness, creaminess, and flavor.
Instructions
Follow these detailed steps to ensure your stuffed peppers are perfectly cooked, with a tender pepper shell and a flavorful, cohesive filling. The key is to pre-bake the peppers slightly to give them a head start on cooking.
- Preheat and Prepare the Peppers: First, preheat your oven to 400°F (200°C). Wash the bell peppers thoroughly. Slice each pepper in half lengthwise, from stem to bottom. Use a small knife and a spoon to carefully remove the seeds and white membranes, creating a clean, boat-like cavity.
- Pre-Bake the Peppers: Place the pepper halves, cut-side up, in a 9×13 inch baking dish or on a parchment-lined baking sheet. Drizzle them lightly with a touch of olive oil and a sprinkle of salt and pepper. Bake for 15-20 minutes. This crucial step softens the peppers, ensuring they are tender and fully cooked at the end, preventing the common issue of a crunchy, undercooked shell.
- Sauté the Aromatics: While the peppers are pre-baking, prepare the filling. Heat 1 tablespoon of olive oil in a large skillet or Dutch oven over medium heat. Add the finely diced yellow onion and cook, stirring occasionally, until it softens and becomes translucent, about 5-7 minutes. Add the minced garlic and cook for another minute until fragrant, being careful not to let it burn.
- Bloom the Spices: Add the chili powder, ground cumin, smoked paprika, and dried oregano directly to the skillet with the onions and garlic. Stir continuously for about 30 seconds. This process, known as “blooming,” toasts the spices and awakens their essential oils, dramatically deepening their flavor.
- Combine the Filling Ingredients: To the skillet, add the rinsed and drained black beans, the drained corn, the cooked quinoa, and the can of undrained diced tomatoes. Stir everything together until well combined. Bring the mixture to a gentle simmer.
- Simmer and Season: Allow the filling to simmer for 5-7 minutes, stirring occasionally. This allows the flavors to meld together and some of the liquid from the tomatoes to evaporate, preventing a watery filling. Taste the mixture and season generously with salt and black pepper until it tastes delicious and well-balanced. Once seasoned, remove the skillet from the heat.
- Stuff the Peppers: By now, your peppers should be finished with their pre-bake. Carefully remove them from the oven. Using a large spoon, generously fill each pepper half with the black bean and corn mixture. Mound the filling slightly on top.
- Bake the Stuffed Peppers: Arrange the stuffed peppers snugly in your baking dish (using the same one is fine). Cover the dish tightly with aluminum foil. This traps the steam and helps the peppers become perfectly tender. Bake for 25 minutes.
- Add Cheese and Finish Baking: After 25 minutes, carefully remove the foil. Sprinkle the shredded cheese evenly over the top of each stuffed pepper. Return the dish to the oven, uncovered, and bake for another 10-15 minutes, or until the cheese is completely melted, bubbly, and slightly golden brown on the edges.
- Rest and Garnish: Remove the stuffed peppers from the oven and let them rest for at least 5 minutes. This allows them to set up slightly and makes them easier to serve. Garnish with chopped fresh cilantro, a dollop of sour cream, or sliced avocado before serving.
Nutrition Facts
This recipe is designed to be as nourishing as it is delicious. The nutritional information is an estimate and can vary based on specific ingredients used.
- Servings: 4 (2 pepper halves per serving)
- Calories per serving: Approximately 380-450 kcal
- High in Fiber: Each serving is packed with dietary fiber from the black beans, quinoa, and vegetables. Fiber is essential for digestive health, helps you feel full and satisfied, and can aid in maintaining stable blood sugar levels.
- Excellent Source of Plant-Based Protein: Thanks to the combination of black beans and quinoa (which is a complete protein), this meal provides a substantial amount of protein without any meat, making it perfect for building and repairing tissues.
- Rich in Vitamin C: Bell peppers, especially red and yellow ones, are a vitamin C powerhouse. This vital antioxidant supports a healthy immune system, promotes skin health, and aids in iron absorption.
- Full of Complex Carbohydrates: The quinoa and beans offer complex carbohydrates that provide sustained energy, unlike the quick spike and crash you might get from refined grains.
- Loaded with Vitamins and Minerals: This dish is a colorful mosaic of nutrients, including iron from the beans, potassium from the tomatoes, and a spectrum of B vitamins from the various plant-based ingredients, all of which are crucial for overall health and wellness.
Preparation Time
This recipe is very manageable for a weeknight, especially if you have cooked quinoa on hand. The active time is minimal, with the oven doing most of the work.
- Prep Time: 20 minutes (chopping vegetables, preparing peppers)
- Cook Time: 50-60 minutes (including pre-baking peppers and final baking)
- Total Time: Approximately 1 hour and 10 minutes
To save time, you can chop the onion and mince the garlic a day ahead. You can also cook a large batch of quinoa at the beginning of the week to use in this recipe and others.
How to Serve
Presentation and accompaniments can turn this simple dish into a festive meal. Here are some creative and delicious ways to serve your Stuffed Bell Peppers with Black Beans and Corn:
- The Classic Plate:
- Serve two pepper halves per person on a large dinner plate.
- Add a generous dollop of sour cream or plain Greek yogurt for a creamy, tangy contrast.
- Sprinkle with freshly chopped cilantro or chives for a burst of freshness.
- Place a lime wedge on the side for squeezing over the top, which brightens all the flavors.
- Build a Toppings Bar:
- This is a fun and interactive option, especially for families or guests.
- Set out small bowls with various toppings and let everyone customize their own peppers.
- Creamy: Sour cream, Greek yogurt, crumbled cotija cheese, sliced avocado, or guacamole.
- Spicy: Sliced jalapeños (fresh or pickled), your favorite hot sauce, or a spicy salsa.
- Fresh: Diced red onion, pico de gallo, or extra chopped cilantro.
- Crunchy: Crushed tortilla chips or toasted pepitas (pumpkin seeds).
- Perfect Pairings (Side Dishes):
- Simple Green Salad: A crisp salad with a light vinaigrette dressing is a perfect fresh counterpoint to the hearty, savory peppers.
- Cilantro Lime Rice: If you used quinoa in the peppers, serving them alongside a bed of zesty cilantro-lime rice can round out the meal beautifully.
- Tortilla Chips and Salsa: Perfect for scooping up any filling that might have spilled out.
- Mexican Street Corn Salad (Esquites): A side of this creamy, cheesy, and spicy corn salad complements the flavors of the stuffed peppers perfectly.
Additional Tips
Take your stuffed peppers from great to absolutely perfect with these eight professional tips and tricks.
- Don’t Skip the Pre-Bake: This is the most important tip for perfect texture. Pre-baking the pepper halves for 15-20 minutes ensures they become tender and sweet, not crunchy and raw-tasting, after the final bake.
- Choose Your Peppers Wisely: For stability, look for peppers with a flat bottom or four distinct lobes that allow them to sit upright. For flavor, remember that red, orange, and yellow peppers are sweeter, while green peppers have a more savory, slightly bitter taste. A mix of colors is always a beautiful choice.
- Make-Ahead for Easy Weeknights: You can prepare the entire filling up to 3 days in advance and store it in an airtight container in the refrigerator. When you’re ready to eat, simply pre-bake the peppers, stuff them with the cold filling, and add about 10-15 extra minutes to the initial covered baking time.
- Boost the Umami Flavor: For an even richer, “meatier” flavor without adding meat, consider adding ½ cup of finely chopped mushrooms (cremini or shiitake) along with the onions, or a teaspoon of soy sauce or tamari to the filling when you add the tomatoes.
- Experiment with Grains: While quinoa is fantastic, feel free to substitute it with other grains. Brown rice is a classic choice. For a quicker option, couscous (which just needs to be rehydrated) works wonderfully. For a chewier texture, try farro or barley.
- Achieve the Perfect Cheesy Top: For that irresistible, golden-brown, bubbly cheese crust, switch your oven to the broiler setting for the last 1-2 minutes of cooking. Watch it very closely to prevent burning, but this will give you that perfect restaurant-quality finish.
- Don’t Overstuff the Peppers: It’s tempting to mound the filling as high as possible, but be careful not to pack it in too tightly. Leaving a little room allows the heat to circulate more evenly, ensuring the filling is heated through and the cheese melts perfectly over the top without just sliding off.
- Drain Your Canned Goods Well: To avoid a watery filling, make sure you thoroughly rinse and drain your black beans and drain your corn very well. If using canned diced tomatoes, using them undrained is fine as the liquid helps create a sauce, but ensuring the other ingredients are dry is key.
FAQ Section
Here are answers to some of the most frequently asked questions about making Stuffed Bell Peppers with Black Beans and Corn.
1. Can I make this recipe vegan?
Absolutely! This recipe is very easy to adapt for a vegan diet. Simply use a high-quality, plant-based shredded cheese that melts well in place of the dairy cheese. For serving, use a vegan sour cream alternative (cashew or tofu-based) or skip it in favor of extra avocado or salsa. The rest of the filling is already naturally vegan.
2. Can I freeze stuffed peppers?
Yes, they freeze beautifully, making them a fantastic meal-prep option. For best results, fully assemble and bake the peppers without the cheese topping. Let them cool completely. You can either wrap them individually in plastic wrap and then foil, or place them in a freezer-safe baking dish, cover tightly, and freeze for up to 3 months. To reheat, bake from frozen (covered) at 375°F (190°C) for 45-60 minutes, then uncover, top with cheese, and bake for another 10-15 minutes until hot and bubbly.
3. My stuffed peppers came out watery. What did I do wrong?
Watery peppers are usually caused by two things: not pre-baking the peppers, and excess moisture in the filling. Peppers release a lot of water as they cook. Pre-baking them helps release some of this liquid, which you can pour out before stuffing. Additionally, ensure your canned beans and corn are very well-drained and that you simmer the filling for a few minutes to allow some of the liquid from the tomatoes to cook off.
4. Can I add meat to this recipe?
Yes, this recipe is a great base for adding meat. If you’d like to include it, brown 1 pound of ground beef, ground turkey, or ground chicken in the skillet after cooking the onions. Drain off any excess fat before proceeding with adding the spices and other filling ingredients. You may need to use slightly less quinoa or beans to accommodate the volume of the meat.
5. Are stuffed peppers genuinely healthy?
Yes, this specific recipe is incredibly healthy. It is a well-balanced meal in an edible, low-calorie package. You get a huge dose of vitamins (especially Vitamin C) from the peppers, plant-based protein and fiber from the beans and quinoa, and healthy fats if you top with avocado. It’s a nutrient-dense meal that is both filling and deeply nourishing.
6. How do I store and reheat leftovers?
Store any leftover stuffed peppers in an airtight container in the refrigerator for up to 4 days. The best way to reheat them is in the oven or a toaster oven. Place them in a baking dish and heat at 350°F (175°C) for 15-20 minutes, or until heated through. You can also microwave them, but the pepper will become much softer.
7. What is the best way to cut bell peppers for stuffing?
There are two main methods: cutting them in half lengthwise (as instructed in this recipe) or cutting the tops off and hollowing them out to stand upright. The lengthwise “boat” method is generally easier to eat, cooks more evenly, and provides a better ratio of filling-to-pepper in each bite. The stand-up method looks great but can sometimes be less stable and may require more cooking time for the pepper walls to become tender.
8. Can I make these on the grill instead of the oven?
Yes, grilling adds a fantastic smoky flavor! To do this, prepare the peppers and filling as directed. Pre-grill the pepper halves over indirect medium heat for about 10-15 minutes to soften them. Fill them with the prepared filling, top with cheese, and place them back on the grill over indirect heat. Close the lid and cook for another 15-20 minutes, or until the peppers are tender and the filling is hot and the cheese is melted.
Stuffed Bell Peppers with Black Beans and Corn
Ingredients
Here are the simple, wholesome components you’ll need to create these vibrant and flavorful stuffed bell peppers. Each ingredient plays a crucial role in building the layers of texture and taste that make this dish a standout.
- 4 large bell peppers (any color): These are the star of the show, acting as edible bowls. Choose peppers that are firm, glossy, and can sit upright when cut in half. A mix of red, yellow, and orange peppers adds a beautiful sweetness and visual appeal.
- 1 tbsp olive oil: Used for sautéing the aromatics, this adds a foundational layer of flavor and helps prevent sticking.
- 1 medium yellow onion, finely diced: The aromatic base of the filling, providing a sweet and savory depth once cooked down.
- 3 cloves garlic, minced: An essential aromatic that adds a pungent, savory kick that complements the other ingredients perfectly.
- 1 can (15 oz) black beans, rinsed and drained: These provide a hearty, plant-based protein source and a wonderful, creamy texture to the filling. Rinsing removes excess sodium.
- 1 can (15 oz) corn, drained: Adds pops of sweetness and a satisfying texture that contrasts beautifully with the soft beans and quinoa. Frozen corn works just as well.
- 1 cup cooked quinoa (or brown rice): This is the backbone of the filling, making it substantial and adding a delightful, slightly nutty flavor and a boost of protein and fiber.
- 1 can (15 oz) diced tomatoes, undrained: These bring moisture, acidity, and a rich tomato flavor that binds the filling together. Fire-roasted diced tomatoes are a great option for an extra layer of smoky depth.
- 1 tsp chili powder: Provides a mild, earthy heat and a classic Tex-Mex flavor profile.
- 1 tsp ground cumin: Adds a warm, nutty, and slightly citrusy note that is essential for the overall savory taste.
- ½ tsp smoked paprika: This is a secret weapon, lending a subtle smokiness that elevates the entire dish, making it taste like it was slow-cooked for hours.
- ½ tsp dried oregano: Contributes a peppery, herbaceous note that balances the richness of the other spices.
- Salt and black pepper to taste: To enhance all the other flavors and tie the dish together.
- 1 cup shredded Monterey Jack or cheddar cheese (or a Mexican blend): The glorious melted topping that adds a creamy, savory, and slightly salty finish. For a vegan option, use a dairy-free shredded cheese.
- Optional for garnish: fresh cilantro, sour cream or Greek yogurt, sliced avocado: These fresh toppings add a final touch of brightness, creaminess, and flavor.
Instructions
Follow these detailed steps to ensure your stuffed peppers are perfectly cooked, with a tender pepper shell and a flavorful, cohesive filling. The key is to pre-bake the peppers slightly to give them a head start on cooking.
- Preheat and Prepare the Peppers: First, preheat your oven to 400°F (200°C). Wash the bell peppers thoroughly. Slice each pepper in half lengthwise, from stem to bottom. Use a small knife and a spoon to carefully remove the seeds and white membranes, creating a clean, boat-like cavity.
- Pre-Bake the Peppers: Place the pepper halves, cut-side up, in a 9×13 inch baking dish or on a parchment-lined baking sheet. Drizzle them lightly with a touch of olive oil and a sprinkle of salt and pepper. Bake for 15-20 minutes. This crucial step softens the peppers, ensuring they are tender and fully cooked at the end, preventing the common issue of a crunchy, undercooked shell.
- Sauté the Aromatics: While the peppers are pre-baking, prepare the filling. Heat 1 tablespoon of olive oil in a large skillet or Dutch oven over medium heat. Add the finely diced yellow onion and cook, stirring occasionally, until it softens and becomes translucent, about 5-7 minutes. Add the minced garlic and cook for another minute until fragrant, being careful not to let it burn.
- Bloom the Spices: Add the chili powder, ground cumin, smoked paprika, and dried oregano directly to the skillet with the onions and garlic. Stir continuously for about 30 seconds. This process, known as “blooming,” toasts the spices and awakens their essential oils, dramatically deepening their flavor.
- Combine the Filling Ingredients: To the skillet, add the rinsed and drained black beans, the drained corn, the cooked quinoa, and the can of undrained diced tomatoes. Stir everything together until well combined. Bring the mixture to a gentle simmer.
- Simmer and Season: Allow the filling to simmer for 5-7 minutes, stirring occasionally. This allows the flavors to meld together and some of the liquid from the tomatoes to evaporate, preventing a watery filling. Taste the mixture and season generously with salt and black pepper until it tastes delicious and well-balanced. Once seasoned, remove the skillet from the heat.
- Stuff the Peppers: By now, your peppers should be finished with their pre-bake. Carefully remove them from the oven. Using a large spoon, generously fill each pepper half with the black bean and corn mixture. Mound the filling slightly on top.
- Bake the Stuffed Peppers: Arrange the stuffed peppers snugly in your baking dish (using the same one is fine). Cover the dish tightly with aluminum foil. This traps the steam and helps the peppers become perfectly tender. Bake for 25 minutes.
- Add Cheese and Finish Baking: After 25 minutes, carefully remove the foil. Sprinkle the shredded cheese evenly over the top of each stuffed pepper. Return the dish to the oven, uncovered, and bake for another 10-15 minutes, or until the cheese is completely melted, bubbly, and slightly golden brown on the edges.
- Rest and Garnish: Remove the stuffed peppers from the oven and let them rest for at least 5 minutes. This allows them to set up slightly and makes them easier to serve. Garnish with chopped fresh cilantro, a dollop of sour cream, or sliced avocado before serving.
Nutrition
- Serving Size: one normal portion
- Calories: 450